How To Develop Your Multitasking Skills – Useful Tips

The demand for individuals who can seamlessly juggle multiple responsibilities has become increasingly prevalent in today’s fast-paced professional world. This art of multitasking, the ability to handle various tasks concurrently, has proven to be a coveted skill across numerous industries. Mastering multitasking boosts productivity, opens career opportunities, and propels promotions.

Are you eager to embrace a new approach and delve into multitasking? Let’s see how to multitask effectively at work. So, let’s get started!

What is Multitasking?

Multitasking skills can handle multiple responsibilities simultaneously. This entails concentrating on one task while maintaining awareness of others. For example, managing phone calls in a bustling reception area while welcoming visitors or responding to emails demonstrates proficient multitasking skills.

How To Develop Multitasking Skills

Let’s see how to multitask and stay organized at the same time: 

Establish Achievable Goals 

Setting realistic goals is crucial to your ability to handle multiple tasks simultaneously. By setting attainable objectives and creating an action plan, you set yourself up for success. Breaking down your goals and establishing a solid plan makes the process more manageable. As you start crossing off tasks from your to-do list, the sense of achievement will fuel your motivation to keep working towards completing the remaining tasks.

Prioritize the Tasks

When you have a list of tasks to tackle, it’s essential to prioritize them effectively. Here’s a helpful framework for categorizing your tasks:

Urgent and Essential Tasks

These tasks take precedence and should be completed first. They often involve time-sensitive matters like addressing customer inquiries, meeting project deadlines, or fulfilling critical requests from your superiors.

Important but Non-Urgent Tasks

These tasks hold significance but may not have immediate deadlines. They contribute value to your work in the long run, such as strategic planning, networking to expand business connections, or engaging in professional development activities.

Urgent but Less Important Tasks

Tasks in this category have a sense of urgency but bear less significance in the grand scheme. Consider completing them swiftly to clear the way for more important responsibilities. If possible, delegate such tasks to team members if you have the authority.

Work on Similar Tasks

Engaging in related activities can improve your ability to balance multiple responsibilities simultaneously.

Furthermore, when tasks share similarities in duties or requirements, working on them concurrently can increase overall efficiency. To develop your multitasking abilities, start tackling two related tasks and gradually increase the complexity as you become more proficient. For instance, SEO marketers can work on optimizing two client websites simultaneously as a starting point.

Minimize Distractions

A crucial aspect of improving your multitasking skills is eliminating distractions while you work. Minimizing external disruptions allows you to focus better and devote your full attention to the tasks. Distractions often hinder effective multitasking and contribute to loss of focus.

To optimize your work environment, consider removing any objects or items that may divert your attention, such as toys, unnecessary equipment, or distracting clocks. A helpful strategy is to log out of or close social media accounts (unless it is part of your job) to reduce online distractions. If you frequently check your phone out of habit, consider turning it off or placing it out of reach during your multitasking sessions.

Maintain a Consistent Work Tempo

Maintaining a steady pace is a valuable approach to effective multitasking. When handling multiple tasks, rushing can compromise work quality.

Rushing compromises accuracy and attention to detail, leading to mistakes and a decrease in the overall quality of your output. Consequently, you may need to redo the work, nullifying the time saved from rushing. Maintaining a steady pace allows for attention to detail and ensures work quality.

Take Regular Breaks

Taking regular breaks helps prevent a decline in motivation and guards against burnout. Working continuously without breaks can be counterproductive as it can decrease the quality of your work.

By scheduling short breaks throughout the day and honoring them, you allow yourself time to unwind and step away from your desk. Consider setting reminders in your calendar to prompt you to take these breaks. Stepping away from your work, even briefly, allows you to recharge and return to your tasks with a refreshed perspective.

Breaks prevent fatigue and burnout and offer a chance to spot overlooked errors and areas for improvement. You can maintain focus and optimize your multitasking abilities by giving yourself time to rest and rejuvenate.

Boost Productivity with Music

Practicing working with music is an excellent method to enhance your multitasking skills. This approach helps train your brain to handle multiple tasks simultaneously and effectively switch between different activities.

Listening to music while completing a simple activity can improve your multitasking ability and adapt to switching between tasks. It trains your brain to navigate different stimuli and focus on multiple activities simultaneously.

The impact of music on multitasking can vary based on individual abilities and preferences. Some individuals may find working with music distracting and hindering their ability to concentrate effectively. If you find music to be a hindrance, it’s best to disregard this particular step and explore other strategies mentioned earlier.

Conclusion 

Discovering the art of multitasking can be a game-changer. Prioritize tasks, eliminate distractions, take breaks, and even practice with music. Mastering multitasking means doing more with focus and quality. Do you know what can help you with your multitasking skills? SmartWindows

SmartWindows is the ultimate multitasking tool streamlining your desktop experience, making it easier to handle multiple tasks simultaneously. You can seamlessly switch between different projects with a single click by organizing your display and app positioning. 

Whether working with multiple browsers, managing Microsoft Office files, or using multiple monitors, SmartWindows has you covered. Its ability to create separate profiles for work and entertainment ensures a smooth transition between different contexts. With SmartWindows, multitasking becomes effortless, empowering you to easily conquer your workload.

SmartWindows

Restore Browser Tabs with SmartWindows. It maintains an active tab history and restores browser size as well as display position on one screen or many.
Is Windows 11 Good for Gaming – Explained

Gamers have been talking about Windows 11 gaming performance since it was launched. Some express concerns that performance may be compromised after installing this new operating system, while others praise its gaming-centric features that promise an improved experience.

Windows 11 has captivated users, especially gamers, with its fresh design and powerful capabilities. Many gamers are eager to uncover the ultimate verdict like, “Is Windows 11 better than Windows 10?” If you ponder this question, let’s explore whether Windows 11 truly lives up to its promise as the ideal platform for gaming enthusiasts.

Is Windows 11 the ultimate choice for gamers? In this blog, we’ll answer your question, “Is Windows 11 good for gaming?”

Windows 10 vs Windows 11 Gaming, Which is Better

Microsoft claims that Windows 11 is designed for gamers. Let’s discuss how Windows 11 is better at gaming than Windows 10!

Regarding Windows 10 vs Windows 11 performance, they show similar results in benchmark tests using identical hardware. While Windows 11 may have slightly higher overall scores, there are instances where it performs slightly lower in terms of frames per second (FPS) when playing certain games. On the other hand, Windows 11 shows better FPS performance in other games.

Considering the raw performance alone, the slight improvement in overall performance on Windows 11 isn’t compelling enough to justify an upgrade solely for that reason. Windows 11 has gaming features that Windows 10 doesn’t have, so that’s something to consider.

What Features in Windows 11 are Dedicated to Gaming?

Several factors come into play when comparing Windows 11 and Windows 10 for gaming. Windows 11 brings performance enhancements in memory management, sleep state recovery, disk footprint, and browser caching. For gamers, the standout features are Auto HDR, DirectStorage, and Game Pass, delivering improved visuals, faster data streaming, and a vast game library.

Auto HDR Enhaces Visual Impact

Auto HDR enhances the visual impact of games that support HDR, improving the gaming experience. However, it may increase the CPU and graphics card workload, potentially reducing frame rates. This feature may not be suitable for gamers with lower computer configurations.

DirectStorage Speeds Up Game Loading

DirectStorage speeds up game and texture loading by bypassing the CPU, but it requires an NVMe SSD. While Windows 11 introduces notable enhancements that enrich the gaming experience for users with higher computer configurations, it’s important to note that these improvements may not yield practical benefits for individuals with lower-end configurations.

Game Pass Gives Access to a Variety of Games

Game Pass, a built-in feature in Windows 11, provides access to Xbox Game Pass, offering a wide variety of games at a more affordable price. This feature primarily benefits console gamers, so it may not be relevant to MMO gamers or those who prefer other game genres.

Considerations for Upgrading to Windows 11 for Gaming

Gamers should carefully consider updating to Windows 11, considering a few crucial factors.

System Specifications and TPM 2.0 Requirement

When considering an upgrade to Windows 11, ensuring that your computer meets the recommended specifications is crucial, particularly if it includes the TPM 2.0 security chip. If your system falls on the lower end of the specifications or lacks TPM 2.0, and you are satisfied with its performance on Windows 10, avoid the update.

Hardware Compatibility and Enhanced Gaming Experience

Upgrading to Windows 11 with a speedy NVMe SSD, compatible graphics card, and HDR monitor can significantly enhance your gaming experience. DirectStorage will reduce load times, and Auto HDR will enhance the visuals of your older games.

Consideration of Driver Compatibility

When upgrading a gaming rig to Windows 11, it’s crucial to consider driver compatibility. While Windows 11 receives regular patches to improve hardware compatibility, it is not flawless.

Before upgrading, check for driver compatibility between Windows 11, your graphics card, and other components to avoid any potential issues. If you encounter numerous complaints or reports of compatibility issues, wait until support for your hardware improves before proceeding with the upgrade.

How You Can Optimize Windows 11 for Gaming

The following are the steps to optimize Windows 11 for gaming: 

  • Open the Settings app by clicking on the Start menu and selecting “Settings.” 
  • In the Settings window, click on “Gaming.”
  • Under the Gaming settings, click on “Game Mode.”
  • Enable the Game Mode toggle switch to activate the feature.
  • Click on “Graphics” in the left sidebar.
  • Select the game you want to adjust settings by clicking on it.
  • Click on “Options” for the selected game.
  • Select your high-performance graphics card from the available options in the Graphics settings for optimal performance.
  • Click “Save.”

Enhance Your Gaming Experience with SmartWindows

SmartWindows is a highly recommended productivity app for gamers, as it offers efficient management of gaming and work setups on a single PC. With SmartWindows, you can create unlimited profiles and set up multiple displays for different purposes, such as work, study, and entertainment. The ability to save and restore profiles allows you to switch between configurations effortlessly whenever needed.

SmartWindows provides a seamless way to optimize your PC setup for various tasks, ensuring a smooth transition between gaming and work environments. By using its features, gamers can enhance their productivity by efficiently managing different profiles and displays according to their needs.

SmartWindows

Restore Browser Tabs with SmartWindows. It maintains an active tab history and restores browser size as well as display position on one screen or many.
FAQs

Which is better Windows 10 or 11 for gaming?

Windows 11 is the optimal choice for gamers seeking the best Windows operating system. With recent updates, it offers optimized support for gaming in windowed mode and incorporates features like Auto HDR and DirectStorage, significantly improving the gaming experience. Windows 11’s advancements make it an ideal platform for gamers looking to enhance performance and enjoy seamless gaming.

Does Windows 11 use more RAM?

Windows 11 tends to utilize more RAM compared to earlier versions. The inclusion of numerous new features and programs requires additional memory to operate. On average, Windows 11 uses around 4 GB of RAM. It’s essential to ensure your system meets the recommended hardware specifications to accommodate the higher RAM requirements of Windows 11 and maintain optimal performance.

With SmartWindows, the possibilities are endless. Say goodbye to limitations as you create unlimited profiles and configure multiple displays tailored to your unique needs. Whether focused on work, studying, or immersing yourself in entertainment, SmartWindows empowers you to achieve peak performance.

What is the Easiest Operating System to Use – Explained

An operating system (OS) is like your computer’s brain. It manages everything behind the scenes, connecting the physical parts to your programs. The OS makes your computer simple to use by providing a user-friendly interface. It’s like having a friendly guide showing you the way. The OS manages tasks, resolves issues, and completes requests. It’s a multitasking pro!

An operating system is necessary for the basic functioning of a computer. It wouldn’t know how to run the cool apps and programs you love. In this article, we’ll discuss the easiest operating systems! So, let’s get started! 

Windows 

Windows is one of the best operating system for laptop Boasting a wide distribution, Windows OS comes preinstalled on numerous computer systems, making it readily available to users. Its reputation as the finest operating system for desktop computers and laptops stems from its remarkable unity, impressive functionality, enhanced productivity, reliable support, and various system utilities.

Windows OS is like having a virtual chameleon that adapts effortlessly to your desired use. Windows incorporates many recognizable operating systems features to bolster security, efficiency, and privacy. It’s as if a digital fortress is guarding your valuable data. Its intuitive nature makes navigating and utilizing the OS a walk in the park.

Features

  • Robust User Interface with easy navigation
  • Start menu on the left side listing options and applications
  • Task View feature for switching between multiple workspaces
  • Two separate user interfaces for mouse/keyboard and touchscreen (Tablet Mode)
  • Multifactor authentication technology for higher security (BIN, PIN, Fingerprint recognition, etc.)
  • Automatic compression of system files to reduce storage footprint
  • Lightning speed operation
  • Protection against potential threats

SmartWindows is a powerful tool that enhances your Windows operating system by simplifying its usage. With features like efficient desktop organization, preset display arrangements, multi-browser support, Microsoft Office file compatibility, multi-monitor capabilities, separate work and entertainment profiles, and multi-user functionality, SmartWindows offers a seamless and customized user experience. It optimizes your desktop display, improves productivity, and allows smooth multitasking.

macOS

macOS, the operating software system exclusive to Apple Macintosh computers, is renowned for its unmatched reliability and user-friendly interface. It’s an easy platform that offers stability, making it a favorite among users. Exploring macOS is a breeze, thanks to its seamless functionality. Apple ensures excellent support, constantly refining and upgrading the OS to enhance security and optimize performance.

What sets macOS apart is its commitment to stringent testing before integrating apps into the system. This meticulous approach ensures that only well-performing and high-quality applications make their way to the users, resulting in a smooth and efficient experience.

Features

  • Dynamic desktop for sorting files by tag, type, or date
  • Dark mode to protect your eyes
  • App Store with over 2 million heavily scanned applications before the release
  • Anonymous online profile to prevent website tracking
  • Apple Music allows search by lyrics
  • iCloud for easy storage of images and documents across multiple devices
  • Excellent support and constant refinement
  • Commitment to stringent testing for integrated apps
  • Regular updates for security enhancement

Android

Google and the Open Handset Alliance created Android for mobile devices. Its open-source nature enables a wide range of app availability and customization options, making it highly favored among smartphone manufacturers. Android allows you to create and customize your interface, making your device unique. 

It has over 2,000,000 apps; you’ll always have options. Whether it’s productivity tools, entertainment apps, or utility applications, the Android ecosystem offers diverse choices to cater to your needs and interests. These apps load and process swiftly, ensuring a smooth and efficient user experience.

Android OS is used in many devices, not just smartphones. It’s in smartwatches, PCs, cars, TVs, cameras, game consoles, and tablets. Android is a flexible and adaptable platform manufacturers use to add smart product features.

Features

  • Highly customizable user interface
  • Support for connectivity options: 3G, 4G, 5G, Bluetooth, CDMA, GSM, Hotspot, NFC, USB, VOLTE, VPN, and WiFi
  • Ability to run multiple services and apps in the background
  • Support for multiple languages, including Chinese, Dutch, English, French, German, Hindi, Japanese, and Russian

Elementary OS

Elementary OS is an easy operating system that is based on Ubuntu. The operating system was announced in July 2011 and released on May 29, 2012, to deliver a seamless and visually appealing computer experience. Unlike other operating systems or distributions, Elementary OS was built entirely from scratch, emphasizing design and elegance. This focus ensures users enjoy the best possible experience on their computers or laptops.

One of the standout features of types of operating system is its desktop environment, known as Pantheon, which bears similarities to the macOS interface. This similarity has earned Elementary OS the “macOS of the Linux world.” The Pantheon desktop environment combines a clean and intuitive design with user-friendly features, providing users with a familiar and enjoyable interface.

Features

  • Modern and clean user interface
  • Designed for accessibility and ease of use
  • Pre-installed applications
  • Renowned for reliability and stability
  • Regular security patches and updates

Conclusion

Choosing the right operating system is important. This latest release incorporates numerous updated features and advancements aimed at enhancing the overall user experience. The preferred OS should exhibit reliability while offering flexibility to accommodate future growth. Picking an operating system can be challenging because there are lots of choices. The user interface should be easy for regular users and IT administrators. It depends on what the business needs and what the person likes. However, by closely aligning with the organization’s needs, customers can make informed decisions that lead to the right choice of the operating system.

SmartWindows

Restore Browser Tabs with SmartWindows. It maintains an active tab history and restores browser size as well as display position on one screen or many.
FAQs

What OS is most commonly used?

It’s Microsoft Windows. Microsoft’s Windows is the world’s most widely used computer operating system, commanding a staggering 70.39% share of the desktop, tablet, and console OS market as of January 2023.

What is the next generation operating system?

Windows 11 marks Microsoft’s long-awaited “next generation” operating system, arriving after a six-year gap. This new release brings many updated features and advancements to enhance the user experience.

What are the 3 most used OS?

The 3 primary operating systems are:

  • Microsoft Windows
  • macOS
  • Linux

5 Tips to Improve Windows 11 Performance

You’ll notice a noticeable boost in overall performance when transitioning from Windows 10 to Windows 11. Microsoft has made significant improvements in the performance. The advancements in memory management, disk usage, app prioritization, and other factors related to CPU and battery performance have contributed to a smoother and more efficient user experience.

Even with the inherent speediness of Windows 11, there’s room for more optimization. PCs slow down gradually over time. In this blog, we’ll discuss 5 tips to improve Windows 11 performance. So, let’s get started!

Disable Unnecessary Programs for Faster Performance

If you want to optimize your Windows 11 performance, disable programs that run on startup. These background programs, which you rarely or never use, can cause your PC to lag. Follow these steps to disable unnecessary startup programs using the Task Manager:

  • Press Ctrl-Shift-Esc or search for “task manager” in the Windows 11 search box and press Enter.
  • Once the Task Manager opens, click on the “Startup apps” icon. This will present a list of programs and services that launch during Windows startup.
  • In the list, you’ll find the name of each program, its publisher, its startup status, and its “Startup impact,” indicating its effect on Windows 11 startup speed.
  • To prevent a program from starting with your computer, right-click on it and choose “Disable.”
  • If you change your mind, you can re-enable the program by returning to the Task Manager and selecting “Enable.”
  • If you come across unfamiliar programs, right-click on them and select “Properties” to gather more information. This will show you where the program is stored and provide information about its last modification.
  • For a quick way to find the program’s location, choose “Open file location” to open the folder directly.

Boost Performance with Efficiency Mode

Task Manager introduces a handy feature in Windows 11 called Efficiency Mode, designed to optimize performance and extend laptop battery life. By reducing the process priority of background applications and implementing other efficiency tricks, Efficiency Mode can enhance your PC experience.

  • Open Task Manager by pressing Ctrl+Shift+Esc.
  • Click the “Processes” icon to view running apps and processes.
  • Choose the specific app or process for which you want to enable Efficiency Mode.
  • Locate the Efficiency Mode icon positioned at the top right corner of the screen.
  • Click on the Efficiency Mode icon.

Use Automatic Windows Maintenance

Windows 11 diligently performs background maintenance tasks to ensure optimal performance and security for your PC. From security scanning to system diagnostics, it continuously works to identify and resolve issues. Automatic maintenance runs daily at 2:00 a.m. when your device is plugged in and in sleep mode.

However, there are instances when this feature may have been disabled or hasn’t run recently due to PC shutdown or unplugged usage. It’s essential to confirm that automatic maintenance is enabled and set to run regularly. If desired, you can also initiate manual maintenance.

  • Click on the search icon located on the taskbar.
  • Type “control” in the search box and select “Control Panel” from the search results.
  • Within the Control Panel, navigate to “System and Security” and click on “Security and Maintenance“.
  • Look for “Automatic Maintenance” and click on “Start maintenance“.
  • To configure scheduled maintenance, click on “Change maintenance settings“.
  • In the maintenance settings window, choose your desired time for maintenance to run.
  • Make sure to check the checkbox next to “Allow scheduled maintenance to wake up my computer at the scheduled time“.
  • Finally, click “OK” to save the changes and apply the new automatic maintenance settings.

Clean Your Hard Disk

A cluttered hard disk filled with unnecessary files can significantly slow down your PC’s performance. Thankfully, Windows 11 offers a convenient built-in tool called Storage Sense to help you tackle this issue.

Here’s how to clean out your hard disk and boost your PC’s speed:

  • Click the Start button and select Settings.
  • Select “System” and click on “Storage“.
  • Scroll down to the Storage Sense section.
  • Toggle the switch from Off to On.
  • Windows will continually monitor your PC and automatically remove outdated files like temporary files, unused items in the Downloads folder that are older than a month, and outdated files in the Recycle Bin. 

To customize Storage Sense and optimize its functionality:

  • Click the arrow located to the right of the Storage Sense toggle.
  • Customize Storage Sense schedule to match your preferences.
  • Customize the deletion of files in your Downloads folder based on their age.
  • Set a specific time duration for automatically deleting files in the Recycle Bin.
  • Enable Storage Sense to remove unused local content from iCloud Drive and iCloud Photos on your PC after a specific period.

Disable Search Indexing

Windows 11’s search feature relies on indexing to provide faster search results. However, indexing can impact the performance of slower PCs. Even for systems with SSDs, indexing’s constant disk writing can eventually slow down performance. To give your machine a speed boost, consider turning off indexing.

Follow these steps to disable search indexing:

  • Locate the search icon on the taskbar and click on it.
  • Type “services.msc” in the Windows 11 search box.
  • Press Enter to execute the search.
  • The Services app will open, displaying a list of services.
  • Scroll down through the list of services to locate either “Indexing Service” or “Windows Search“.
  • Double-click on the selected service.
  • On the screen that appears, click on the “Stop” button to pause the service.
  • Restart your computer.

To improve performance without sacrificing quick searches for frequently accessed files, disable indexing for specific locations on your hard disk. This allows you to index only the files and folders you frequently search for, reducing the impact on system performance.

Follow these steps to customize indexing:

  • Type “index” in the Windows 11 search box.
  • Select the “Indexing Options” entry from the displayed results.
  • The Control Panel will open, presenting you with the Indexing Options page.
  • Access the list of indexed locations by clicking the “Modify” button.
  • Deselect the checkbox beside any location you want to exclude from indexing.
  • Click “OK”.

Conclusion

You can significantly enhance the performance of your system by following these Windows 11 performance settings. The advancements in memory management, disk usage, app prioritization, and other CPU and battery-related factors contribute to a faster and more efficient user experience. You can still optimize Windows 11 further.

Users can ensure their system operates at its best by following the recommended tips and utilizing built-in tools like Task Manager, Storage Sense, and automatic maintenance. Whether disabling unnecessary startup programs, activating Efficiency Mode, cleaning the hard disk, or customizing search indexing, these steps can significantly boost overall performance.

Improving Windows 11 efficiency with SmartWindows is a simple and effective way to enhance your productivity and multitasking experience. Also, SmartWindows allows you to easily organize and manage your desktop on Windows 11 that will increase your Windows’ performance.

SmartWindows

Restore Browser Tabs with SmartWindows. It maintains an active tab history and restores browser size as well as display position on one screen or many.
FAQs

How do I increase CPU speed in Windows 11?

  • Optimize Autostart Programs
  • Free Up Memory with Disk Cleanup
  • Remove Obsolete Programs
  • Disable Visual Effects
  • Minimize Background Apps
  • Manage App Notifications
  • Keep Windows Updated
  • Perform Regular Defragmentation
  • Consider Resetting Windows 11

How can I increase my RAM speed in Windows 11?

  • Utilize Task Manage
  • Uninstall Unused Programs
  • Reduce Background Applications
  • Clean Page File
  • Optimize Image Swapping
  • Ensure Malware-Free Environment

Why is Windows 11 so slow?

Excessive junk files and temporary files on your system can slow down Windows 11’s performance. It’s crucial to regularly clean up and remove these files to optimize your system’s speed and free up disk space.

How to Recover Unsaved Word Document – Solved

Losing a document you’ve given your time and effort can be devastating. We’ve all been there! Imagine diligently working on a Word document, giving it your all, only to see it disappear completely. It feels terrible when all the effort you put into your Word document suddenly disappears.

But don’t worry! Even! If you find yourself in such a situation, there’s still hope. You can recover unsaved Word documents regardless of the version you’re using or whether you’re on a Mac. You read that right; your precious work might not be lost forever!

And it’s not just about accidental deletions either. We’ll also cover how to retrieve that mistakenly trashed Word document from the Recycle Bin or, if all else fails, turn to data recovery programs for a helping hand. Want to know how to recover unsaved Word document? So, let’s get started! 

Recovering Unsaved Word Documents

Losing an unsaved Word document can be a major setback, whether using Word for personal or business purposes. Experiencing the frustration of losing your work due to an unexpected crash is a familiar and disheartening situation. While some users habitually save their documents frequently, many do not.

Fortunately, even if your system crashes and you find yourself with an unsaved document, various options are available to recover your precious work. Let’s explore ways to retrieve unsaved files, ensuring your efforts are not wasted.

Temporary Files

Discover the world of temporary files and uncover the possibility of finding your unsaved document amidst these hidden gems.

AutoRecover Files

Learn how to leverage the AutoRecover feature to retrieve your unsaved Word documents and safeguard your work against unforeseen crashes.

Document Recovery

Explore the built-in Document Recovery option, which serves as a lifeline for retrieving unsaved documents and getting you back on track.

Recycle Bin

Don’t overlook the Recycle Bin! Find out how to recover your unsaved Word documents from this often-forgotten treasure trove.

Data Recovery Solutions

In dire situations where everything fails, discover powerful data recovery solutions that can help you retrieve your unsaved Word documents, no matter the circumstances.

Does Word Create Backup Files?

Similar to many software programs of its kind, Microsoft Word incorporates an automatic “auto-save” feature that regularly creates backup copies of your work. Usually, the backup files are saved in the AppData folder as a standard setting.

Here are a few paths you can explore to locate backup copies of your files:

C:\Users\Your_Username\AppData\Local\Microsoft\Word

Or

C:\Users\Your_Username\AppData\Local\Temp

Or

C:\Users\Your_Username\AppData\Local\Microsoft\Office\UnsavedFiles

Backup files in Word have the file extension “.wbk“. Unless you have disabled the backup option, Word will generate these copies of your documents at regular intervals.

To confirm whether the backup option is enabled, follow these steps:

  • Go to the “File” tab.
  • Select “Options”.
  • Choose “Advanced” in the options window.
  • Scroll down to the “Save” section.
  • Ensure that the checkbox next to “Always create backup copy” is selected.

Does Word Offer Cloud Saving Capabilities? 

Absolutely! Word allows you to save your documents to the cloud, specifically OneDrive.

Storing documents in the cloud brings numerous advantages, including simplified sharing and enhanced collaboration. It also allows seamless access from various devices such as PCs, laptops, smartphones, or tablets, ensuring convenient mobility and bolstered data protection.

Let’s see how you can save files to the cloud: 

  • Click on the “File” menu and select “Save As”.
  • Choose “OneDrive” as the storage option.
  • Provide a descriptive file name.
  • Click on “Save”.

Safeguard your personal and payment information in your personal OneDrive account. Or, you can select another location from the provided list or even “Add a Place” of your preference.

You can upload backup files to the Acronis cloud using a third-party backup solution like Acronis Cyber Protect Home Office. By utilizing a dedicated cloud backup service, you gain the benefits of backup encryption, automated backups, and reliable data recovery processes, thus enhancing your cybersecurity measures.

How Can You Recover a Permanently Deleted File?

Accidentally deleting important files can be distressing, but there are potential solutions to recover them. Here’s how to recover unsaved Word document on laptop.

Use File History or Previous Versions 

If you have enabled File History or created previous versions of your files, you can access older versions and restore the deleted file. Click on its location, select “Properties”, and go to the “Previous Versions” tab to restore the file.

Use File Recovery Software 

Various file recovery software programs can help you recover permanently deleted files. Discover powerful tools designed to recover deleted files from your storage devices. These software solutions, including Recuva, EaseUS Data Recovery Wizard, and Disk Drill, can effectively scan your devices and provide an opportunity to retrieve lost data.

Recovering Deleted Word Documents from Trash Bin

When you delete files on your Mac, they are moved to the Trash Bin. They remain there until you choose to empty the Trash. The following are the steps to recover deleted Word documents:

  • Find and click the Trash Bin icon in the lower-left corner of your screen.
  • Right-click the file and choose “Put Back”. It will be restored to its original location.

Recovering Deleted Word Documents from Backup

Regularly backing up your Mac’s data is a recommended practice. If you have a backup created by Time Machine that predates the deletion of your Word document, you can restore it. Here’s how:

  • Connect the Time Machine backup storage device to your computer.
  • Open Finder and locate the folder with the lost Word document.
  • Launch Time Machine by clicking its icon in the menu bar.
  • Use the timeline and arrows to browse through the backups and snapshots.
  • Select the specific Word document you wish to restore, and click the “Restore” button. 

Recovering Deleted Word Documents with SmartWindows

SmartWindows automatically restore a wide range of Microsoft Office files, encompassing Word, PowerPoint, Excel, Project, Notepad, and Wordpad. If you’ve ever experienced the frustration of losing unsaved work due to a power outage, system crash, or accidental closure of your Word document, SmartWindows can be a lifesaver. 

By leveraging advanced recovery algorithms and intelligent file management, SmartWindows ensures that your unsaved Word documents are promptly recovered and made available for retrieval. Let’s explore how you can use SmartWindows to recover your Word file.

  • Download SmartWindows software.
  • Open SmartWindows from the bottom left corner.
  • Select “Restore Profile”.
  • Click on “Microsoft File”.

Tips to Protect Your Important Word Files from Loss

Losing important Word files can be a frustrating experience. Consider implementing the following tips to prevent such setbacks and protect your valuable documents. By taking proactive measures, you can avoid the stress of data loss and ensure the safety of your important files.

Review Before Deleting

Before permanently deleting files by emptying the Trash, pause and review the items you will discard. Often, you can retrieve mistakenly deleted files from the Trash itself, saving you the trouble of using data recovery software after it’s emptied.

Install Reliable Anti-Virus Software

Installing a trusted and up-to-date anti-virus program protects from malware and viruses that can lead to data loss. Stay vigilant with the best data security practices to shield your Word files from potential threats.

Use a Surge Protector

Protect your system against unforeseen crashes and data loss resulting from power surges or spikes. Investing in a reliable surge protector safeguards against losing your valuable Word documents due to unforeseen electrical fluctuations.

Activate AutoRecovery

Take advantage of Microsoft’s AutoRecovery feature, an invaluable tool for protecting your Word documents. Refer to Microsoft’s documentation on enabling and utilizing AutoRecovery effectively. This will automatically protect and recover your files.

Maintain Diversified Backups

To reduce the data loss risk, maintain multiple Word file backups. Save your documents regularly and create backups on different devices. Use external drives, cloud storage solutions, and other options to ensure your files are safely stored and easily recoverable.

Conclusion 

Sometimes, despite taking precautions, unexpected crashes or system errors can lead to losing your Word files. While it’s crucial to protect your files proactively, data loss can still occur unexpectedly. In such unfortunate situations, you have several data recovery methods. One simple solution is to store your documents in the cloud. Or use reliable recovery software like SmartWindows to significantly increase the chances of retrieving lost Word files.

SmartWindows

Restore Browser Tabs with SmartWindows. It maintains an active tab history and restores browser size as well as display position on one screen or many.
FAQs

How do I recover an unsaved Word document Windows 10?

  • Access the File tab, navigate to Info, and proceed to Manage Documents.
  • Locate and select “Recover Unsaved Documents” from the dropdown menu within the provided options.
  • Once you have identified the document you wish to recover, click the Open button.
  • To protect your recovered Word document, click the Save As button and save it in your desired location.

How to recover unsaved Word document 2016?

  • Review recent document history.
  • Access temporary files.
  • Utilize the AutoRecover feature.

Where are temporary Word files stored?

When Word performs an automatic save, it creates a temporary file as a safety net. This temporary file is usually stored in the Temp folder. However, if a valid Temp folder is not present, Word cleverly saves the temporary file in the same location where it saves the document.

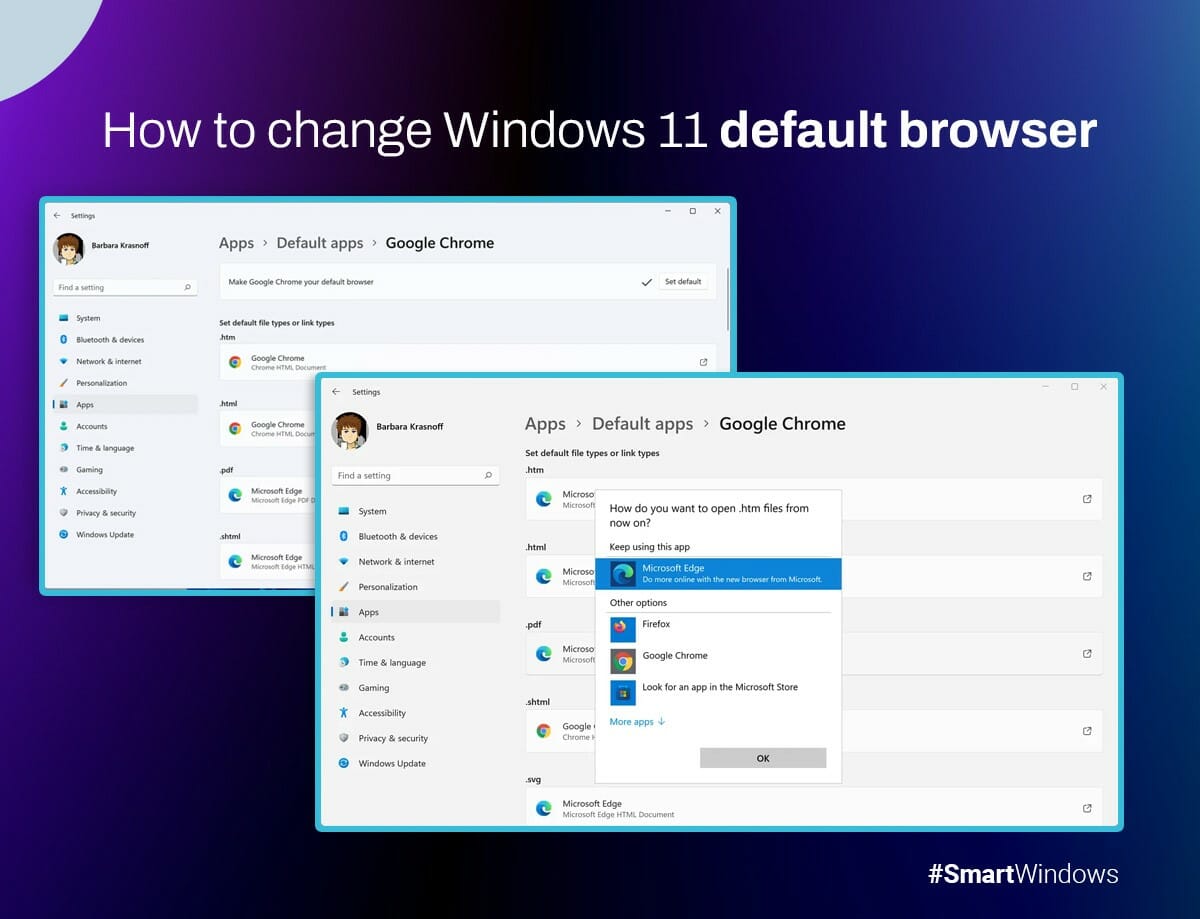
How to Change Windows 11 Default Browser – Useful Guide

Microsoft’s most current Windows 11 is different from past versions thanks to a number of brand-new features and an improved user experience. The default browser in Windows 11 is one of the significant changes.

Users can still alter their browsing experience despite this change by setting their favorite browser as the default one. This enables people to easily use the functions and features of their selected browser while browsing the internet without any issues. This article will walk you through the quick process to answer your question about how to change the default browser in Windows 11.

  1. Download and Install Your Preferred Browser 

To change the default browser in Windows 11, the first step is downloading and installing the preferred browser. You can download the browser from the browser’s official website or from Microsoft Store if it is available there.

  1. Launch the Settings App

Launching the Settings app is the next action. You can achieve this by selecting the Start menu, followed by the gear symbol. Or, you can launch the Settings app by pressing the Windows key + I.

  1. Navigate to the Apps Section

In the window settings, click on the “Apps” section. Here, you can manage all the applications installed on your system.

  1. Select the Default Apps

Next, select “Default apps” from the menu to bring up a list of default applications set on your system.

  1. Choose the Preferred Browser to Set as Default

Under “Web browser,” you will see the current default browser (most likely Microsoft Edge). Click on it and select the preferred browser set as your default browser.

  1. Test the Default Browser

Open a link or a web page to test if the default browser has been changed. The link or web page should open in the browser you set as the default.

Troubleshooting Methods

Changing the default browser in Windows 11 is a straightforward process, but if you still run into some trouble, don’t worry! To repair it, you can still attempt a few troubleshooting methods.

  • Check if the browser that needs to be set as the default is already installed on your computer before making the change. The browser can be downloaded and installed from its official website or, if available, the Microsoft Store.
  • You can try restarting your system and changing the default browser again. Sometimes, restarting your system can fix issues related to default applications.
  • The antivirus software running on the computer can also cause a problem in changing the default browser. Some antivirus software can block the default application settings from being changed. In this case, you can disable your antivirus software temporarily and then change the default browser again. If disabling the antivirus software resolves the issue, you can contact the software vendor for further assistance in resolving the conflict between the antivirus software and Windows 11.
  • You can reset the default program settings in Windows 11 if the preceding methods didn’t eliminate your problem. Launch the Settings app, then complete this in the “Apps” area. Afterward, choose “Default apps” from the left-hand menu and then click “Reset” next to “Reset to the Microsoft recommended defaults.” After doing this, the default program settings will all be restored to their suggested defaults You may then try setting the default browser again.

Conclusion

You might wonder “Why Microsoft Edge is the default browser in Windows 11.” It’s because Edge has been optimized for Windows 11 and offers various new features, including vertical tabs, web capture, and new themes. Nevertheless, don’t worry if you prefer a different browser to Microsoft Edge. Following the steps outlined above, you can easily change the default browser in Windows 11. Simple measures can be taken to complete the procedure because it is uncomplicated.

If you want to experience productivity boost, you can try SmartWindows. With its advanced capabilities, SmartWindows allows for efficient organization of desktop displays, restoring preset display arrangements, and supporting multiple browsers and Microsoft Office files. By using SmartWindows, users can effectively restore browsers and perform tasks to boost productivity. This ultimately results in a more productive and efficient computing experience.

SmartWindows

Restore Browser Tabs with SmartWindows. It maintains an active tab history and restores browser size as well as display position on one screen or many.
FAQs

How to set default browser Internet Explorer 11 in Windows 11?

  • Go to “Default apps settings” from the Start menu search.
  • Scroll down to “Web browser.”
  • Click on the current default browser.
  • Select “Internet Explorer” from the list.
  • Close the settings window.

Does Windows 11 allow Chrome as default browser?

Yes. You can set Google Chrome as your default browser in Windows 11. When you install Chrome, it’ll ask you if you want to make it your default browser. If you missed that, you can still set it as your default browser by going to the “Default apps settings” and choosing Chrome. 

How do I find my default browser?

  • Click on the Start menu.
  • Type “default apps” in the search bar and click on “Default apps settings” from the search results.
  • Scroll down to the “Web browser” section. The name of your default browser will be displayed there.

Or you can try opening a web link or clicking on an HTML file. Your default browser should automatically open to handle the task.

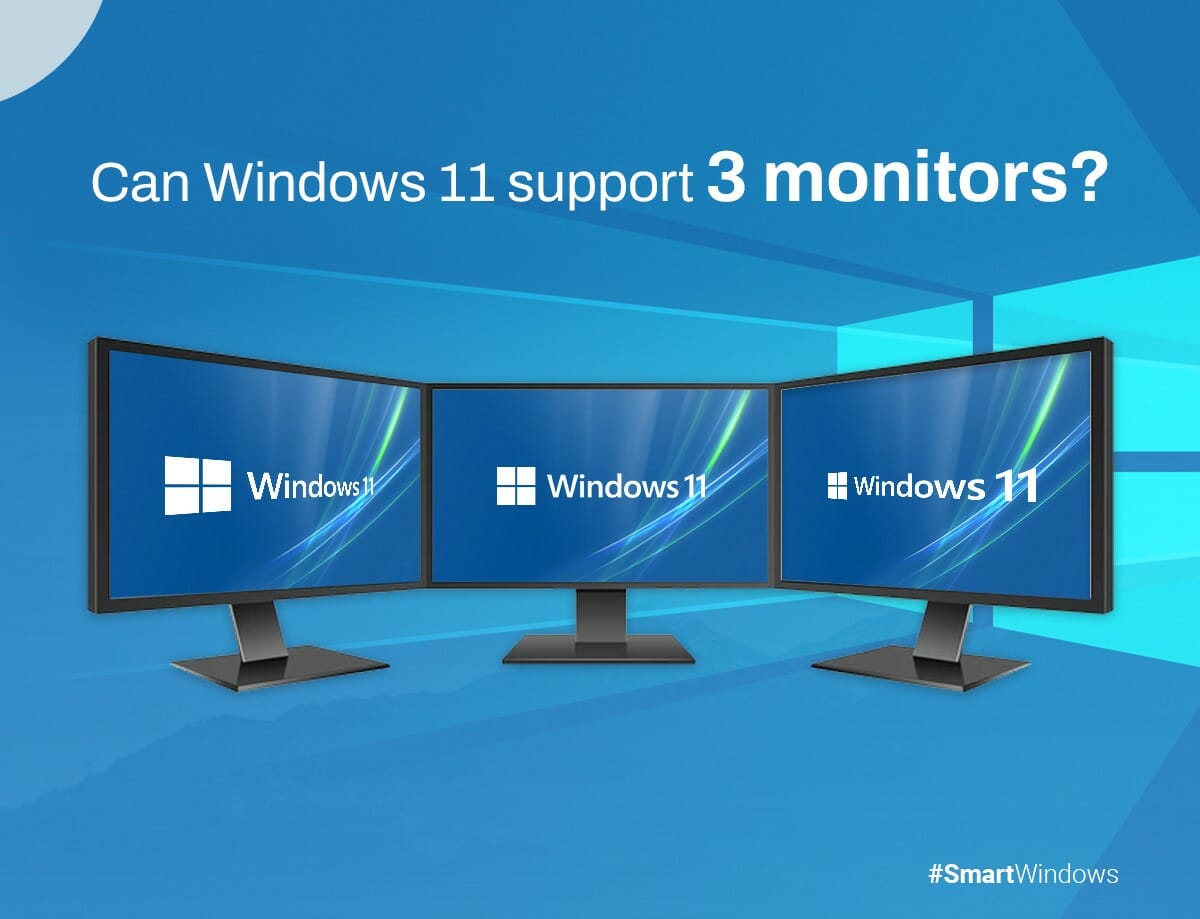
Can Windows 11 Support 3 Monitors? Explained

Can Windows 11 Support 3 Monitors?

Windows 11 is the newest version of Microsoft’s operating system, bringing a revamped and contemporary appearance to the Windows interface. Although Windows 10 was famous for accommodating several monitors, users are eager to know whether Windows 11 can handle 3 or more monitors. This article will explore the prerequisites for running three monitors on Windows 11 and how many monitors can windows 11 support. as well as the various methods for connecting and setting them up.

Requirements for Running 3 Monitors on Windows 11?

Graphics Card and Driver Requirements

To run 3 monitors on Windows 11, your computer must have a graphics card that supports three or more displays. The most recent driver must also be installed for the graphics card to function correctly with the operating system. The manufacturer’s website or Device Manager on your computer allows you to view the specifications for your graphics card.

Display Output Requirements

Apart from the graphics card, your computer must have the necessary display output ports to connect three monitors. HDMI, DisplayPort, and VGA are the most common display output ports. If your computer lacks the required ports, you can use display adapters to connect them.

How to Connect 3 Monitors to Windows 11

Connect 3 different monitors to your computer using a combination of display output ports and adapters. They can have different input types like HDMI, DisplayPort, or VGA. You can connect a 3rd monitor to the first two using a VGA to HDMI adapter, with the other two connected by DisplayPort and HDMI.

If your computer lacks the required display output ports, you can connect the monitors using display adapters. To connect three monitors to your computer, you have the option to use various types of adapters such as USB to HDMI, DisplayPort to HDMI, and VGA to HDMI.

Configuring Multiple Monitors on Windows 11

Display Settings

Once you have connected the monitors to your computer, you can configure them through the Windows 11 monitor settings. Right-click on the desktop and then choose “Display Settings.” Here, you can choose each monitor’s orientation, resolution, and scale.

Taskbar and Start Menu

You can also configure the Taskbar and Start menu to work across all 3 monitors. Right-click on the Taskbar. Then choose “Taskbar settings.” Select “Show taskbar on all displays” under  the “Multiple displays.” You can also configure the Start menu to open on the display of your choice.

Multi-tasking with Three Monitors

You can multitask more efficiently with 3 monitors by having different applications and windows open on different screens.

Common Multi Monitors Issues and Troubleshooting

Running 3 monitors on Windows 11 is simple. Still, you may encounter some Windows 11 multiple monitors issues that require troubleshooting. Let’s have a look at them: 

  • Windows 11 extend display not working: Update your graphics card driver to the latest version. This can resolve compatibility issues and enable extended display functionality.
  • Windows 11 not detecting second monitor: Verify that the second monitor is properly connected to your computer and powered on. Check the cables and connections to ensure they are secure.
  • Windows 11 dual monitor resolution problem: Ensure that both monitors are set to their native or recommended resolution. Right-click on the desktop, select “Display settings,” and adjust the resolution for each monitor individually.
  • Second monitor resolution too low: Update your graphics card driver to the latest version. Download the appropriate driver for your graphics card model. Installing the latest driver can help resolve resolution issues.
  • Performance issues: Running three monitors can tax your computer’s performance, especially if you are running resource-intensive applications. You can improve performance by closing unnecessary applications, updating drivers, or upgrading your hardware.

Conclusion

Windows 11 supports three monitors or more, provided your computer meets the necessary requirements. By ensuring that you have the right graphics card, display output ports, and adapters, you can connect and configure three Windows 11 to improve your productivity and multitasking abilities; we hope this article helps solve your question of How do I setup 3 monitors on Windows 11.

If you are still facing any issues, then you can try SmartWindows. SmartWindows is the program for you if you want to increase both your personal and workplace efficiency. Thanks to this useful tool, it’s much simpler than ever to handle many apps and tasks at once, enabling you to connect up to six screens to your computer. SmartWindows makes it simple to keep everything organized and in one location, so you can stop flitting between screens and windows. Try it out and observe the impact it can have!

SmartWindows

Restore Browser Tabs with SmartWindows. It maintains an active tab history and restores browser size as well as display position on one screen or many.
FAQs

Can I run three monitors on Windows 11 without a graphics card?

No, you must have a graphics card that supports three or more displays to run three monitors on Windows 11.

How many monitors can I run?

Well, it depends on your graphics card and the number of available display output ports.

Can I use different monitor brands and sizes for my three-monitor setup?

Yes, you can use different monitor brands and sizes for your three-monitor setup, but you may encounter issues with resolution and scaling.

Does having multiple monitors affect PC performance?

Yes, running 3 monitors on Windows 11 can be resource-intensive, especially if you are running resource-intensive applications. You can improve performance by closing unnecessary applications, updating your drivers, or upgrading your hardware.

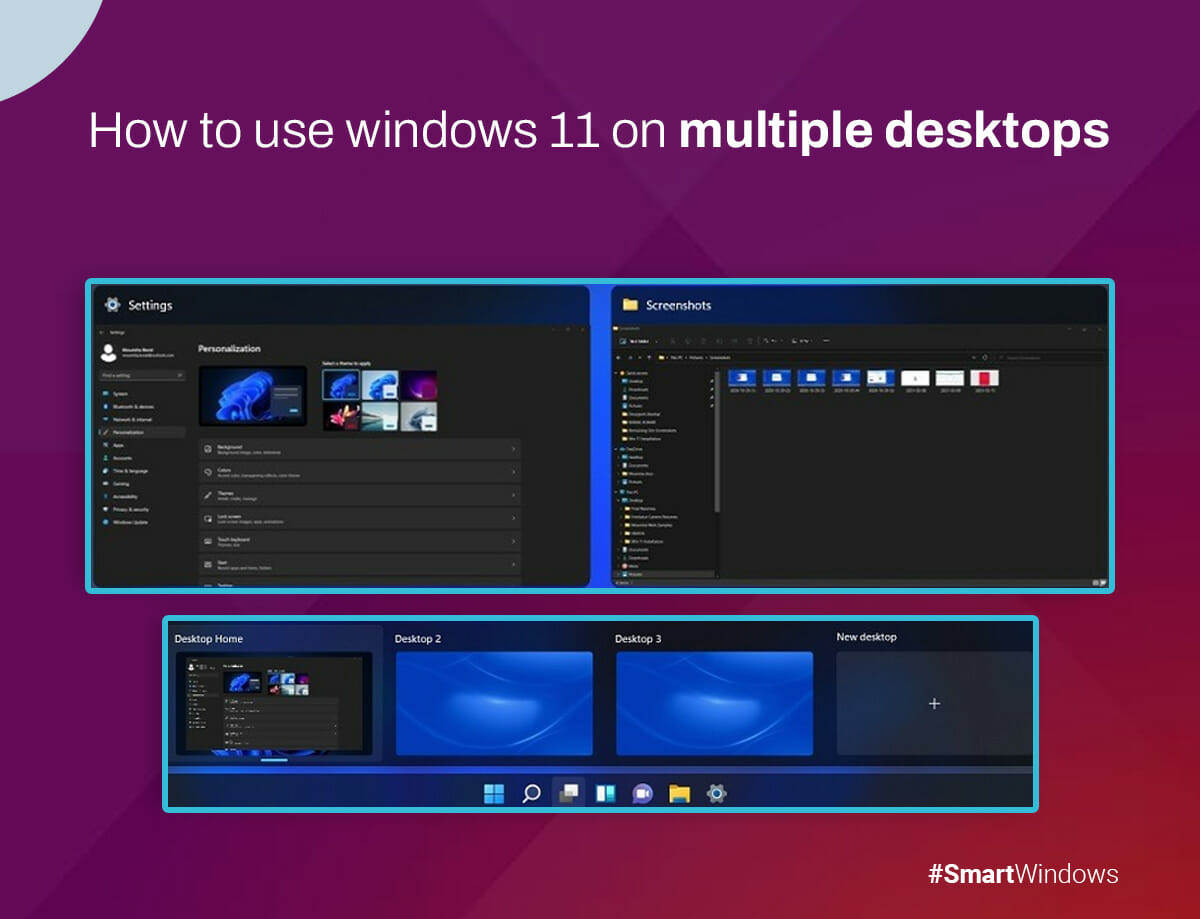
How to Use Windows 11 Multiple Desktops – Useful Guide

You know how chaotic your desktop can become if you work on a single monitor and juggle multiple projects. Fortunately, Windows 11 has a feature that can help – virtual desktops. Creating multiple desktops allows you to organize your work and avoid visual clutter.

Using Windows 11 virtual desktops is easy. Simply access the Task View pane and create the number of needed desktops. You can move applications to different desktops and switch between desktops in Windows 11. Keeping your workspaces separate lets you focus on each project and be more productive.

Need help with virtual desktops in Windows 11? We’ve got you covered. This article will show you how to use Windows 11 multiple desktops. So, let’s get started!

How to Add a New Desktop in Windows 11?

Virtual desktops are a great way to separate your work and personal life or organize your workspaces by project or task. Here’s how you can add a new desktop in Windows 11:

  • Open “Task View.
  • Click on the Task View.
  •  Right-click the taskbar if you can’t find the button, and select “Taskbar settings.”
  • Switch from “Task View” to “On.”
  • Click the “New Desktop” button in the Task View pane. This will create a new virtual desktop that you can switch to whenever necessary.

To create a new desktop even faster, use the keyboard shortcut Windows Key + Ctrl + D. In a swift moment, a new desktop materializes, bypassing the need to access the Task View pane.

How Can You Switch Between Different Desktops in Windows 11?

Having several desktops set up makes switching between virtual desktops a breeze. You may view thumbnail previews of your active desktops by selecting the Task View button on your taskbar. To switch between desktops in Windows 11, follow these steps:

  • Click on its preview.
  • To access the left and right desktops, enter Windows Key + Ctrl + Left Arrow and Key + Ctrl + Right Arrow.

Windows 11 multiple desktop shortcuts can speed up switching between virtual desktops and save time.

How to Rename Your Desktops in Windows 11?

Undoubtedly, a crowded desktop can be stressful, especially when you have work to complete. Windows 11 offers convenient features to enhance organization and productivity. One such tip is to rename your desktops for a clear and efficient workspace. To do this:

  • Enter the Task View pane.
  • Right-click the desktop and choose “Rename.”

You can give your desktop a new name that accurately describes its contents, making it simple to quickly determine which desktop has what you need without opening each one individually.

How to Customize Desktop Backgrounds in Windows 11?

The ability to customize your desktop backgrounds is another fantastic feature of Windows 11. This can help visually distinguish your workspaces, which can help maintain focus on the task at hand. To modify your desktop wallpaper:

  • Right-click and choose “Select a background.”
  • Pick an image from your existing collection or browse the alternate choices available.

How Can You Move Windows Between the Desktops in Windows 11?

Moving windows between desktops is also a breeze in Windows 11. Effortlessly navigate to the desired application by accessing the Task View pane, where a simple hover over the corresponding desktop allows you to select and relocate it seamlessly.

  • Click and glide the application to the preferred location.
  • Choose “Move to” and meticulously designate the desired desktop for a seamless transition.

That’s it! Keeping your applications organized and moving them around depending on the task you are working on is quite simple in Windows 11.

How to Move APPs Between Desktops?

Windows 11 allows you to have multiple desktops, and when you open an app, it appears only on your active desktop. This feature makes creating a desktop with specific apps convenient by opening a new desktop, switching to it, and launching the desired apps there. If you relocate an app to a different desktop, you can easily move it using Task View. Let’s see how:

  • Click on the Task View on the taskbar. This will open the Task View pane, which displays thumbnails of your desktops.
  • Locate the app you want to move and click and drag it.
  • While dragging the app, move your cursor to the desktop thumbnail where you want to place the app.
  • Drop the app on the desktop thumbnail. The app will then switch to the new desktop.

How Can You Close Desktops in Windows 11?

Finally, when you’re finished with a virtual desktop, you can quickly close it out in Windows 11.

  • Hover over the desktop until an X symbol emerges in the corner.
  • Click it to close the desktop.

Or, you can open Task View with Windows Key + Tab, choose the virtual desktop you want to close, and press the Delete key.

Conclusion

Windows 11 has excellent tools that will keep your workspace effective and organized. You can easily maintain focus and productivity while using your computer by renaming desktops, changing backgrounds, moving windows, and compact desktops. This article helped you learn how to use Windows 11 on multiple desktops. 

If you still have problems, you can tend to SmartWindows. It can help you increase your productivity and efficiency on Windows 10 and 11 with its helpful features like desktop arrangement, multiple monitor setup, multi-browser setup, etc. This software lets you do your work and play games on different desktops with its Windows 11 multiple desktop shortcuts.

SmartWindows

Restore Browser Tabs with SmartWindows. It maintains an active tab history and restores browser size as well as display position on one screen or many.
FAQs:

Why do I have two desktops on my Windows 11?

If you see two desktops on your Windows 11, you have multiple virtual desktops enabled. Virtual desktops make multitasking easier. You can open multiple desktops simultaneously, each with its windows and programs. This way, you can organize different tasks or projects and switch between them effortlessly.

What is the shortcut key for switch desktops in Windows 11?

In Windows 11, you can quickly switch between desktops using the shortcut key “Windows key + Ctrl + Left/Right arrow.”

Or

  • Click the Task View.
  • Select the desired desktop from the thumbnails shown in the Task View pane.
  • This lets you switch to the chosen desktop and access its windows and programs.

How do I get rid of multiple desktops in Windows 11?

  • Click the Task View button on your taskbar.
  • Hover over the desktop you wish to close.
  • Look for the desktop thumbnail displaying an “X” in the top right corner and click it to close.

Why Does Windows 11 Keep Freezing? Explained

Are you frustrated with your Windows 11 freezing up on you? Well, you’re not alone! This has been frustrating for many since the new operating system’s release. But why does Windows 11 freeze? In this article, we’ll answer your question, “Why does Windows 11 freeze sometimes?” and discuss solutions to help you resolve the issue. So, if you’re tired of dealing with frozen screens, let’s start to find out how to fix Windows 11 freezing.

Possible Reasons for Windows 11 Freezing

Nothing can beat the frustration when Windows 11 freezes and crashes randomly. Well, it can happen due to the following reasons:

Hardware Issues

Outdated or malfunctioning drivers, insufficient RAM or hard disk space, and faulty hardware components can cause Windows 11 to freeze. Outdated or malfunctioning drivers can cause conflicts and issues that lead to system instability. Sometimes, Windows 11 freezes due to faulty hardware components, leading to problems such as a failing hard drive or power supply.

Software Conflicts

Incompatible software or conflicting drivers can also be why Windows 11 freezes randomly for a few seconds or a long time. This can be a case for a recently installed program or an updated existing one. Sometimes, two programs or drivers may be incompatible, causing system instability.

Malware or Virus Infections

Malware or virus infections are another reason that can cause Windows 11 to freeze. This can be especially true if the malware has infected critical system files. Malware can also use system resources. Due to this, your computer slows down or freezes.

Overheating

Overheating is also another issue that lets Windows 11 freeze. This can happen due to dust buildup in the cooling system, a malfunctioning fan, or insufficient cooling. Overheating can cause damage to hardware components, leading to system instability.

Power Issues

Power issues such as power surges or a failing power supply can be a reason for Windows 11 freezing randomly. Power surges can cause damage to hardware components, leading to system instability. A failing power supply can also cause voltage fluctuations and instability.

Faulty Windows Updates

Windows updates can sometimes cause system stability issues and lead to Windows 11 freezing. The reason can be bugs or incompatibility issues with hardware or software. In some cases, a corrupted Windows update can cause system instability.

Corrupt System Files

If system files are corrupt, this can cause Windows 11 to freeze or crash. This can occur due to a virus infection, hardware issues, or other system errors. Corrupted system files can cause issues with system stability, leading to freezes or crashes.

Graphics Issues

If you’re using a PC with limited graphic processing capabilities, your screen resolution may need to be lowered for your computer’s graphics adapter. This can cause freezing issues on Windows 11.

GPU Driver Incompatibility

Upgrading to Microsoft’s latest desktop platform may result in your graphics card having an incompatible Windows 11 driver.

Limited RAM

Insufficient system memory can also be a factor behind random Windows 11 freezing, especially on PCs with only 4 GB of RAM.

System File Corruption

If you want to fix the issue when your files are corrupted, running a system scan can be helpful. However, if the issue doesn’t resolve, reset Windows 11 to repair the system files.

Here are some other scenarios when Windows 11 freezes and crashes randomly:

Windows 11 Freezing When Idle

If your computer files are damaged, your Windows 11 system might freeze when idle. Running system scans can help identify and fix the issue.

Windows 11 Freezing After Update

Sometimes, a new Windows 11 update can cause your system to freeze. If this happens, uninstall the latest update to resolve the issue.

Windows 11 Freezing on Login Screen

Update your GPU driver to resolve immediate Windows 11 freezing on startup effectively.

Windows 11 Freezing While Gaming

Reducing your monitor’s resolution can prevent interruptions during gaming and ensure a smoother gameplay experience.

Windows 11 Freezing on Shutdown

RAM issues can cause your Window to freeze. In addition to fixing any RAM problems, optimizing and cleaning it may also help resolve the issue.

How to Fix Windows 11 Freezing

Let’s see how to unfreeze Windows 11:

Run Malware Scans

If you’re experiencing random freezing on your Windows 11 PC, it could be due to malware infecting your system. Malware can consume a lot of your system resources, leading to drops in performance and even causing your computer to freeze. Run a malware scan to remove malware as the cause of your problem. Here’s how to do it:

  • Right-click on the Start menu.
  • Select Settings.
  • Go to Privacy & Security, and click on Windows Security.
  • Select Virus & Threat Protection.
  • Click on the Scan options in the new window.
  • Select Full Scan. 
  • Click on Scan Now.

This will scan your system for malware and help you identify and remove any threats causing your Windows 11 PC to freeze.

Change Screen Resolution

 If you have a low-end graphics card and use resource-intensive tasks, Windows 11 might freeze randomly due to improper screen resolution. To fix this issue, reduce the screen resolution by following these simple steps:

  • Select Setting from the Start menu.
  • Click on System and select Display, and then select Scale & Layout.
  • Select the resolution under Display resolution.
  • Click on Keep Changes to save your new display settings.

Reinstall GPU Drivers

The GPU drivers are essential for your computer to properly display graphics. However, if they become outdated or corrupted, it can cause your system to lag and freeze. Reinstall the graphics driver of your GPU manufacturer to fix such issues.

  • Press key + R to open Run.
  • Type “devmgmt.msc” & press Enter.
  • Expand “Display adapters” and right-click your graphics driver.
  • Select “Uninstall device” and confirm.
  • Go to the GPU manufacturer’s website and Download the driver.
  • Run the set-up file from your Downloads folder.
  • Follow the on-screen instructions and install the driver.
  • Restart your computer.

Update Your Window

You can update your system if your Windows 11 is unresponsive. Windows updates often contain fixes for known bugs and issues.

  • Select Settings by right-clicking the Start menu.
  • Click on Windows Update.
  • For updates, select Check.
  • With the availability of the update, Windows 11 will start downloading it.
  • Restart your computer.

Conclusion 

Windows 11 freezing can be a frustrating experience for users, but it’s not an uncommon issue. Users can troubleshoot by updating drivers, running system scans, and disabling unnecessary programs. Identify the root cause to find a solution for a smoother computing experience. SmartWindows can be a helpful tool to help with Windows 11 freezing problems.

With its ability to organize desktop displays efficiently, restore preset display arrangements, and support multiple browsers and Microsoft Office files. Using SmartWindows, users can address some of the underlying issues that cause Windows 11 to freeze and ultimately have a more productive and efficient computing experience.

SmartWindows

Restore Browser Tabs with SmartWindows. It maintains an active tab history and restores browser size as well as display position on one screen or many.
FAQs

Why does Windows 11 keep on freezing?

Windows 11 may freeze for various reasons, such as insufficient system resources like RAM or CPU, outdated drivers, software compatibility issues, malware, or hardware problems like a failing hard drive or overheating. Windows updates or other background processes can also cause temporary freezes.

How do I stop Windows 11 from freezing?

  • Update your device’s drivers and firmware.
  • Run the Windows 11 Troubleshooter.
  • Disable unnecessary startup programs.
  • Scan for malware.
  • Adjust power settings.
  • Run a clean boot.
  • Reset or reinstall Windows 11.

Is Windows 11 bug free?

Windows 11 is not completely free of bugs or issues because it’s complex software. However, Microsoft works to fix any bugs and releases relevant updates regularly.

How to manage user profiles on Windows 11 – Useful Guide

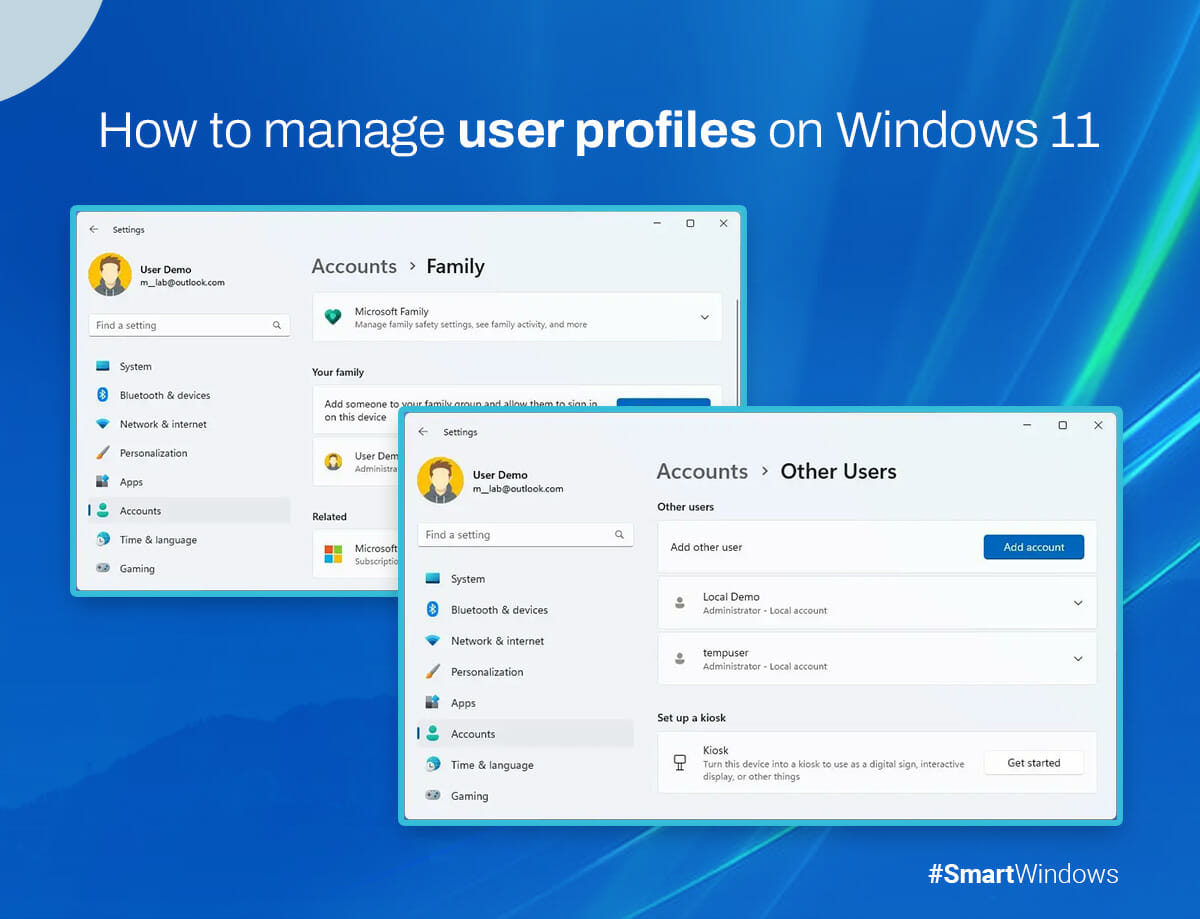
User profiles on Windows 11 are an essential part of the operating system. A user profile is like a digital wardrobe that holds a user’s unique settings and preferences on a device. Managing user profiles ensures users can access the apps and resources they need while keeping things organized and secure. It’s like giving each user their own little corner of the computer world to make their own and call home! In this article, you’ll learn how to manage user profiles on Windows 11. So, let’s get started! 

Managing User Profiles on Windows 11

Windows 11, the latest Microsoft operating system version, comes with many features and improvements, including enhanced user profile management. User profiles allow multiple users to use the same computer while keeping their data and settings separate.

Create a New User Profile

Want to create a new Windows 11 user profile? If so, then follow these steps: 

  1. Click the “Windows Start” button.
  2. Click “Settings.”
  3. Click “Accounts.”
  4. Click “Family & other users.”
  5. Click “Add account.”
  6. Choose the account type (Local or Microsoft).
  7. Follow the prompts to set up the new account.

Editing User Profiles

Want to edit a user profile? The following are the steps to edit user profiles: 

  1. Click on the “Windows Start” button.
  2. Click “Settings.”
  3. Click “Accounts.”
  4. Click “Family & other users.”
  5. Select the account to manage from the list of accounts.
  6. Click on the “Manage” button.
  7. Depending on the task you want to perform, you can edit the account type, reset the password, or delete the account for the user profile.
  8. Follow the prompts to make the changes to the selected user account.

Deleting User Profiles

Let’s have a look at how to delete user profile from Windows 11:

  1. Click the “Windows Start” button.
  2. Click “Settings.”
  3. Click “Accounts.”
  4. Click “Family & other users.”
  5. Select the account to delete.
  6. Click the “Remove” button.
  7. Follow the prompts to confirm the deletion.

Managing User Profiles Using the Command Prompt

Using the Settings app, you can manage user profiles on Windows 11 using the Command Prompt. The following are some of the commands you can use:

  1. Create a new user profile: net user username password /add
  2. Delete a user profile: net user username /delete
  3. Change the password for a user profile: net user username new password
  4. Disable a user profile: net user username /active: no
  5. Enable a disabled user profile: net user username /active: yes

How Can SmartWindows Help Make the Process Easier

Want an easy way to manage user profiles on Windows 11? Look no further than SmartWindows! With this app, managing user profiles is a breeze. You can effortlessly create, modify, and delete profiles. Let’s explore some of the ways SmartWindows simplifies profile management. 

Simplifies User Profile Creation

Creating a new user profile on Windows 11 can be a bit of a hassle, especially if you have to create several profiles. SmartWindows simplifies this process by providing a user-friendly interface.   

Provides Advanced User Management Features

SmartWindows provides advanced user management features unavailable in Windows 11, such as setting user-specific permissions, password policies, and time restrictions. If you’re looking to limit access to specific applications or files, these features can be quite useful.

Allows for Easy Profile Modification

With SmartWindows, modifying user profiles is straightforward. You can change user names, passwords, and other profile settings with a few clicks.

Provides Centralized Management

SmartWindows provides centralized management of user profiles, which means you can manage all your profiles from a single interface. This can be particularly useful if you have multiple computers or want to manage user profiles for a large organization.

SmartWindows

Restore Browser Tabs with SmartWindows. It maintains an active tab history and restores browser size as well as display position on one screen or many.
Conclusion

Managing user profiles is crucial to ensure that users can access the resources and permissions they need on their Windows 11 devices. With the help of the steps that are discussed in this article, you can easily create, modify, and delete user profiles. Whether you use the Settings app or the Command Prompt, managing user profiles on Windows 11 is easy with SmartWindows!

FAQs

How do I clean up User Profiles in Windows 11?

To clean up user profiles in Windows 11:

  • Open Settings.
  • Click on Accounts.
  • Select Family & other users.
  • Click on the user profile to clean up.
  • Click Remove to delete the user profile or delete unnecessary files in the user’s folder at C:\Users\username.

How do I change profiles in Windows 11?

  • Click on the Start button.
  • Click on your user profile in the Start menu.
  • Choose the profile that you want to switch to from the list.
  • Or, Click “Add a user” to create a new profile.

You can also manage user profiles in Settings > Accounts > Family & Other users.

Does deleting user profile Delete files?

Yes, deleting a user profile in Windows 11 can delete the associated files and data. It’s important to back up any important files before deleting a profile. Any programs installed only on that profile will need to be reinstalled on another profile or on the same profile if you recreate it later.