How To Do a Windows 10 Factory Reset? A Comprehensive Guide

Factory Reset Windows 10

Maintaining your computer’s performance and security is essential. Sometimes, despite all efforts to keep your system in top shape, you may encounter persistent issues that require more than just routine maintenance. A factory reset is one such solution. This blog will guide you through understanding when a factory reset is necessary and how to perform it on a Windows 10 system.

When is a Windows 10 Factory Reset Required?

Restoring your computer to its initial configuration by erasing all installed applications, personal data, and system settings is possible with a factory reset. Here are some scenarios where a factory reset might be necessary: 

Persistent Performance Issues

If your computer is running slow, freezing, or crashing frequently, and no amount of troubleshooting, updating, or optimizing seems to help, a factory reset can give it a fresh start.

Malware or Virus Infection

When your system is compromised by malware or a virus that you cannot remove through antivirus software or other security measures, a factory reset ensures that all traces of malicious software are eliminated.

Preparing to Sell or Give Away Your PC

Ensure all your personal data is deleted before giving someone else access to your computer. A factory reset ensures all your private data is lost.

Corrupt System Files

Sometimes, system files become corrupted due to software conflicts, unexpected shutdowns, or failed updates. A factory reset can resolve these issues by reinstalling a clean version of Windows 10.

How to Factory Reset Windows 10?

Performing a factory reset on Windows 10 is straightforward, but it’s essential to back up your data before proceeding, as this process will erase everything on your hard drive. Here’s how you can do: 

Step 1: Open Settings

Choose Settings (the gear symbol) from the Start Menu by clicking on it.

Step 2: Go to the Update & Security page

Click Update & Security in the Settings window.

Step 3: Recovery Options

Pick the Recovery option from the menu on the left.

Step 4: Launch the Reset Process

Under the Reset this PC section, select the Get started option.

Step 5: Select an Option

There will be two choices available to you: 

  • Keep my files: Using this option will save your personal files while removing applications and settings.
  • Remove everything: This will erase all private files, settings, and applications.

Step 6: Follow the On-Screen Instructions

Select the one that best fits you, then adhere to the on-screen directions. Also, if you wish to wipe everything, you will be asked to choose if you want to erase all your data or the entire drive. A full clean is more secure but takes longer.

Step 7: Complete the Reset

Click Reset after making your selections. Once the procedure starts, your computer will restart many times. After everything is finished, Windows 10 will be reinstalled, and the factory settings of your machine will be restored.

SmartWindows

Restore Browser Tabs with SmartWindows. It maintains an active tab history and restores browser size as well as display position on one screen or many.

Conclusion

A factory reset can be a lifesaver when dealing with persistent system issues, malware infections, or preparing your PC for a new user. You can make sure your Windows 10 system resets successfully by following the instructions. Keep in mind that this procedure will remove every piece of data from your hard disk, so before starting, make a backup of any crucial information. With a fresh start, your computer will run like new, free from previous issues and ready for future tasks.

How Can You Reinstall Windows 10?

How Can You Reinstall Windows 10

These days, a large portion of our lives—including work, entertainment, and personal organization—center around computers. When our systems encounter problems, it can be incredibly frustrating. Installing the operating system again is one way to fix a lot of problems. For Windows 10 users, this can be a highly effective way to restore system performance, resolve persistent problems, and ensure a fresh start.

In this blog, we’ll explore what issues can be resolved by reinstalling Windows 10, the types of reinstalls available, and a step-by-step guide on how to perform a reinstall.

Related Blogs: https://smartwindows.app/blog/12-tips-for-improving-your-slow-laptops-speed/  

What Issues Can Be Resolved by Reinstalling Windows 10?

Reinstalling Windows 10 can address a wide range of problems that may be affecting your computer. The following are some typical problems that are fixable: 

1. System Performance Problems

Your computer may get slowed down over time by unnecessary files, out-of-date applications, and fragmented data. Reinstalling the software can help solve these problems and increase speed and performance.

2. Malware and Viruses

If your system has been compromised by malware or viruses, reinstalling Windows 10 can help to completely remove these threats and restore your computer to a secure state.

3. Software Conflicts

Installing and uninstalling various programs can sometimes lead to software conflicts and system instability. A clean reinstall can help resolve these conflicts by providing a fresh start.

4. System Crashes and Errors

Frequent system crashes, blue screens of death (BSOD), and other persistent errors can often be resolved by reinstalling Windows 10, as it can fix corrupted system files and drivers.

5. Upgrade Issues

If you’ve encountered problems during a Windows update or upgrade, a fresh install can help ensure that your system is running the latest version of Windows 10 without any issues.

Types of Reinstalls for Windows 10

When it comes to reinstalling Windows 10, there are several methods you can choose from, depending on your needs and the severity of the issues you’re experiencing: 

Reset This PC

This option allows you to reinstall Windows 10 while keeping your personal files intact. It’s a good choice if you want to address performance issues or remove problematic software without losing your data. 

Clean Install

To do a clean installation, you must format your hard drive and install a brand-new copy of Windows 10. This method is the most thorough and is ideal for resolving severe issues, such as malware infections or significant system errors. However, it requires you to back up your data beforehand, as everything on your drive will be wiped. 

In-Place Upgrade

This method involves using the Windows 10 installation media to upgrade your current installation. It can resolve some system issues without affecting your files or applications. However, it’s not as comprehensive as a clean install. 

How to Reinstall Windows 10?

Although reinstalling Windows 10 could appear difficult, if you follow the appropriate instructions, it’s a simple procedure. Here’s how: 

1. Using the “Reset This PC” Option

  • Open Settings: Select “Settings” (the gear symbol) by clicking on the Start menu. 
  • Navigate to Update & Security: To access the Settings panel, select “Update & Security.” 
  • Choose Recovery: From the option on the left, choose “Recovery.” 
  • Reset This PC: Click the “Get started” button located under the “Reset this PC” section. 
  • Choose an Option: Either select “Keep my files” or select “Remove everything.” Select the solution that best meets your requirements. 
  • Follow the Prompts: To finish the reset process, adhere to the on-screen directions. 

2. Performing a Clean Install

  • Back-Up Your Data: Before starting, ensure that you back up all important files and data. 
  • Create Installation Media: Make a bootable USB device or DVD by downloading the Windows 10 Media Creation Tool from the Microsoft website. 
  • Boot from Installation Media: After inserting the USB drive or DVD, turn on your computer again. To access the BIOS or boot menu and choose the installation medium, press the corresponding key. 
  • Install Windows 10: For Windows 10 installation, follow the on-screen directions. Choose “Custom: Install Windows only (advanced)” to perform a clean install. 
  • Complete Setup: After the installation is finished, set up your fresh Windows 10 installation by following the instructions. 

3. Performing an In-Place Upgrade 

  • Download the Installation Media: Use the Windows 10 Media Creation Tool to download the latest version of Windows 10. 
  • Run the Setup: Open the downloaded file and run the setup. Choose “Upgrade this PC now.” 
  • Follow the Prompts: Follow the on-screen instructions to complete the upgrade process. 

SmartWindows

Restore Browser Tabs with SmartWindows. It maintains an active tab history and restores browser size as well as display position on one screen or many.

Conclusion

Reinstalling Windows 10 may be a useful fix for several system problems, including malware and performance concerns. You can guarantee a seamless and effective reinstallation procedure by being aware of the various reinstallation options and taking the right precautions. Whether you choose to reset your PC, perform a clean install, or do an in-place upgrade, you’ll be able to restore your computer to its optimal state and enjoy a fresh start.

12 Tips for Improving Your Slow Laptop’s Speed 

why is my laptop so slow

Is your laptop feeling sluggish and unresponsive? Recognizing common signs like long boot times, slow applications, and frequent crashes is crucial for diagnosing the issue. Various factors, from too many startup programs and insufficient RAM to malware, overheating, and outdated hardware, can slow down your laptop.  

Fortunately, there are effective solutions to tackle these problems. In this blog, we’ll explore how to manage startup programs, run antivirus scans, upgrade hardware, clean up disk space, and update software. 

What are The Common Signs of a Slow Laptop?

A slow laptop can be frustrating, but recognizing common signs can help diagnose and address the issue. Indicators include long boot times, slow application launches, frequent lagging or freezing, slow internet browsing, unresponsive programs, delayed keyboard and mouse response, high disk and CPU usage, memory leaks, overheating, frequent crashes, excessive pop-ups and ads, delayed file operations, outdated software, and low battery life. 

Why is My Laptop So Slow?

1. Too Many Startups Programs

Boot times and general performance can be considerably slowed down by having many apps configured to begin at startup. 

2. Malware or Viruses

Your laptop may become slower due to the consumption of system resources by malware, viruses, and other dangerous applications. 

3. Insufficient RAM

Not having enough RAM can cause your laptop to struggle with multitasking and running modern applications efficiently. 

4. Fragmented or Full Hard Drive

A fragmented or nearly full hard drive can slow down data retrieval times. This particularly applies to conventional hard disks (HDDs). 

5. Outdated Hardware

New applications and tasks might be challenging for obsolete technology, such as a graphics card that is out of date or a CPU that is sluggish. 

6. Overheating

Overheating can cause your laptop to throttle its performance to cool down, leading to sluggish behavior. 

7. Background Processes

Excessive background processes and services can drain system resources, affecting performance. 

8. Outdated Software

Running outdated operating systems, drivers, and applications can cause compatibility and performance issues. 

9. Unnecessary Visual Effects

Fancy visual effects and animations can consume resources and slow down performance, especially on older machines. 

10. Poor Maintenance

Lack of regular maintenance, such as disk cleanups and defragmentation (for HDDs), can lead to slower performance over time. 

11. Low Storage Space

Running low on storage space can impact system performance, especially if the operating system requires additional space for virtual memory.

12. Faulty Hardware

Performance can be significantly impacted by malfunctioning hardware, such as a broken RAM module or a hard drive.

13. Network Issues

Slow internet speeds or network issues can affect online activities, making it seem like the laptop is slow.

14. Bloatware

Pre-installed software (bloatware) that you don’t need can consume resources and slow down your laptop.

How Can I Fix My Laptop from Slowing Down?

You may enhance a sluggish laptop’s performance by doing the following:

1. Manage Startup Programs

Disable any apps that you don’t need to execute at launch by opening Task Manager (Ctrl + Shift + Esc), selecting the “Startup” tab.

2. Run Antivirus Scans

Use a reliable antivirus program to scan your laptop and remove any detected malware or viruses.

3. Upgrade Hardware

Performance and multitasking on your laptop may be greatly enhanced by adding more Memory. Additionally, replacing a traditional hard disk (HDD) with a solid-state drive (SSD) may greatly enhance overall speed and startup times.

4. Clean Up Disk Space

Uninstall programs you don’t use and delete temporary files and other unnecessary data. Utilize pre-installed tools such as Windows’ Disk Cleanup or similar apps for alternative operating systems.

5. Update Software

Ensure that the newest patches and updates are applied to your operating system. Keep all drivers and applications updated to their latest versions to ensure your laptop keeps running at optimal speeds.

6. Reduce Visual Effects

To deactivate certain visual effects, go to System Properties > Advanced > Performance Settings on Windows and select “Adjust for best performance” or another option.

7. Manage Background Processes

In Task Manager, identify which processes are taking extensive resources and end them with the “End Task” command.

8. Perform Regular Maintenance

Defragment your hard drive if you’re using an HDD. This is not necessary for SSDs. Open your laptop (if you’re comfortable doing so) and carefully clean out dust from the components to prevent overheating.

9. Check for Overheating

Make sure there is enough airflow on your laptop and that it is not overheated. Use a cooling pad if required. Furthermore, dust accumulation can clog cooling systems and fans, therefore it’s critical to keep them clean.

10. Uninstall Bloatware

You can also try uninstalling software that came pre-installed with your laptop that you don’t use. This can help clear space in your hard disk and speed up your laptop.

11. Optimize Internet Performance

Resolve any network issues to ensure smooth online activities. Make sure your network drivers are current as well.

12. Advanced Options

As a last resort, you can reset your laptop to its factory settings or perform a clean installation of the OS to start fresh.

Is There a Software That Can Speed Up Your Laptop?

If all these tips don’t work, and you don’t see an improvement in the performance of your laptop, then you can use FastWindows. FastWindows is a windows utility tool that allows users to prioritize their apps and programs so that they can use your laptop resources for a smooth performance.

FastWindows

Boost productivity and system performance with FastWindows. Organize your apps and games and simplify your workflows with FastWindows’ automatic app prioritization

Conclusion

Even if a sluggish laptop might be quite annoying, its performance can be recovered with the correct procedures. By managing startup programs, running antivirus scans, upgrading hardware, cleaning up disk space, and updating software, you can address many common causes of sluggishness.

Maintaining ideal speed also requires frequent maintenance, regulating background operations, and minimizing visual impacts. If these solutions don’t fully resolve the issue, consider using FastWindows, a utility tool designed to prioritize apps and improve overall performance. By putting these tactics into practice, you may restore your laptop’s functionality and make it operate properly once more.

10+ Tips to Improve Your PCs Performance in Windows 11

window 11 fast

Our computers play an increasingly pivotal role in our daily lives. Whether we’re tackling work tasks, engaging in creative pursuits, or unwinding with our favorite games, the performance of our PCs can make or break the experience. Microsoft has ushered in a new age of computing with Windows 11, promising improved productivity, design, and seamless cross-device integration. 

However, if you want more juice out of Windows 11 fast then we can help you.  In this blog, we’ll delve into a comprehensive array of strategies designed to maximize the performance of your Windows 11 PC. 

Tips to Improving PC Performance in Windows 11

Improving PC performance in Windows 11 fast can be achieved through a combination of system settings adjustments, software management, and hardware optimization. Here are some tips to help enhance your PC’s performance: 

System Settings Adjustments

  1. Update Windows and Drivers

Ensure Windows 11 is up to date by checking for updates in the Settings app. Update your device drivers, especially graphics, audio, and network drivers, through Device Manager or the manufacturer’s website.

  1. Adjust Power Settings

For optimal performance, choose “High Performance” or “Balanced” for your power plan.  

  • Navigate to Power & Battery > Power mode under Settings > System. 
  1. Manage Startup Programs

Disable unnecessary startup programs to speed up boot time. 

  • Open Task Manager (Ctrl + Shift + Esc) > Startup tab and disable unwanted programs. 
  1. Optimize Visual Effects

Reduce visual effects for better performance. 

  • Go to Settings > System > About > Advanced system settings > Performance Settings and select “Adjust for best performance” or customize which effects to disable. 
  1. Disk Cleanup and Defragmentation

To get rid of system cache and temporary files, use Disk Cleanup. Here’s how to do it: 

  • Go to Settings > System > Storage > Cleanup recommendations. 
  • For HDDs, use the defragmentation tool (Defragment and Optimize Drives). 

Software Management

  1. Uninstall Unnecessary Software

Remove bloatware and unused programs to free up resources. 

Go to Settings > Apps > Apps & features and uninstall unwanted applications. 

  1. Use Lightweight Software 

Use software that is less resource-intensive for your everyday tasks. 

  1. Manage Background Processes 

Disable or limit background processes and apps. Here’s how: 

Go to Settings > Apps > Apps & features, select the app, and configure its background activity. 

Hardware Optimization

  1. Upgrade RAM 

Adding more RAM can significantly boost performance, especially for multitasking and memory-intensive applications. 

  1. Switch to an SSD 

An SSD may significantly speed up boot times and general system responsiveness if you’re still using an HDD.  

  1. Check for Overheating 

Make sure your computer is not overheated and has adequate ventilation because too much heat might stifle performance. Clean dust from vents and consider using a cooling pad for laptops. 

  1. Optimize Graphics Settings 

To strike a balance between performance and visual quality, adjust the in-game visuals. To adjust performance parameters, use your GPU’s control panel (NVIDIA Control Panel or AMD Radeon parameters). 

  1. Virtual Memory (Paging File) 

Adjust the size of the virtual memory (paging file) for better performance. 

Go to Settings > System > About > Advanced system settings > Performance Settings > Advanced tab > Virtual memory. 

  1. Disable Search Indexing 

If you rarely use Windows search, disabling indexing can improve performance. 

Open Services (type services.msc in the Run dialog), find “Windows Search,” and set it to “Manual” or “Disabled.” 

  1. Use Performance Monitoring Tools 

Use built-in tools like Task Manager or third-party tools to monitor and manage system resources effectively. 

  1. Keep Your System Secure 

Regularly scan for malware and viruses using Windows Defender or other reputable antivirus software, as infections can severely impact performance. 

However, if you don’t want the hassle of applying these tips, then you can use FastWindows to improve your PCs performance in Windows 11 fast. FastWindows is a top-tier windows utility app that users can use to prioritize their apps and programs and improve their computer’s performance.

FastWindows

Boost productivity and system performance with FastWindows. Organize your apps and games and simplify your workflows with FastWindows’ automatic app prioritization

Final Word 

Optimizing the performance of your Windows 11 PC is not merely about enhancing speed; it’s about cultivating a smoother, more efficient computing experience. By implementing the strategies outlined in this guide, from adjusting system settings to managing software and hardware, you can breathe new life into your device.  

Whether you’re aiming to boost productivity, enhance gaming experiences, or simply streamline everyday tasks, these tips offer a roadmap to success. On Windows 11, though, you may also utilize FastWindows to enhance PC performance. 

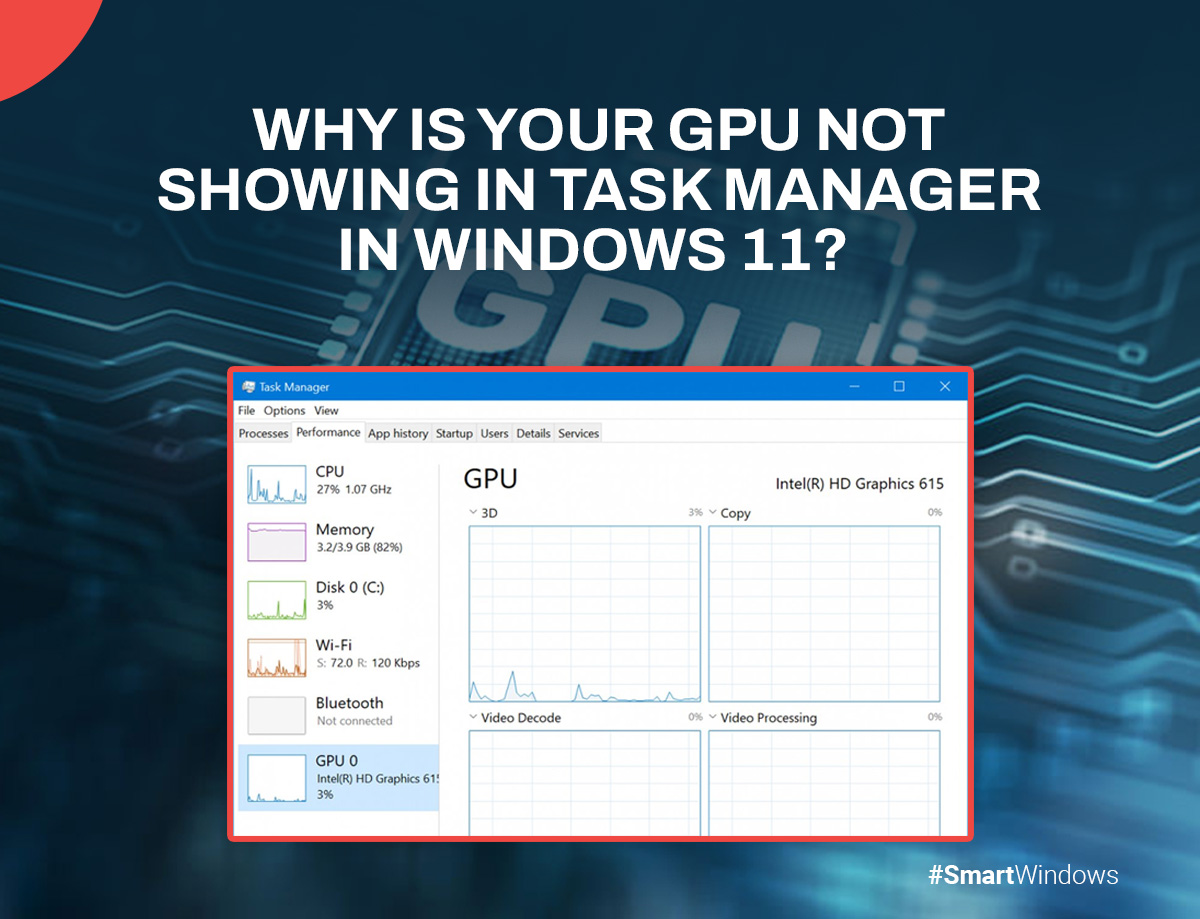
Why is Your GPU Not Showing in Task Manager in Windows 11?

gpu not showing up in task manager

If you have ever opened the Task Manager in Windows 11 and cannot seem to find your GPU, then, for once, you are not alone.

The details of your GPU are shown in the Task Manager. The Task Manager lets users monitor and manage their system resources, including their GPU. However, sometimes, for many reasons, you won’t be able to see your GPU listed there. In this article, we will help you fix this issue.

Why is my GPU not showing up in the task manager in Windows 11?

The Task Manager shows your GPU’s entire processing report. However, sometimes, your GPU won’t appear in the Task Manager. The following tips can help you fix this problem.

Update your graphic drivers.

Updating your GPU should be your first step towards fixing this problem. Updating the drivers can become critical, as corrupted drivers can cause your GPU to not appear in the Task Manager.

  • Open Settings and go to Update & Security; from there, navigate to Windows Update.
  • Look for a link named View Optional Updates.
  • You will see a list of updates. Install those you need.

However, you can use Driver Update Software, or if you have an AMD graphics card, you can use AMD Driver Autodetect to update your GPU. Moreover, you can use the NV Updater to update your GPU if you have an NVIDIA card.

Check the BIOS settings.

If your BIOS settings are misconfigured, your GPU won’t appear in the Task Manager. So, it is vital to configure your BIOS to the correct settings to ensure your GPU is visible.

Go to the BIOS settings during system startup and ensure that the integrated graphics or discrete GPU is enabled. However, if this setting is already enabled, reset the BIOS to its default values. A corrupted BIOS can cause your system to malfunction.

Repair all the corrupted system files.

Another reason you cannot see your GPU, is due to corrupted or missing files. You can fix this issue through a SFC scan.

  • Search for the Command Prompt by pressing the Windows key.
  • In the administrator mode, run the Command Prompt.
  • Type the command: sfc/scannow
  • Check whether the issue is resolved by restarting your device

Disable power-saving mode.

Power-Saving mode can be a great way to save battery, but it can limit your GPU’s performance. But you can turn it off to resolve this issue.

  • Open Settings by pressing Windows + I.
  • Navigate to System and Power & Battery.
  • Select Balanced or Best Performance from the drop-down menu.

Check for hardware issues.

Lastly, check whether your device’s hardware has any issues. Run the Hardware and Devices Troubleshooter to fix the issue. However, if that doesn’t fix the issue, visit your nearest service center.

How do I make my GPU show up in the Task Manager in Windows 11?

If you want your GPU to appear in the Task Manager, press CTRL + ALT + Delete and select Task Manager. Expand the Performance section and click on your GPU. Moreover, if your device has multiple GPUs, they will be labeled as GPU 1, GPU 2, etc.

SmartWindows

Restore Browser Tabs with SmartWindows. It maintains an active tab history and restores browser size as well as display position on one screen or many.

Conclusion

Your GPU is one of the most important parts of your device, and being unable to find it in the Task Manager can adversely impact it. You won’t be able to monitor how your GPU is performing and what apps are consuming the most GPU resources. However, you can implement the fixes described in this article and get the most out of your device.

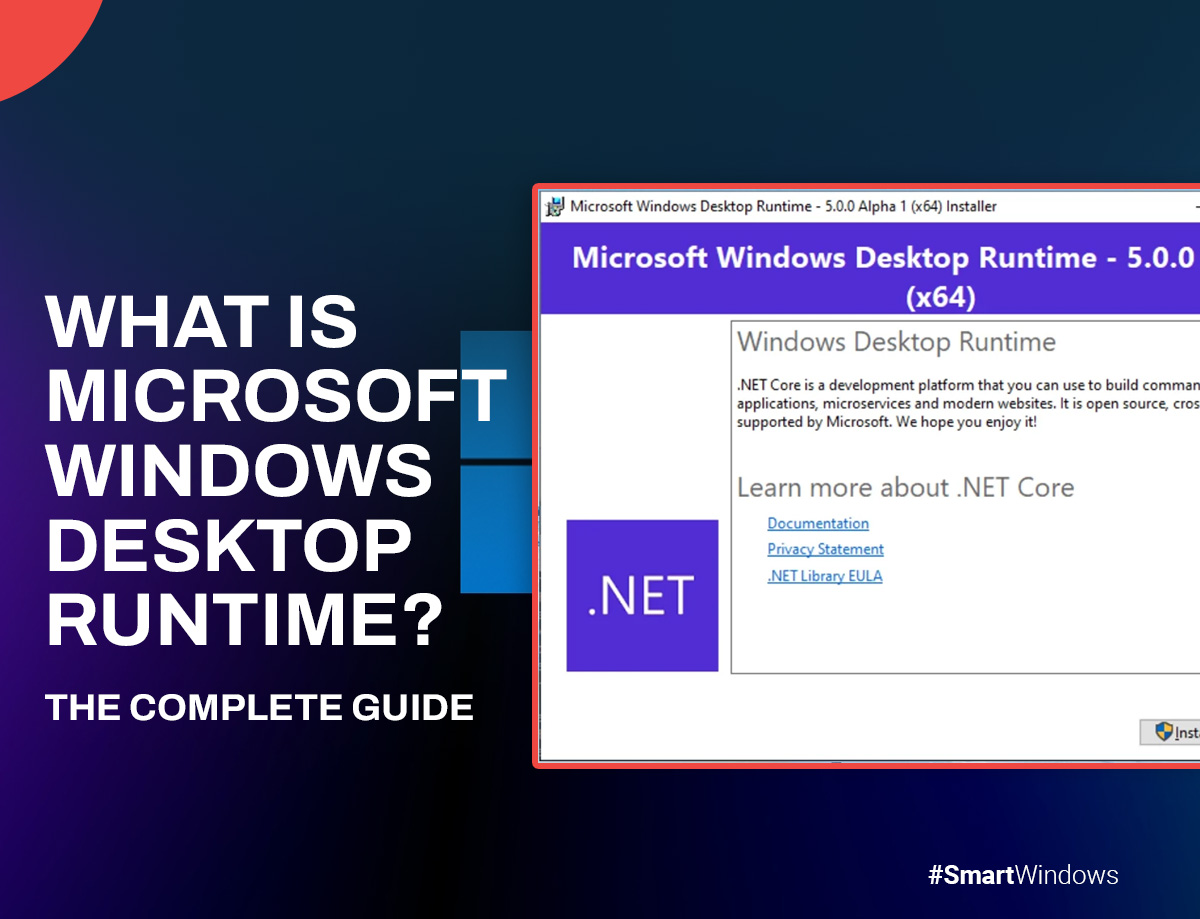
What is Microsoft Windows Desktop Runtime? The Complete Guide

Microsoft Windows Desktop Runtime

As a Windows user, you might have encountered a program called Microsoft Windows Desktop Runtime in the Programs and Features tab in your Control Panel. Most users don’t know what this program does and are confused about whether to keep it or remove it.

Realizing this, we have written a guide that explains what Microsoft Windows Desktop is and all the details you need to know about it.

What is the Microsoft Windows Desktop Runtime?

Have you heard of the Microsoft.NET Framework? It is a.NET library that contains shared codes for developers. These codes allow them to build functions without ever needing to write a code from scratch. Also, any program that is written in.NET needs to have.NET runtime installed.

Known as a redistributable package or end-user runtime in earlier versions, Microsoft Desktop Runtime is a feature that helps you run existing desktop applications built on the .NET framework. It lets a computer program interact with the computing resources it needs to work properly.

Also, whenever you start your application on your PC, runtime also works. Thus, when a program is running on your PC, it is the runtime for that program. The.NET core builds command-line applications, websites, and other services.

Which Microsoft Windows Desktop Runtime version should you download?

The most confusing aspect for users is figuring out which version of .NET they need. If you need an older version, you can get .NET 6.0. If you want the latest version, you can get .NET 8.0.

Moreover, .NET Desktop Runtime shouldn’t be confused with .NET Framework, which comes pre-installed with Windows. The runtime includes .NET runtime but doesn’t include ASP.NET Core Runtime installed separately.

How do I check which Microsoft Windows Desktop Runtime version is installed?

You can check the version of the Microsoft Windows Desktop Runtime running on your device in the following ways.

If you want to check the Desktop Runtime Version, open the command prompt and type the following command.

dotnet --list-runtimes

If you want to check both the SDK and the runtime versions, you can do so with the command dotnet--info. You can also get environmental-related information such as operating system version and runtime identifier.

How can you uninstall the Windows Desktop Runtime?

If you don’t see the point of installing Windows Desktop Runtime on your computer and want to uninstall it, you can do this via the Windows Control Panel.

  • Open the Control Panel from the start menu
  • Go to Programs and Features
  • Select the version you want to uninstall by right-clicking on the version and selecting “Uninstall”
  • Afterwards, reboot your PC, and the uninstallation process will be complete

SmartWindows

Restore Browser Tabs with SmartWindows. It maintains an active tab history and restores browser size as well as display position on one screen or many.

Conclusion

There you have it. This is how you can check the version of your Microsoft Desktop Runtime in three different ways. Microsoft Desktop Runtime is an important program, and should you wish to uninstall it, do it only if you know what you are doing. If you don’t know, then uninstalling it would cause some of your apps and programs to not function properly.

What Software You Can Use to Improve Your Computer’s Performance?

how to Improve Computer Performance

A slow and sluggish computer can impact productivity and user experience. Fortunately, there are various software tools available to optimize the performance of your windows computer. From cleaning up disk space to enhancing security measures, these tools can significantly improve your system’s speed and efficiency.  

In this blog post, we will delve into a selection of software applications meticulously designed to elevate your computing experience by ensuring swifter and more seamless performance.

What Software Can You Use to Improve the Performance of Your Windows Computer?

To improve the performance of your PC, you can consider using the following software: 

1. Disk Cleanup 

Disk Cleanup is a handy tool that comes with Windows, helping your free up space on your computer. It clears away unnecessary files like temporary files and system cache. Using Disk Cleanup regularly keeps your hard drive organized, making your computer respond faster. 

2. CCleaner 

CCleaner is a popular third-party utility that goes beyond the capabilities of Disk Cleanup. It not only cleans up temporary files but also scans and fixes registry issues. Additionally, CCleaner allows you to manage startup programs, giving you better control over your system’s boot time. 

3. Windows Defender 

Having a strong antivirus is essential for a safe and smooth-running computer. Windows Defender, the built-in antivirus from Microsoft, offers real-time protection against malware, viruses, and other online threats. Regularly updating it ensures your computer is protected from the newest cyber risks. 

4. Malwarebytes 

Alongside Windows Defender, think about adding Malwarebytes for an extra security boost. Malwarebytes is good at finding and removing malware, ransomware, and other tricky threats. Doing regular scans with Malwarebytes helps keep your system safe and avoids slowdowns caused by harmful software. 

5. MSI Afterburner 

For users interested in optimizing their graphics card performance, MSI Afterburner is a powerful tool. It allows you to overclock your GPU, adjust fan speeds, and monitor temperature levels. Properly configuring MSI Afterburner can lead to improved graphics performance in resource-intensive applications and games. 

6. Disk Defragmentation 

Over time, files on your hard drive may become fragmented, leading to slower read and write speeds. The built-in Windows Disk Defragmenter tool can help rearrange file fragments, resulting in faster access times and improved overall system performance. 

7. Virtual Memory Management 

Virtual memory, also called the page file, is super important for how your computer works. Setting up virtual memory based on what your computer needs can stop problems when there’s not enough memory, keeping your system running smoothly. 

8. Operating System Updates 

Keeping Windows up to date is important for ensuring it works best. Updates usually have things like security fixes, bug repairs, and ways to make your computer run smoother. Making sure your system is always updated helps it stay stable and secure. 

How Can FastWindows Help You in Improving Your Computer’s Performance? 

FastWindows is a Windows utility app that improves a PC’s performance by allowing users to automatically or manually assign priority access to Windows resources to specific apps and programs. 

FastWindows is a quick and hassle-free way to improve a PC’s performance. Users only have to install FastWindows on their PCs, and the app will automatically start to assign priorities to  

 Here’s how you can use FastWindows: 

  1. Install FastWindows on your Computer 
  1. In the bottom right icon tray, find the FastWindows icon and click on it to launch it 
  1. Once launched, you will see a panel where all of your open apps will be listed 
  1. You can either manually assign priorities to the apps you use the most or allow FastWindows to assign priorities 
  1. You can assign priority starting from the low to the highest 

FastWindows

Boost productivity and system performance with FastWindows. Organize your apps and games and simplify your workflows with FastWindows’ automatic app prioritization

Conclusion

Optimizing the performance of your windows computer involves a combination of built-in utilities and third-party software applications. By incorporating tools like Disk Cleanup, CCleaner, Windows Defender, Malwarebytes, and MSI Afterburner, and managing disk defragmentation and virtual memory effectively, you can achieve a faster and more responsive system. Additionally, staying proactive with operating system updates ensures that your computer is equipped with the latest enhancements and security patches. Taking these steps will not only boost your system’s performance but also contribute to a more enjoyable and efficient computing experience. 

And, if you don’t want the hassle of cleanup disks and updating your OS, you can use FastWindows to considerably improve your PC’s performance.

Why does your PC boot into BIOS instead of Windows

how to boot into bios

It can be quite frustrating when you boot your PC only for it to boot to the BIOS and not to Windows. Windows users have complained about this issue. So, what should one do if their computer keeps booting to the BIOS in Windows?

It can happen due to numerous reasons, such as having the boot key pressed, running an outdated BIOS, a misconfigured boot sequence, or a CMOS battery issue.

Regardless of the reason, it can be a frustrating experience. But we have your back! We have compiled a guide that can help you overcome this issue.

Why does your PC boot into BIOS instead of Windows?

If your PC boots every time to the BIOS instead of Windows, then it means that there is an issue with hardware connectivity or your CMOS battery needs to be replaced, among other issues.

But you can try out some of the following fixes to resolve this issue.

Disconnect all the peripherals 

If you have removed or added hardware to your PC, or if they are not connected properly, then this can cause your PC to boot to the BIOS.

You can fix this issue by disconnecting all the peripherals, for example, the keyboard, hard drive, and mouse. After that, try rebooting the PC and checking whether or not the issue persists.

Moreover, you have to discharge the static electricity by pressing the power button down for 30 seconds. Afterward, reboot the device and check if the issue is fixed or not.

Do a quick restart from the BIOS.

Another simple fix you can implement is to do a quick restart from the BIOS, which may bypass this issue. So, start by saving the changes and exiting the BIOS. After that your device will restart and will boot into Windows.

However, this won’t resolve the issue permanently. You have to restart Windows every time through the BIOS, which can be annoying at times.

Check whether your boot key isn’t pressed down

Users have to press a specific key during booting to enter the BIOS. Different manufacturers allocate different keys on the keyboard to access the BIOS. There is a high possibility that this key might be stuck and be constantly pressed down, signaling the PC to boot into the BIOS.

To fix this, ensure that your BIOS key isn’t pressed all the time. If a lot of dust is accumulated under or around the boot key, clean it so that it doesn’t keep your boot pressed down.

Check your boot sequence.

When your device searches for bootable data in a specific order, this order is called a boot sequence. So, it’s an ideal thing to keep the drive containing your OS on top of the sequence, especially if you have multiple storage devices connected.

By keeping this device on top, your device will find the bootable data and boot your operating system quickly.

Run Windows repair

When a computer automatically boots into the BIOS, you need to create a bootable USB or CD/DVD to run Windows Repair. After creating a bootable device, simply boot the PC from this device.

Afterward, enter WinRE and then click on Troubleshoot. From there, navigate to Advanced Options and find and click on Start Repair. Next, just follow the instructions on the screen to complete the repair.

Disable Fast Startup

The Fast Startup feature in Windows is built into the OS that hibernates the system and makes the booting processing faster. Although it is a quick fix that allows users to get back to work quickly, it can cause some annoying issues. But you can disable it through the BIOS. Go to your system manufacturer’s website and read the instructions on turning off Fast Startup from the BIOS.

Update your BIOS.

One of the most neglected causes that doesn’t allow you to boot directly into Windows is an outdated BIOS. Updating your BIOS, however, can fix the problem in discussion. You can do so easily by copying the BIOS file onto a USB and updating the BIOS on it.

Replace or reinsert your CMOS battery.

A CMOS battery powers the firmware of the BIOS on a system. One of the reasons why you aren’t able to boot directly into the window is that your CMOS battery isn’t inserted properly or has been damaged.

Often, just reinserting the battery can fix the issue; however, this can change a few settings on your system. In case your battery is dead, you have to replace it altogether.

SmartWindows

Restore Browser Tabs with SmartWindows. It maintains an active tab history and restores browser size as well as display position on one screen or many.

PC still booting into the BIOS?

Although fixing booting issues can be done through quick and simple fixes, more often than not, this issue can arise from some very serious problems. If you don’t have experience updating the BIOS or replacing a CMOS battery, we recommend that you don’t try to implement these fixes and take your PC to a service center.

How to Resolve Screenshots Not Saving in Windows 11?

Does your work require you to take a lot of screenshots? If yes, then you might have faced the issue of your screenshots not saving at your desired location. This can happen due to a few reasons, most commonly a change of destination folder.

But sometimes, it can be a bit more serious than that, and you might have to dig into the Windows registry settings to set it right.

In this blog post, we will look into the reasons why your screenshots are not saving into the default Pictures folder and how you can fix that issue with a few simple fixes.

Why are my screenshots not saving in Windows 11?

A simple reason why your screenshots are not being saved in the Pictures folder is that your default folder has been changed. You can check where your screenshots are saved by right-clicking on the image and clicking on the Properties option.

But if your images are still not saving in your desired folder, then it might be that your registry files are corrupted. But if you go about fixing it without knowing what you are doing, then you can do more harm than good and might disturb other registry settings.

How can I save my screenshots in Windows 11?

If your registry files are corrupted, which is causing your screenshots to not save in your desired folder, then you can implement the following fix to resolve the issue:

  • Press Win+R to open the Run dialogue box.
  • In the dialog box, type regedit
  • Navigate to Explorer in HKCU.
  • Right-click on it and create a new DWORD (32-bit) value.
  • Rename it ScreenshotIndex.
  • Select the decimal option by double-clicking on it.
  • Enter the data value of 695.
  • Save these settings by clicking OK.
  • Navigate to the User Shell folders.
  • After that, click on the following {B7BEDE81-DF94-4682-A7D8-57A52620B86F}
  • Enter the following user profile: %USERPROFILE%\Pictures\ Screenshots
  • Save the it and reboot your PC

Here’s a bit more detail on these steps:

Before changing your registry settings, make sure to create a system restore point. Subsequently,  press the Windows + R keys to open the Run dialog box. Type regedit in the dialog box to open the Registry Editor.

Afterward, navigate to the following location:

HKEY_CURRENT_USER\Software\Microsoft\Windows\CurrentVersion\Explorer

Once you navigate to the aforementioned location, look for ScreenshotIndex. You will not find this DWORD in your registry editor. This is the reason why your screenshots aren’t being saved in the default folder. You have to create this word yourself.

Start by right-clicking on the right window pane and create a new DWORD value. Double-click on the word to modify its decimal value to 695.

The next step is to point out this word in the correct user profile settings. You can do this through the User Shell Folders entry inside the Registry Editor. Start by navigating to the following location:

HKEY_CURRENT_USER\Software\Microsoft\Windows\CurrentVersion\Explorer\User Shell Folders

In the right pane, click on the following entry:

 {B7BEDE81-DF94-4682-A7D8-57A52620B86F}

Make sure that the entry points to the following value data:

%USERPROFILE%\Pictures\Screenshots

After setting the value data, close the Registry Editor and reboot your PC. Now, try to take screenshots. You’ll see that your screenshots are saved in your desired folder.

How can you change where your screenshots are saved in Windows 11?

If you don’t want to use the default screenshot folder and want to change it, you can do it through the Registry Editor. After changing the default location through the Registry Editor, your computer will automatically start saving your screenshots to your new provided location.

SmartWindows

Restore Browser Tabs with SmartWindows. It maintains an active tab history and restores browser size as well as display position on one screen or many.

Conclusion

There you have it. With the steps mentioned in this guide, you can successfully resolve your screenshot-saving issues by just tweaking a few Registry Editor settings. But, before you change any settings in the Registry Editor, ensure that you first create a restore point. Because if the registry settings are wrongly changed, you can face serious issues with your PC.

That’s why you can save and restore your app positioning, display settings, and Registry Editor settings with SmartWindows. Smart Windows is a top-notch Windows utility tool that lets you become highly productive by allowing you to create multiple profiles for your Windows for multiple users and various tasks.

How Many Times Can You Use A Windows 10 Key?

If we were to ask you what operating system you have on your PC, chances are you would say Windows. Windows 10, without a doubt,  is among the most popular operating systems in the world. However, one question that comes up regularly is how to use the product key and how many times you can use it.

The number of times you can use a product key depends on the license you have purchased. In this article, we’ll explain how you can use the product key and how you can use it multiple times.

How many times can you use a Windows 10 product key?

After purchasing Windows 10, you’ll be given a product key that is used to activate Windows. This key can be used multiple times to activate the operating system; however, the exact number of times you can use it depends upon the license you have purchased.

Let’s look in detail at what licenses you can purchase.

What licenses do you need to activate Windows 10?

The two licenses that you need to activate Windows 10 are the OEM license and the retail license.

OEM License

An OEM license is typically associated with specific hardware, such as laptops and desktops, and therefore cannot be transferred to another device. So, you can only use that product key for that specific device with a pre-installed OEM license.

Retail License

Retail licenses are not tied to any specific hardware. Retail licenses can be used for multiple devices. So, you can use the product key on up to 10 devices if you buy Windows 10 with a retail license.

Can you use the same Windows product key twice?

As we discussed earlier, reusing a Windows 10 product key entirely depends on the license. If your Windows 10 has an OEM license, then you can only use the product key once. However, if you have a retail license, you can use it up to 10 times.

Can you upgrade your Windows 10 license?

You can upgrade your Windows 10 license. If you have an OEM license, then you can buy a retail license from Microsoft or a third-party vendor. This will allow you to use your product key multiple times.

SmartWindows

Restore Browser Tabs with SmartWindows. It maintains an active tab history and restores browser size as well as display position on one screen or many.

Conclusion

You can reuse a Windows 10 product key multiple times with a Retail license. However, if you have an OEM license, you cannot use it more than once and also cannot transfer it to another device.

Therefore, if you want to reuse your product key for multiple devices, you need to get the right Windows license.

FAQs

Can you reactivate Windows 10 with the same key?

Yes. if you have uninstalled and reinstalled it on the same computer, you can reactivate Windows 10 with the same key. The key will be automatically reactivated.

However, if you have an OEM license and use the key on another computer, Microsoft will detect this and block the key from being used again.

What happens if you don’t activate Windows 10?

You can use Windows 10 without ever activating it, however, you won’t be able to use certain features, such as multiple desktops, Task View, or the Windows Store.

Moreover, you won’t be able to personalize your lock screen or change the themes, and your notifications will also be disabled.