How to Change Windows 11 Default Browser – Useful Guide

Microsoft’s most current Windows 11 is different from past versions thanks to a number of brand-new features and an improved user experience. The default browser in Windows 11 is one of the significant changes.

Users can still alter their browsing experience despite this change by setting their favorite browser as the default one. This enables people to easily use the functions and features of their selected browser while browsing the internet without any issues. This article will walk you through the quick process to answer your question about how to change the default browser in Windows 11.

  1. Download and Install Your Preferred Browser 

To change the default browser in Windows 11, the first step is downloading and installing the preferred browser. You can download the browser from the browser’s official website or from Microsoft Store if it is available there.

  1. Launch the Settings App

Launching the Settings app is the next action. You can achieve this by selecting the Start menu, followed by the gear symbol. Or, you can launch the Settings app by pressing the Windows key + I.

  1. Navigate to the Apps Section

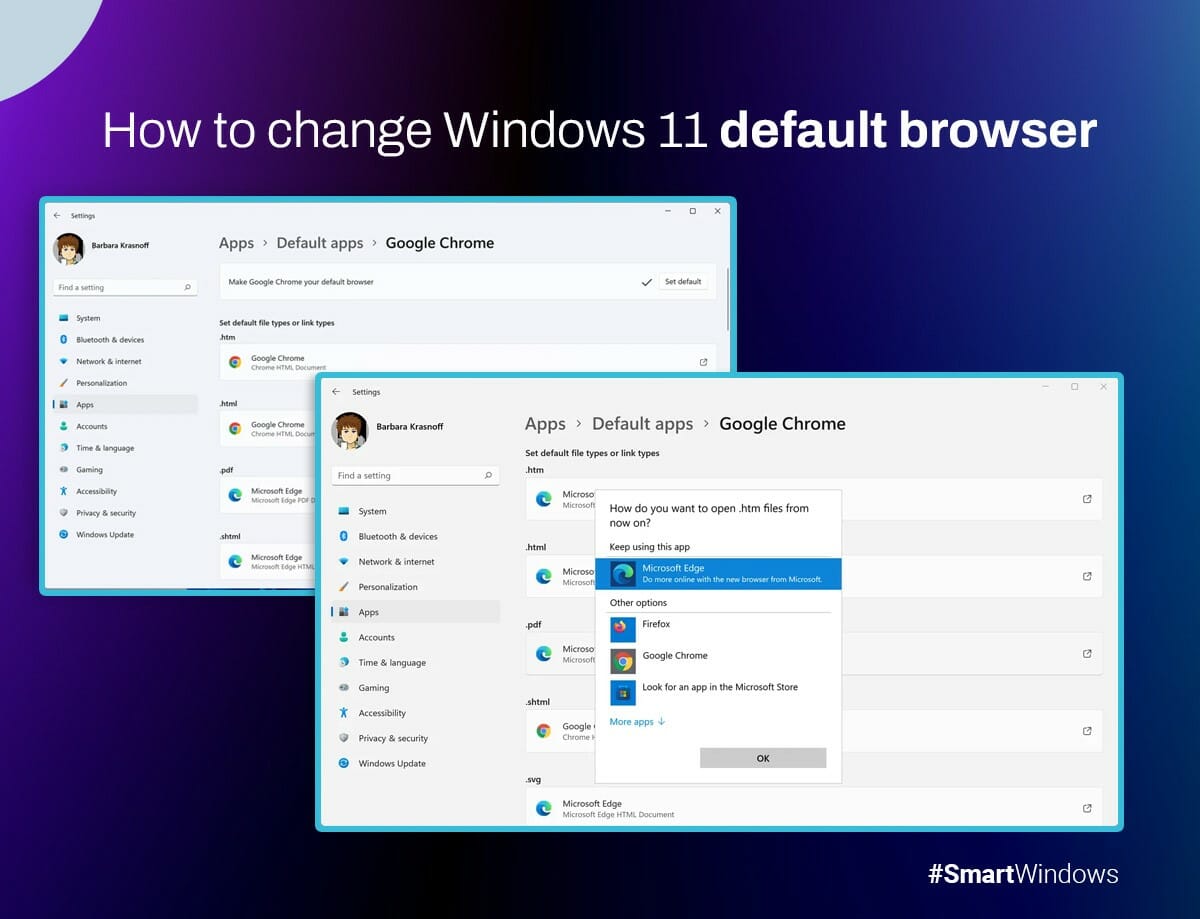
In the window settings, click on the “Apps” section. Here, you can manage all the applications installed on your system.

  1. Select the Default Apps

Next, select “Default apps” from the menu to bring up a list of default applications set on your system.

  1. Choose the Preferred Browser to Set as Default

Under “Web browser,” you will see the current default browser (most likely Microsoft Edge). Click on it and select the preferred browser set as your default browser.

  1. Test the Default Browser

Open a link or a web page to test if the default browser has been changed. The link or web page should open in the browser you set as the default.

Troubleshooting Methods

Changing the default browser in Windows 11 is a straightforward process, but if you still run into some trouble, don’t worry! To repair it, you can still attempt a few troubleshooting methods.

  • Check if the browser that needs to be set as the default is already installed on your computer before making the change. The browser can be downloaded and installed from its official website or, if available, the Microsoft Store.
  • You can try restarting your system and changing the default browser again. Sometimes, restarting your system can fix issues related to default applications.
  • The antivirus software running on the computer can also cause a problem in changing the default browser. Some antivirus software can block the default application settings from being changed. In this case, you can disable your antivirus software temporarily and then change the default browser again. If disabling the antivirus software resolves the issue, you can contact the software vendor for further assistance in resolving the conflict between the antivirus software and Windows 11.
  • You can reset the default program settings in Windows 11 if the preceding methods didn’t eliminate your problem. Launch the Settings app, then complete this in the “Apps” area. Afterward, choose “Default apps” from the left-hand menu and then click “Reset” next to “Reset to the Microsoft recommended defaults.” After doing this, the default program settings will all be restored to their suggested defaults You may then try setting the default browser again.

Conclusion

You might wonder “Why Microsoft Edge is the default browser in Windows 11.” It’s because Edge has been optimized for Windows 11 and offers various new features, including vertical tabs, web capture, and new themes. Nevertheless, don’t worry if you prefer a different browser to Microsoft Edge. Following the steps outlined above, you can easily change the default browser in Windows 11. Simple measures can be taken to complete the procedure because it is uncomplicated.

If you want to experience productivity boost, you can try SmartWindows. With its advanced capabilities, SmartWindows allows for efficient organization of desktop displays, restoring preset display arrangements, and supporting multiple browsers and Microsoft Office files. By using SmartWindows, users can effectively restore browsers and perform tasks to boost productivity. This ultimately results in a more productive and efficient computing experience.

SmartWindows

Restore Browser Tabs with SmartWindows. It maintains an active tab history and restores browser size as well as display position on one screen or many.

FAQs

How to set default browser Internet Explorer 11 in Windows 11?

  • Go to “Default apps settings” from the Start menu search.
  • Scroll down to “Web browser.”
  • Click on the current default browser.
  • Select “Internet Explorer” from the list.
  • Close the settings window.

Does Windows 11 allow Chrome as default browser?

Yes. You can set Google Chrome as your default browser in Windows 11. When you install Chrome, it’ll ask you if you want to make it your default browser. If you missed that, you can still set it as your default browser by going to the “Default apps settings” and choosing Chrome. 

How do I find my default browser?

  • Click on the Start menu.
  • Type “default apps” in the search bar and click on “Default apps settings” from the search results.
  • Scroll down to the “Web browser” section. The name of your default browser will be displayed there.

Or you can try opening a web link or clicking on an HTML file. Your default browser should automatically open to handle the task.
Can Windows 11 Support 3 Monitors? Explained

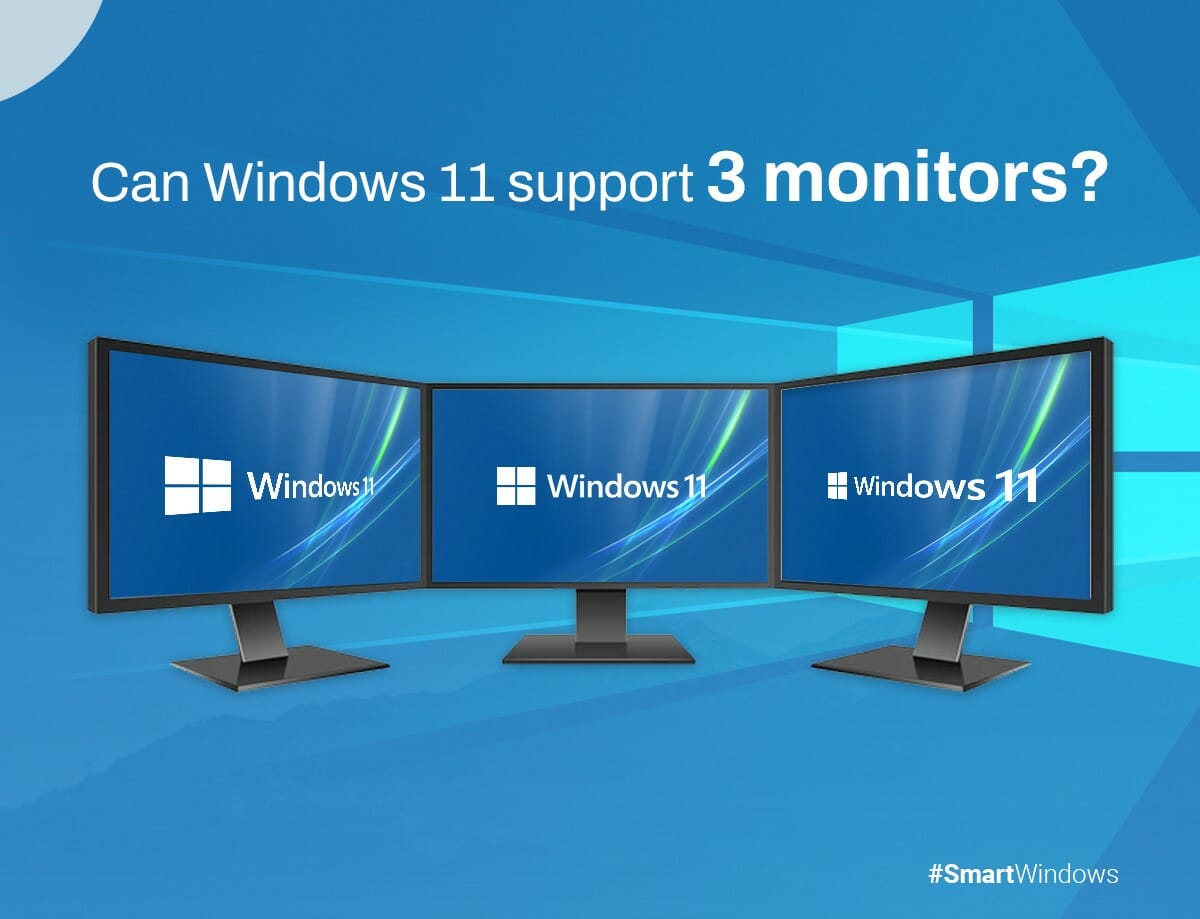
Can Windows 11 Support 3 Monitors?

Windows 11 is the newest version of Microsoft’s operating system, bringing a revamped and contemporary appearance to the Windows interface. Although Windows 10 was famous for accommodating several monitors, users are eager to know whether Windows 11 can handle 3 or more monitors. This article will explore the prerequisites for running three monitors on Windows 11 and how many monitors can windows 11 support. as well as the various methods for connecting and setting them up.

Requirements for Running 3 Monitors on Windows 11?

Graphics Card and Driver Requirements

To run 3 monitors on Windows 11, your computer must have a graphics card that supports three or more displays. The most recent driver must also be installed for the graphics card to function correctly with the operating system. The manufacturer’s website or Device Manager on your computer allows you to view the specifications for your graphics card.

Display Output Requirements

Apart from the graphics card, your computer must have the necessary display output ports to connect three monitors. HDMI, DisplayPort, and VGA are the most common display output ports. If your computer lacks the required ports, you can use display adapters to connect them.

How to Connect 3 Monitors to Windows 11

Connect 3 different monitors to your computer using a combination of display output ports and adapters. They can have different input types like HDMI, DisplayPort, or VGA. You can connect a 3rd monitor to the first two using a VGA to HDMI adapter, with the other two connected by DisplayPort and HDMI.

If your computer lacks the required display output ports, you can connect the monitors using display adapters. To connect three monitors to your computer, you have the option to use various types of adapters such as USB to HDMI, DisplayPort to HDMI, and VGA to HDMI.

Configuring Multiple Monitors on Windows 11

Display Settings

Once you have connected the monitors to your computer, you can configure them through the Windows 11 monitor settings. Right-click on the desktop and then choose “Display Settings.” Here, you can choose each monitor’s orientation, resolution, and scale.

Taskbar and Start Menu

You can also configure the Taskbar and Start menu to work across all 3 monitors. Right-click on the Taskbar. Then choose “Taskbar settings.” Select “Show taskbar on all displays” under  the “Multiple displays.” You can also configure the Start menu to open on the display of your choice.

Multi-tasking with Three Monitors

You can multitask more efficiently with 3 monitors by having different applications and windows open on different screens.

Common Multi Monitors Issues and Troubleshooting

Running 3 monitors on Windows 11 is simple. Still, you may encounter some Windows 11 multiple monitors issues that require troubleshooting. Let’s have a look at them: 

  • Windows 11 extend display not working: Update your graphics card driver to the latest version. This can resolve compatibility issues and enable extended display functionality.
  • Windows 11 not detecting second monitor: Verify that the second monitor is properly connected to your computer and powered on. Check the cables and connections to ensure they are secure.
  • Windows 11 dual monitor resolution problem: Ensure that both monitors are set to their native or recommended resolution. Right-click on the desktop, select “Display settings,” and adjust the resolution for each monitor individually.
  • Second monitor resolution too low: Update your graphics card driver to the latest version. Download the appropriate driver for your graphics card model. Installing the latest driver can help resolve resolution issues.
  • Performance issues: Running three monitors can tax your computer’s performance, especially if you are running resource-intensive applications. You can improve performance by closing unnecessary applications, updating drivers, or upgrading your hardware.

Conclusion

Windows 11 supports three monitors or more, provided your computer meets the necessary requirements. By ensuring that you have the right graphics card, display output ports, and adapters, you can connect and configure three Windows 11 to improve your productivity and multitasking abilities; we hope this article helps solve your question of How do I setup 3 monitors on Windows 11.

If you are still facing any issues, then you can try SmartWindows. SmartWindows is the program for you if you want to increase both your personal and workplace efficiency. Thanks to this useful tool, it’s much simpler than ever to handle many apps and tasks at once, enabling you to connect up to six screens to your computer. SmartWindows makes it simple to keep everything organized and in one location, so you can stop flitting between screens and windows. Try it out and observe the impact it can have!

SmartWindows

Restore Browser Tabs with SmartWindows. It maintains an active tab history and restores browser size as well as display position on one screen or many.

FAQs

Can I run three monitors on Windows 11 without a graphics card?

No, you must have a graphics card that supports three or more displays to run three monitors on Windows 11.

How many monitors can I run?

Well, it depends on your graphics card and the number of available display output ports.

Can I use different monitor brands and sizes for my three-monitor setup?

Yes, you can use different monitor brands and sizes for your three-monitor setup, but you may encounter issues with resolution and scaling.

Does having multiple monitors affect PC performance?

Yes, running 3 monitors on Windows 11 can be resource-intensive, especially if you are running resource-intensive applications. You can improve performance by closing unnecessary applications, updating your drivers, or upgrading your hardware.

How to Use Windows 11 Multiple Desktops – Useful Guide

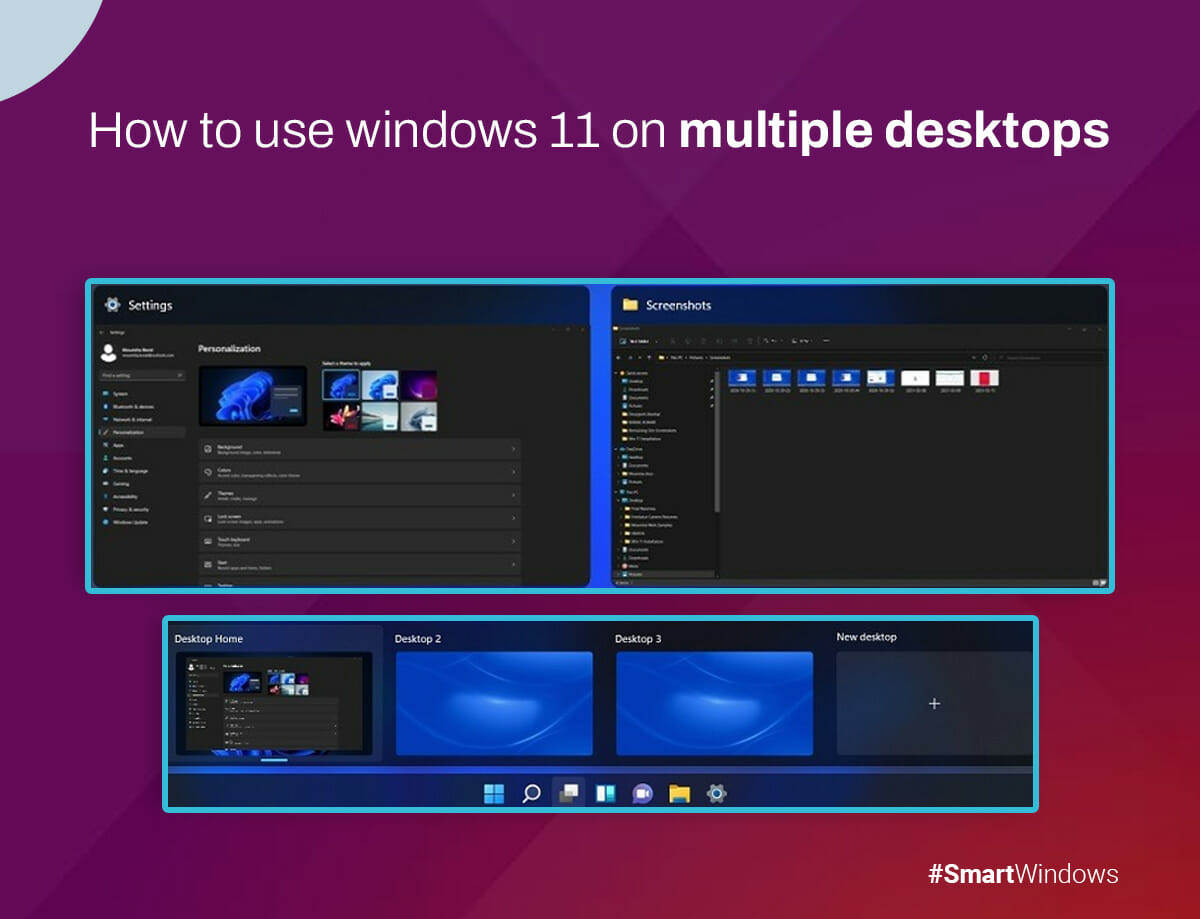
You know how chaotic your desktop can become if you work on a single monitor and juggle multiple projects. Fortunately, Windows 11 has a feature that can help – virtual desktops. Creating multiple desktops allows you to organize your work and avoid visual clutter.

Using Windows 11 virtual desktops is easy. Simply access the Task View pane and create the number of needed desktops. You can move applications to different desktops and switch between desktops in Windows 11. Keeping your workspaces separate lets you focus on each project and be more productive.

Need help with virtual desktops in Windows 11? We’ve got you covered. This article will show you how to use Windows 11 multiple desktops. So, let’s get started!

How to Add a New Desktop in Windows 11?

Virtual desktops are a great way to separate your work and personal life or organize your workspaces by project or task. Here’s how you can add a new desktop in Windows 11:

  • Open “Task View.
  • Click on the Task View.
  •  Right-click the taskbar if you can’t find the button, and select “Taskbar settings.”
  • Switch from “Task View” to “On.”
  • Click the “New Desktop” button in the Task View pane. This will create a new virtual desktop that you can switch to whenever necessary.

To create a new desktop even faster, use the keyboard shortcut Windows Key + Ctrl + D. In a swift moment, a new desktop materializes, bypassing the need to access the Task View pane.

How Can You Switch Between Different Desktops in Windows 11?

Having several desktops set up makes switching between virtual desktops a breeze. You may view thumbnail previews of your active desktops by selecting the Task View button on your taskbar. To switch between desktops in Windows 11, follow these steps:

  • Click on its preview.
  • To access the left and right desktops, enter Windows Key + Ctrl + Left Arrow and Key + Ctrl + Right Arrow.

Windows 11 multiple desktop shortcuts can speed up switching between virtual desktops and save time.

How to Rename Your Desktops in Windows 11?

Undoubtedly, a crowded desktop can be stressful, especially when you have work to complete. Windows 11 offers convenient features to enhance organization and productivity. One such tip is to rename your desktops for a clear and efficient workspace. To do this:

  • Enter the Task View pane.
  • Right-click the desktop and choose “Rename.”

You can give your desktop a new name that accurately describes its contents, making it simple to quickly determine which desktop has what you need without opening each one individually.

How to Customize Desktop Backgrounds in Windows 11?

The ability to customize your desktop backgrounds is another fantastic feature of Windows 11. This can help visually distinguish your workspaces, which can help maintain focus on the task at hand. To modify your desktop wallpaper:

  • Right-click and choose “Select a background.”
  • Pick an image from your existing collection or browse the alternate choices available.

How Can You Move Windows Between the Desktops in Windows 11?

Moving windows between desktops is also a breeze in Windows 11. Effortlessly navigate to the desired application by accessing the Task View pane, where a simple hover over the corresponding desktop allows you to select and relocate it seamlessly.

  • Click and glide the application to the preferred location.
  • Choose “Move to” and meticulously designate the desired desktop for a seamless transition.

That’s it! Keeping your applications organized and moving them around depending on the task you are working on is quite simple in Windows 11.

How to Move APPs Between Desktops?

Windows 11 allows you to have multiple desktops, and when you open an app, it appears only on your active desktop. This feature makes creating a desktop with specific apps convenient by opening a new desktop, switching to it, and launching the desired apps there. If you relocate an app to a different desktop, you can easily move it using Task View. Let’s see how:

  • Click on the Task View on the taskbar. This will open the Task View pane, which displays thumbnails of your desktops.
  • Locate the app you want to move and click and drag it.
  • While dragging the app, move your cursor to the desktop thumbnail where you want to place the app.
  • Drop the app on the desktop thumbnail. The app will then switch to the new desktop.

How Can You Close Desktops in Windows 11?

Finally, when you’re finished with a virtual desktop, you can quickly close it out in Windows 11.

  • Hover over the desktop until an X symbol emerges in the corner.
  • Click it to close the desktop.

Or, you can open Task View with Windows Key + Tab, choose the virtual desktop you want to close, and press the Delete key.

Conclusion

Windows 11 has excellent tools that will keep your workspace effective and organized. You can easily maintain focus and productivity while using your computer by renaming desktops, changing backgrounds, moving windows, and compact desktops. This article helped you learn how to use Windows 11 on multiple desktops. 

If you still have problems, you can tend to SmartWindows. It can help you increase your productivity and efficiency on Windows 10 and 11 with its helpful features like desktop arrangement, multiple monitor setup, multi-browser setup, etc. This software lets you do your work and play games on different desktops with its Windows 11 multiple desktop shortcuts.

SmartWindows

Restore Browser Tabs with SmartWindows. It maintains an active tab history and restores browser size as well as display position on one screen or many.

FAQs:

Why do I have two desktops on my Windows 11?

If you see two desktops on your Windows 11, you have multiple virtual desktops enabled. Virtual desktops make multitasking easier. You can open multiple desktops simultaneously, each with its windows and programs. This way, you can organize different tasks or projects and switch between them effortlessly.

What is the shortcut key for switch desktops in Windows 11?

In Windows 11, you can quickly switch between desktops using the shortcut key “Windows key + Ctrl + Left/Right arrow.”

Or

  • Click the Task View.
  • Select the desired desktop from the thumbnails shown in the Task View pane.
  • This lets you switch to the chosen desktop and access its windows and programs.

How do I get rid of multiple desktops in Windows 11?

  • Click the Task View button on your taskbar.
  • Hover over the desktop you wish to close.
  • Look for the desktop thumbnail displaying an “X” in the top right corner and click it to close.

Why Does Windows 11 Keep Freezing? Explained

Are you frustrated with your Windows 11 freezing up on you? Well, you’re not alone! This has been frustrating for many since the new operating system’s release. But why does Windows 11 freeze? In this article, we’ll answer your question, “Why does Windows 11 freeze sometimes?” and discuss solutions to help you resolve the issue. So, if you’re tired of dealing with frozen screens, let’s start to find out how to fix Windows 11 freezing.

Possible Reasons for Windows 11 Freezing

Nothing can beat the frustration when Windows 11 freezes and crashes randomly. Well, it can happen due to the following reasons:

Hardware Issues

Outdated or malfunctioning drivers, insufficient RAM or hard disk space, and faulty hardware components can cause Windows 11 to freeze. Outdated or malfunctioning drivers can cause conflicts and issues that lead to system instability. Sometimes, Windows 11 freezes due to faulty hardware components, leading to problems such as a failing hard drive or power supply.

Software Conflicts

Incompatible software or conflicting drivers can also be why Windows 11 freezes randomly for a few seconds or a long time. This can be a case for a recently installed program or an updated existing one. Sometimes, two programs or drivers may be incompatible, causing system instability.

Malware or Virus Infections

Malware or virus infections are another reason that can cause Windows 11 to freeze. This can be especially true if the malware has infected critical system files. Malware can also use system resources. Due to this, your computer slows down or freezes.

Overheating

Overheating is also another issue that lets Windows 11 freeze. This can happen due to dust buildup in the cooling system, a malfunctioning fan, or insufficient cooling. Overheating can cause damage to hardware components, leading to system instability.

Power Issues

Power issues such as power surges or a failing power supply can be a reason for Windows 11 freezing randomly. Power surges can cause damage to hardware components, leading to system instability. A failing power supply can also cause voltage fluctuations and instability.

Faulty Windows Updates

Windows updates can sometimes cause system stability issues and lead to Windows 11 freezing. The reason can be bugs or incompatibility issues with hardware or software. In some cases, a corrupted Windows update can cause system instability.

Corrupt System Files

If system files are corrupt, this can cause Windows 11 to freeze or crash. This can occur due to a virus infection, hardware issues, or other system errors. Corrupted system files can cause issues with system stability, leading to freezes or crashes.

Graphics Issues

If you’re using a PC with limited graphic processing capabilities, your screen resolution may need to be lowered for your computer’s graphics adapter. This can cause freezing issues on Windows 11.

GPU Driver Incompatibility

Upgrading to Microsoft’s latest desktop platform may result in your graphics card having an incompatible Windows 11 driver.

Limited RAM

Insufficient system memory can also be a factor behind random Windows 11 freezing, especially on PCs with only 4 GB of RAM.

System File Corruption

If you want to fix the issue when your files are corrupted, running a system scan can be helpful. However, if the issue doesn’t resolve, reset Windows 11 to repair the system files.

Here are some other scenarios when Windows 11 freezes and crashes randomly:

Windows 11 Freezing When Idle

If your computer files are damaged, your Windows 11 system might freeze when idle. Running system scans can help identify and fix the issue.

Windows 11 Freezing After Update

Sometimes, a new Windows 11 update can cause your system to freeze. If this happens, uninstall the latest update to resolve the issue.

Windows 11 Freezing on Login Screen

Update your GPU driver to resolve immediate Windows 11 freezing on startup effectively.

Windows 11 Freezing While Gaming

Reducing your monitor’s resolution can prevent interruptions during gaming and ensure a smoother gameplay experience.

Windows 11 Freezing on Shutdown

RAM issues can cause your Window to freeze. In addition to fixing any RAM problems, optimizing and cleaning it may also help resolve the issue.

How to Fix Windows 11 Freezing

Let’s see how to unfreeze Windows 11:

Run Malware Scans

If you’re experiencing random freezing on your Windows 11 PC, it could be due to malware infecting your system. Malware can consume a lot of your system resources, leading to drops in performance and even causing your computer to freeze. Run a malware scan to remove malware as the cause of your problem. Here’s how to do it:

  • Right-click on the Start menu.
  • Select Settings.
  • Go to Privacy & Security, and click on Windows Security.
  • Select Virus & Threat Protection.
  • Click on the Scan options in the new window.
  • Select Full Scan. 
  • Click on Scan Now.

This will scan your system for malware and help you identify and remove any threats causing your Windows 11 PC to freeze.

Change Screen Resolution

 If you have a low-end graphics card and use resource-intensive tasks, Windows 11 might freeze randomly due to improper screen resolution. To fix this issue, reduce the screen resolution by following these simple steps:

  • Select Setting from the Start menu.
  • Click on System and select Display, and then select Scale & Layout.
  • Select the resolution under Display resolution.
  • Click on Keep Changes to save your new display settings.

Reinstall GPU Drivers

The GPU drivers are essential for your computer to properly display graphics. However, if they become outdated or corrupted, it can cause your system to lag and freeze. Reinstall the graphics driver of your GPU manufacturer to fix such issues.

  • Press key + R to open Run.
  • Type “devmgmt.msc” & press Enter.
  • Expand “Display adapters” and right-click your graphics driver.
  • Select “Uninstall device” and confirm.
  • Go to the GPU manufacturer’s website and Download the driver.
  • Run the set-up file from your Downloads folder.
  • Follow the on-screen instructions and install the driver.
  • Restart your computer.

Update Your Window

You can update your system if your Windows 11 is unresponsive. Windows updates often contain fixes for known bugs and issues.

  • Select Settings by right-clicking the Start menu.
  • Click on Windows Update.
  • For updates, select Check.
  • With the availability of the update, Windows 11 will start downloading it.
  • Restart your computer.

Conclusion 

Windows 11 freezing can be a frustrating experience for users, but it’s not an uncommon issue. Users can troubleshoot by updating drivers, running system scans, and disabling unnecessary programs. Identify the root cause to find a solution for a smoother computing experience. SmartWindows can be a helpful tool to help with Windows 11 freezing problems.

With its ability to organize desktop displays efficiently, restore preset display arrangements, and support multiple browsers and Microsoft Office files. Using SmartWindows, users can address some of the underlying issues that cause Windows 11 to freeze and ultimately have a more productive and efficient computing experience.

SmartWindows

Restore Browser Tabs with SmartWindows. It maintains an active tab history and restores browser size as well as display position on one screen or many.

FAQs

Why does Windows 11 keep on freezing?

Windows 11 may freeze for various reasons, such as insufficient system resources like RAM or CPU, outdated drivers, software compatibility issues, malware, or hardware problems like a failing hard drive or overheating. Windows updates or other background processes can also cause temporary freezes.

How do I stop Windows 11 from freezing?

  • Update your device’s drivers and firmware.
  • Run the Windows 11 Troubleshooter.
  • Disable unnecessary startup programs.
  • Scan for malware.
  • Adjust power settings.
  • Run a clean boot.
  • Reset or reinstall Windows 11.

Is Windows 11 bug free?

Windows 11 is not completely free of bugs or issues because it’s complex software. However, Microsoft works to fix any bugs and releases relevant updates regularly.

How to manage user profiles on Windows 11 – Useful Guide

User profiles on Windows 11 are an essential part of the operating system. A user profile is like a digital wardrobe that holds a user’s unique settings and preferences on a device. Managing user profiles ensures users can access the apps and resources they need while keeping things organized and secure. It’s like giving each user their own little corner of the computer world to make their own and call home! In this article, you’ll learn how to manage user profiles on Windows 11. So, let’s get started! 

Managing User Profiles on Windows 11

Windows 11, the latest Microsoft operating system version, comes with many features and improvements, including enhanced user profile management. User profiles allow multiple users to use the same computer while keeping their data and settings separate.

Create a New User Profile

Want to create a new Windows 11 user profile? If so, then follow these steps: 

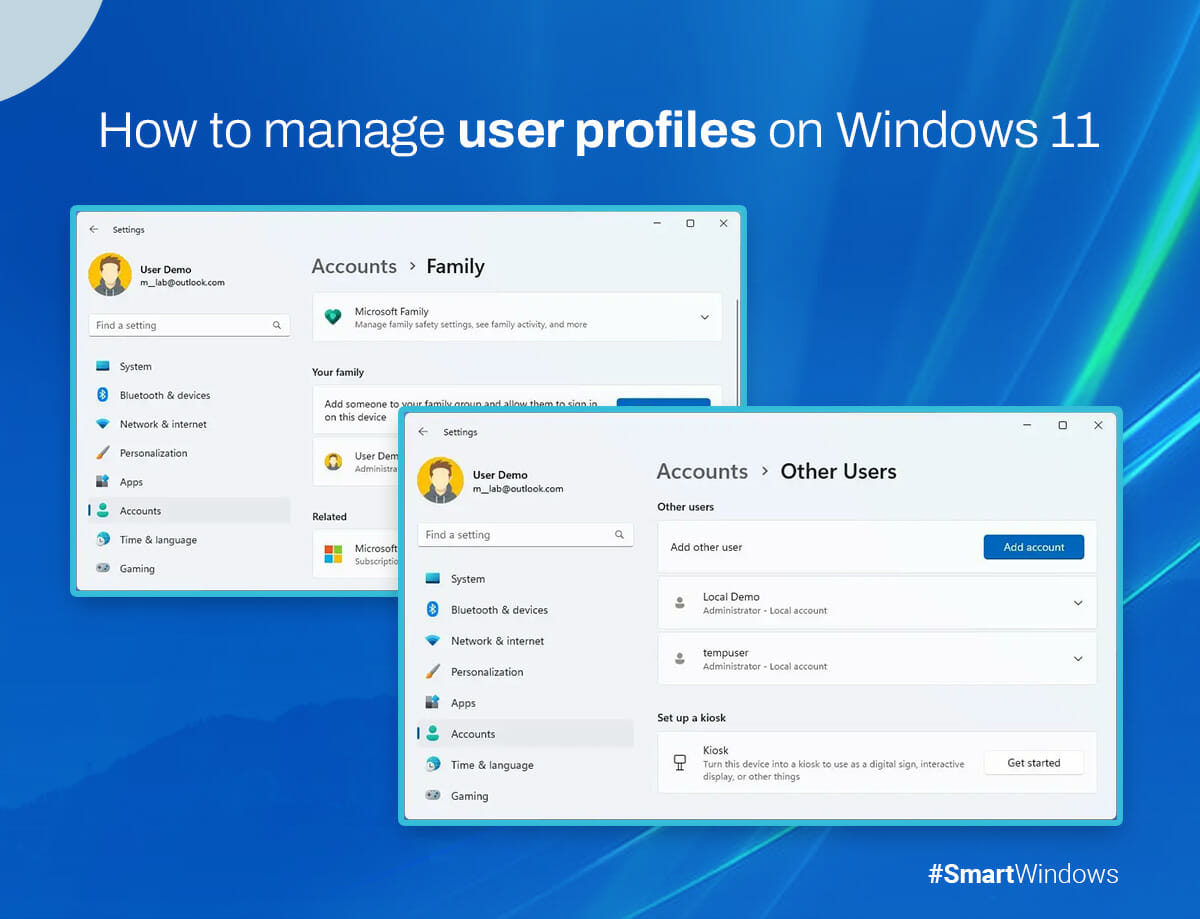
  1. Click the “Windows Start” button.
  2. Click “Settings.”
  3. Click “Accounts.”
  4. Click “Family & other users.”
  5. Click “Add account.”
  6. Choose the account type (Local or Microsoft).
  7. Follow the prompts to set up the new account.

Editing User Profiles

Want to edit a user profile? The following are the steps to edit user profiles: 

  1. Click on the “Windows Start” button.
  2. Click “Settings.”
  3. Click “Accounts.”
  4. Click “Family & other users.”
  5. Select the account to manage from the list of accounts.
  6. Click on the “Manage” button.
  7. Depending on the task you want to perform, you can edit the account type, reset the password, or delete the account for the user profile.
  8. Follow the prompts to make the changes to the selected user account.

Deleting User Profiles

Let’s have a look at how to delete user profile from Windows 11:

  1. Click the “Windows Start” button.
  2. Click “Settings.”
  3. Click “Accounts.”
  4. Click “Family & other users.”
  5. Select the account to delete.
  6. Click the “Remove” button.
  7. Follow the prompts to confirm the deletion.

Managing User Profiles Using the Command Prompt

Using the Settings app, you can manage user profiles on Windows 11 using the Command Prompt. The following are some of the commands you can use:

  1. Create a new user profile: net user username password /add
  2. Delete a user profile: net user username /delete
  3. Change the password for a user profile: net user username new password
  4. Disable a user profile: net user username /active: no
  5. Enable a disabled user profile: net user username /active: yes

How Can SmartWindows Help Make the Process Easier

Want an easy way to manage user profiles on Windows 11? Look no further than SmartWindows! With this app, managing user profiles is a breeze. You can effortlessly create, modify, and delete profiles. Let’s explore some of the ways SmartWindows simplifies profile management. 

Simplifies User Profile Creation

Creating a new user profile on Windows 11 can be a bit of a hassle, especially if you have to create several profiles. SmartWindows simplifies this process by providing a user-friendly interface.   

Provides Advanced User Management Features

SmartWindows provides advanced user management features unavailable in Windows 11, such as setting user-specific permissions, password policies, and time restrictions. If you’re looking to limit access to specific applications or files, these features can be quite useful.

Allows for Easy Profile Modification

With SmartWindows, modifying user profiles is straightforward. You can change user names, passwords, and other profile settings with a few clicks.

Provides Centralized Management

SmartWindows provides centralized management of user profiles, which means you can manage all your profiles from a single interface. This can be particularly useful if you have multiple computers or want to manage user profiles for a large organization.

SmartWindows

Restore Browser Tabs with SmartWindows. It maintains an active tab history and restores browser size as well as display position on one screen or many.

Conclusion

Managing user profiles is crucial to ensure that users can access the resources and permissions they need on their Windows 11 devices. With the help of the steps that are discussed in this article, you can easily create, modify, and delete user profiles. Whether you use the Settings app or the Command Prompt, managing user profiles on Windows 11 is easy with SmartWindows!

FAQs

How do I clean up User Profiles in Windows 11?

To clean up user profiles in Windows 11:

  • Open Settings.
  • Click on Accounts.
  • Select Family & other users.
  • Click on the user profile to clean up.
  • Click Remove to delete the user profile or delete unnecessary files in the user’s folder at C:\Users\username.

How do I change profiles in Windows 11?

  • Click on the Start button.
  • Click on your user profile in the Start menu.
  • Choose the profile that you want to switch to from the list.
  • Or, Click “Add a user” to create a new profile.

You can also manage user profiles in Settings > Accounts > Family & Other users.

Does deleting user profile Delete files?

Yes, deleting a user profile in Windows 11 can delete the associated files and data. It’s important to back up any important files before deleting a profile. Any programs installed only on that profile will need to be reinstalled on another profile or on the same profile if you recreate it later.

Remember Windows Size and Positions in Windows 11

Remember Windows Size and positions in Windows 11

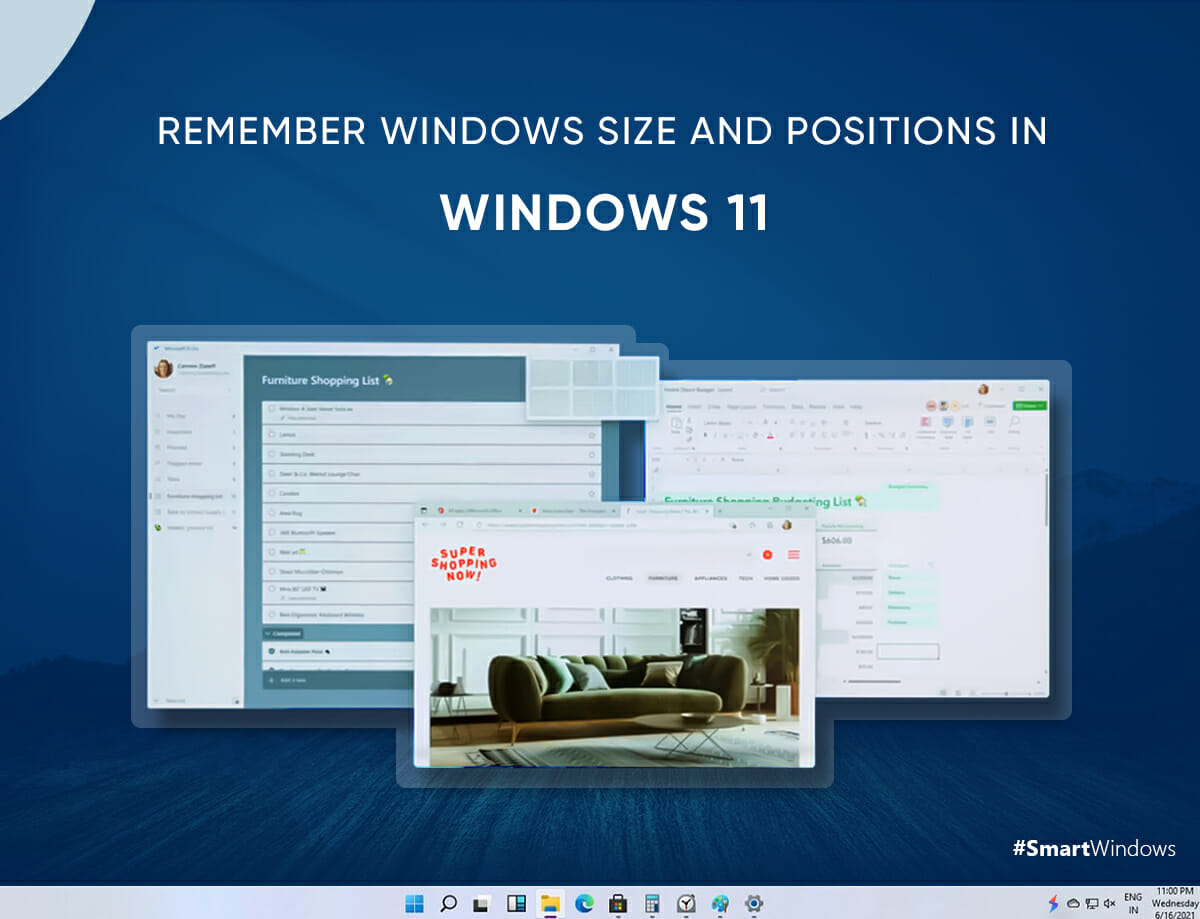
We start our workday with reopening all the work files, desktop apps, and browser tabs that we worked on the previous day. This manual labor takes up a significant amount of our time and leaves us a bit tired. To maximize productivity, it is necessary to employ smart methods that can lead to a seamless workflow and a happy start.

Here are a few solutions to reduce this daily hassle and remember window size and position in Windows 11.  

Remember Windows Size and Position in Windows 11

We start our work by putting up the desktop apps, browser tabs, and work files on our desktop screen. It is inconvenient for the majority of users to re-arrange the same work screens daily before starting work. This routine activity takes our time while leaving our minds dull. For an active start of the day, we need to take smart solutions that help us complete tasks automatically without putting in any manual effort. Windows 11 provides its users with some productive features that help them remember the window size and position of apps on the screen.

  • Remember Window Positions on Multiple Monitors
  • Remember Window Locations using Registry Editor
  • Remember Window Size and Position with SmartWindows – One-Click Solution

Remember Window Positions on Multiple Monitors

Multiple monitors help in having an extended view of the work screen. Users can organize their multiple desktop apps, work files, and browser tabs on their multiple monitors thus leading to a visually clean interface. 

For instance, having multiple reference browser tabs on one monitor and writing apps on the next monitor helps writers in their work. Similarly organizing the multiple desktop apps on more than one monitor helps users in an extended display of their work sessions. 

The clean view of the desktop screens on multiple monitors comes with a common issue, the re-arrangement of the work screens when the monitor is reattached. 

Windows 11 empowers its multi-monitor users to save the window positions of their dedicated work screens for easy restoration of their work sessions. Users can customize the multiple display settings to remember the window screen locations based on the monitor connection.  

This feature can be enabled in the following steps

  • Open the ‘Settings’ menu
  • Select ‘System’
  • Select ‘Display’
  • Open and expand the ‘Multiple displays’ section 
  • Then check the box ‘ Remember window locations based on monitor connection’.

After selecting this option whenever the user detaches the monitor, Windows 11 will remember the multiple window screen arrangement. So when the user reopens the work screens, they will be repositioned as they were set before. 

Remember Window Locations using Registry Editor

Users can reset window position and size as per their work preference to better arrange and organize their work screens. Using the Registry Editor they can save those window locations. The Windows Registry stores information about Windows programs and processes in the form of Registry keys. You can easily create administrative-level modifications by altering the necessary keys. Registry Editor also serves as a database for your system’s functions. 

To enable this feature, follow the steps below.

  • Open the Run dialogue box by pressing the Windows & R keys
  • Type ‘regedit’ in the box (It will open the Windows Registry)
  • Navigate to the place HKEY_CURRENT_USER\Control Panel\Desktop once you’ve entered the Windows Registry. 
  • Choose NEW > DWORD (32-bit) Value from the right-click menu in the right pane.
  • To save the modifications, rename this value to RestorePreviousStateRecalcBehavior and click Enter.
  • Set the basis to Hexadecimal by double-clicking on RestorePreviousStateRecalcBehavior.
  • Type 0 in the Value data field to enable the functionality. If you wish to disable it, type 1.
  • Lastly, restart your system to apply the modifications.

After performing this list of functions, Windows 11 will be able to remember the window locations on your PC. 

Doesn’t it feel hectic to remember this list of commands? Why opt for longer and complicated solutions when you have a smart and easy solution at your disposal!

SmartWindows helps remember the window size and location for multiple desktop screens. Let’s see how… 

SmartWindows Remembers your Window Positions & Sizes

SmartWindows is a Windows productivity app for Windows 11. It helps users organize their multiple desktop screens and restore that arrangement whenever needed. 

For instance professionals such as writers, designers, programmers, teachers, and non -professionals as students; often work simultaneously on multiple apps. They start by organizing their multiple browser tabs, desktop apps, and work files and create a screen arrangement that best suits their work needs. 

The main concern of all such people is the rearrangement of their dedicated work screens the next time they start work. To eliminate the hassle of setting up the same screens SmartWindows brings the ultimate solution. 

SmartWindows allow users to create one-time screen configurations for their work sessions and multiple projects consisting of multiple desktop apps, browser tabs, and work files. Once done, save it using SmartWindows that you can restore anytime on one or many screens. It empowers users to save and restore multiple work sessions with one click.

To create one-time screen arrangements

  • Pull up all the desktop apps, browser tabs, and work files that you work on. Resize and arrange them as per your work preference. 
  • Right-click on the SmartWindows icon.
  • Select ‘Create Profile’ 
  • Name that profile and hit ‘Save’.
  • Just like that, your SmartWindows profile will be created and your dedicated screen arrangement will be saved in the profile. 

To restore the window positions

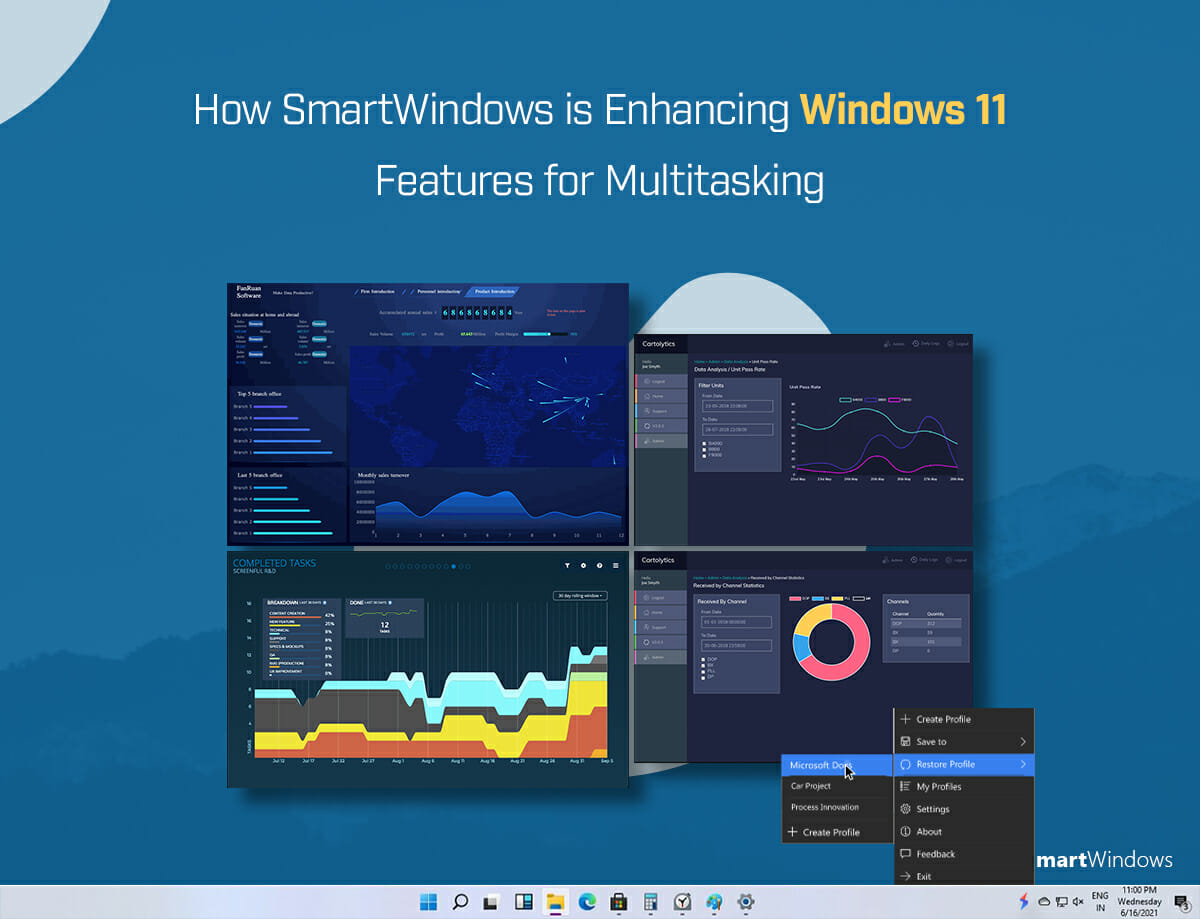
  • Right-click on the SmartWindows icon.
  • Select ‘Restore Profile’
  • Choose the profile you wish to restore.
  • And with one click you can restore your screen arrangement in the exact size and display location it was saved. 

Instead of remembering the long list of steps, SmartWindows does the job even better in a few simple steps. It is ingeniously designed to remember the window size and display positions of your desktop screens and restore them in the exact same manner.

Restore Snap Groups and Snap Layouts with SmartWindows

Windows 11 provides the functionality of ‘Snap Groups’ and ‘Snap Layouts’ to its users, which allows them to arrange multiple desktop apps on their screen. 

With Snap Layouts users can arrange up to 6 different apps into the layouts offered by Windows 11. Snap Groups is basically a group of all those desktop apps and work files. It offers 6 layouts for different positioning of your window screens. They are as follows

  1. Two vertical screens of the same length.
  2. Two vertical screens, one side larger than the other.
  3. Three vertical screens with the center screen bigger than the rest.
  4. Three screens, one vertical and two horizontal.
  5. Four equally sized quarter screens.
  6. Three equally sized vertical screens

The users can arrange their multiple work screens in these layouts, however, the need still remains to restore the screen arrangement manually. 

SmartWindows empowers you to save the Snap Group in the SmartWindows profile and restore it at any time. Thus allowing you to maximize productivity and save time spent in the rearrangement of Snap Layouts. 

Restore Multiple Profiles with SmartWindows

SmartWindows enables its users to create multiple profiles or presets for their diverse work needs. Users can create multiple work zones to separate office and personal work, entertainment, sports, or games and as well as create multiple profiles for their multiple projects. 

Having separate profiles for multiple projects helps in easy access of the relevant data, desktop apps, and project files. It is also easier with SmartWindows to restore all the project apps, work files, and browser tabs with one click. 

You can also create multiple browser profiles for saving your browser tabs. SmartWindows maintains an active tab history and remembers the display position and size of your browser tabs, restoring them in the same manner they were saved. It spares you from the hassle of saving your bookmarks on multiple browser windows.

SmartWindows supports multiple browsers like Mozilla Firefox, Google Chrome, and Microsoft Edge, allowing users to use their choice of browser. 

SmartWindows Boosts Windows 11

SmartWindows is also packed with some other features that help save time and maximize productivity. 

It supports Microsoft apps like MS Word, PowerPoint, and MS Excel. This helps users save their relevant MS Files or documents in their profiles and restore them later on. 

Its support for multiple displays for up to 6 monitors enables users to create extended displays of their work screens. 

With SmartWindows you can make screen arrangements on multiple monitors and displays and save that configuration in your profile. The saved configuration will be restored with a single click in the same window size and display position. Packed with all these productive features SmartWindows is the ultimate solution for your daily work needs.

Empower Windows 11 with smart productivity features of SmartWindows!

How SmartWindows is Enhancing Windows 11 Features for Multitasking

How SmartWindows is Enhancing Windows 11 Features for Multitasking

Windows 11 has hit the market with its killer multitasking features along with an improved and modern design. Snapping windows has become easier in Windows 11 allowing you to work on multiple apps simultaneously without doing excessive switching. Moreover, the virtual desktop experience also gets an upgrade. Let’s look at Windows 11 features, particularly, the multitasking upgrade and how SmartWindows fire up its use with its intelligent capabilities.

Windows 11 Multitasking 

Windows 11 is giving more multitasking skills in the hands of Windows users. A sizable upgrade in multitasking introduces Snap Groups and virtual desktops. 

Snap Groups

Snap Groups are a unique way of organizing the desktop apps you are working on. It groups the apps and arranges them on one screen in such a way that each app becomes easily accessible. When it comes to Windows 10 multitasking, the users used to snap apps on either side of the screen according to their work preferences. Users could easily open, drag, and drop, resize the app window, set each on the most appropriate position on the display, and even overlap each other. 

Windows 11 makes multitasking a little smarter by allowing making Snap Groups from your favorite Snap Layouts. This new Snap Layout feature allows you to choose from four to six different layouts (layout options vary based on the screen size and resolution) by clicking on the maximize button in the app. Choose the layout and the tile where you want to snap that particular app. Similarly, you can snap the other apps in tiles according to your liking. 

Once arranged, the Snap Groups make it easy for the user to access the most-used apps all at once. A consolidated view of all apps arranged on one screen helps the user get quick insights and get more work done in less time.

Virtual Desktops

The new virtual desktops experience has changed the name to Desktops. It comes with a better interface and allows users to set a separate background image for each desktop. Desktops allow users to create separate work environments, open different projects, and study or game independently on each desktop. This configuration enables users to use the PC in an organized way and avoid any mess of app and tabs accumulation. 

Enabling Multitasking with Windows 11 Features

Both the Snap Groups and Desktops introduce multitasking in Windows 11. Windows users can make smart use of their PC by building Snap Groups of most-used apps and creating customized work zones. The app windows are arranged in a very appropriate proportion on the screen. When apps are easily accessible and users can view multiple apps in a visually clean interface, it enables users to get more work done in less time. Multitasking maximizes work productivity and eliminates the overhead of excessive back and forth switching between the apps. 

Giving Wings to Windows 11 Features with SmartWindows 

SmartWindows fully supports Windows 11 with its smart productivity capabilities for Windows users. The following are the ways how SmartWindows empowers the use of Windows 11 multitasking features.

Smart Layouts

Smart Layouts by SmartWindows allows the users to save and auto-restore the Snap Groups and Snap Layouts with one click. Once the apps’ windows are snapped in the tiles, you can save the screen configuration using SmartWindows. Once saved, you can restore it anytime you switch on your PC. 

Smart Layouts eliminate the need for rearranging the apps in Snap Groups again and again before getting started to work. SmartWindows remembers the screen configuration and restores the apps at exactly the same tile with a single click. You can create multiple Snap Groups for work, study, and entertainment purposes separately and save them with SmartWindows. Work smart and save time!

Browser Restoration

SmartWindows supports multiple browsers such as Google Chrome, Firefox, and Microsoft Edge. You can open one or multiple browser windows on Windows 11 with dozens of tabs and URLs. Click “Save” and SmartWindows will save your browsers, URLs, and order of tabs. On restoration, you will get back all your tabs and URLs on one or many browser windows with a single click. 

Not only this, but SmartWindows also remembers the size of the app’s window and its display position on the screen. If you have opened the browsers in Snap Groups, you do not need to open the window or restore tabs again. Also, there is no need to remember the ways of tab restoration in different browsers and repeat the steps over and over again to continue work. Just one click of profile restoration does all the magic!

MS Office Files Support

SmartWindows supports MS Office files such as Word, PowerPoint, Excel, Project, etc. So if you have opened any MS Office file in the Snap Groups, one-click can restore your files in the exact same tile. 

Multiple Profiles & Displays

SmartWindows allows you to create unlimited profiles in Windows 11. You can create and save multiple presets according to your work, study, or entertainment preferences. Auto-restore any layout anytime with one click, or create more SmartWindows profiles. Moreover, you can create up to 6 displays using SmartWindows. Each profile can have multiple displays that you can create separately for each project, research, writing, meeting, gaming, coding, or any purpose. 

Multiple work environments provide you with a highly customized work experience. You get an organized screen where each app is highly accessible and you can get immediate insights without any interruption.

SmartWindows gives more power to Windows 11 features. You can make smart use of Windows 11 with the productivity-focused capabilities of SmartWindows. Get the app now and enhance your Windows 11 experience!

Windows 11 Snap Layouts: A Powerful Way to Multitask and Optimize your Screen

Windows 11 Snap Layouts

Windows 11 comes up with a slew of updates and features. It may be known better for the UI improvements but the new Snap Layouts and Snap Groups feature is in full swing to provide you with better productivity. It is a major UI innovation that allows Windows users to organize their desktop screen and multitask in a very efficient manner.

After tiresome steps of manually arranging each app on the desktop to multitask in Windows 10, now this upgraded OS takes multitasking to a whole next level with Snap Layouts. 

What are Snap Layouts?

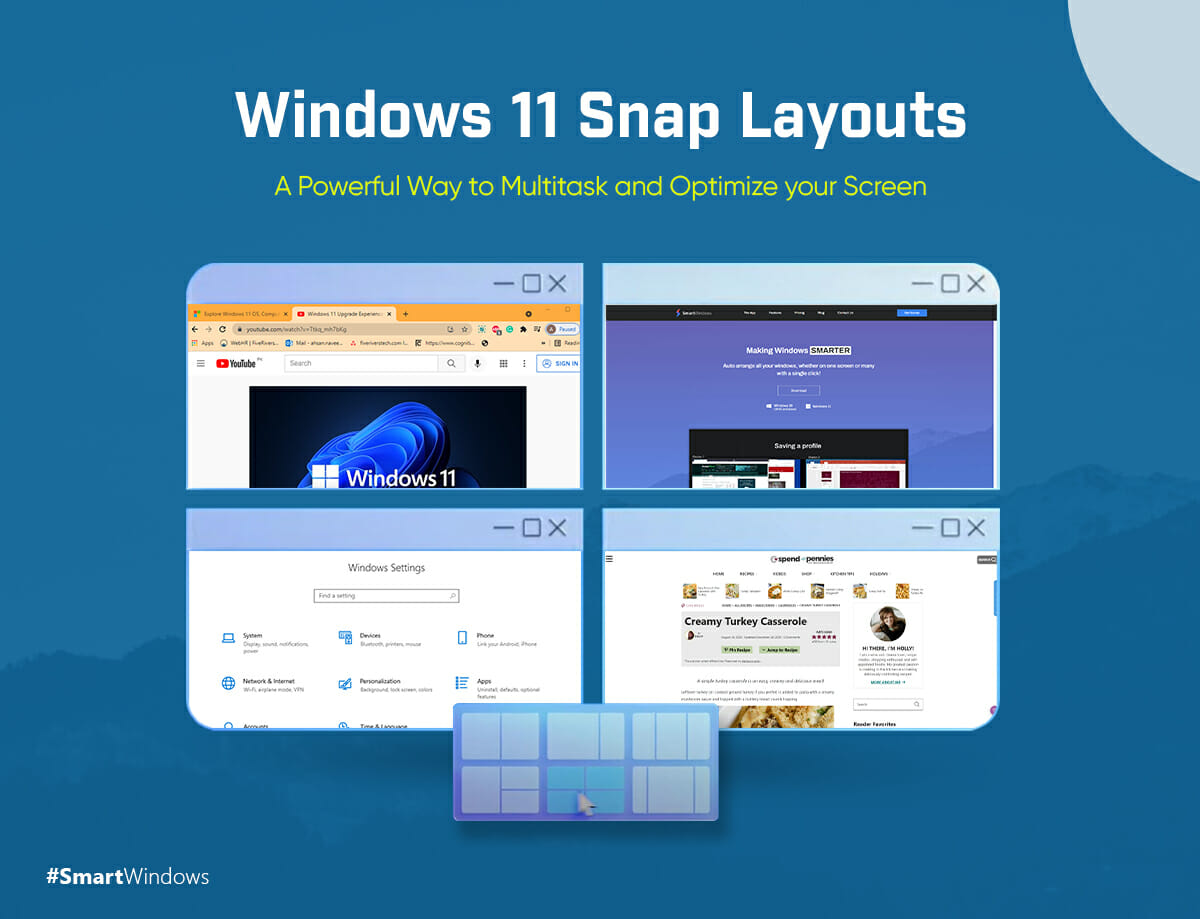
Snap Layouts is a new feature introduced in Windows 11 that allows you to organize the apps and windows in a better way by grouping them. The available options of layouts depending on the screen dimensions. On a standard screen display, you will get 4 layout options to choose from whereas, on an ultra-wide display screen, you get 6 layout options. Selecting one and adjusting apps into each section, Snap Layouts split screen into partitions based on the layout you have chosen.

Say you are working on some research, and have a group of browser windows or apps opened all related to your work. You can group windows by applications using Snap Layouts to cleanly organize all the apps on your screen to keep all information in one place. A visually clean interface would help you seamlessly grasp the information and collect chunks from each window to complete your research work. 

Snap Layouts help you create your customized work zones. Similar to the research example, a project manager could organize all apps to make lookup easy and eliminate the excessive switching between the apps. A student can read, watch, and write at the same time. You can also create a preset of all entertainment apps and activities when in the mood for gaming. In short, Snap Layouts have made multitasking easy for Windows users.

How do Snap Layouts Work?

To get started with Snap Layouts, all you need to do is hover the mouse over the Maximize icon of the app’s window at the upper-right corner. Doing this, you will find options of layouts available to you based on your screen size and dimension. Now select the one that you find more suitable according to work needs. You can also tap on the slot where you want to adjust your current program window. On tapping, you will see a complete layout on your desktop screen with all other spots that you can fill with other apps you have opened. 

You will see all the opened apps to fill the placeholders. Now select and put apps in each vacant space. Note that in Windows 10, snapping windows allows you to resize the window size of the app according to work preferences. Whereas in Windows 11, you are supposed to adjust the apps in a given layout and cannot change the size or overlap them. 

This layout app for PC is built-in that eliminates the need of manually sizing the apps. With layouts available, you can just select and fit the apps in space for efficient multitasking. The Windows Snap feature populates the apps to make it easy for you to access information from multiple apps easily. You can view each app in the taskbar, and the whole windows groups in layout form as well in the taskbar. 

Keep it Tidy with Snap Layouts!

A handful of new features in Windows 11 have productivity and multitasking as a major focus. Snap Layout keeps Windows tidy. You can open and organize the apps according to your taste. Easy access to all the information makes it easy for you to grasp it and get the job done earlier. Multiple layouts for Windows help you arrange apps in slots based on the ease of access, reading, or writing. Windows snapping groups all the apps and keep your desktop screen tidy enough to multitask in an easy manner. In this way, you can create multiple work zones, gaming zones, study zones, entertainment zones, and another desktop presets. 

Smart Layouts & Snap Layouts 

Smart Layouts by SmartWindows empower the use of Snap Layouts by giving them the capability to auto-restore in Windows 10 and 11.

Smart Layouts save the screen configuration and auto-arranges the apps on one or many screens. It fully supports all desktop apps, MS Office files, and browsers. Smart Layouts keep the display position, window size of each app, browser tabs and URLs saved. With one click you can auto-arrange the apps and windows on multiple displays. Enhance the use of Snap Layouts by giving them the ability to auto-arrange apps effortlessly when you start up your PC. It saves time opening and arranging apps every time before getting started to work. Be more productive at work with SmartWindows! 

SmartWindows

Restore Browser Tabs with SmartWindows. It maintains an active tab history and restores browser size as well as display position on one screen or many.

Windows 11 Snap Layouts vs Smart Layouts: What’s the Difference?

Snap Layouts vs Smart Layouts

Windows 11 – the latest operating system by Microsoft will become available from 5 October 2021. Windows 11 is coming up with a number of features with a fresh new design and layout, multitasking capabilities, improvements in Microsoft Teams, and support for gaming and Android apps. One of the phenomenal features of Windows 11 is ‘Snap Layouts and Groups’. Snap Groups would help users multitask and organize multiple window apps on the screen. Now on one monitor, you can easily access the apps without excessive switching.

Snap Layouts 

With virtual desktops in Windows 11, Snap Layouts allow you to maximize productivity by structuring the screen. Snap Layouts are the flyout that displays a number of Snap layouts options when you hover your mouse on the ‘Maximize’ window button of the apps’ window. According to leaked information of the Windows 11 beta version, the options of different snap layouts available vary based on the display’s physical properties.

Ultra-wide displays have more layout options as compared to traditional/standard displays. You would need to create a Snap Layout before a Snap Group. Choose the apps in each box of the layout to adjust it according to your liking and work requirements. 

How do Snap Layouts work?

Snap Layouts work as follows:

  1. Open all the programs you want to work on. 
  2. Pull one window to the front of the screen and hover your mouse on the Maximize button (on the top-right and second from the left).
  3. You will see six layout options to snap your open windows from which you can choose one. These snap layouts are:
  • Two windows at an even length
  • Two windows with one bigger side
  • Three vertical windows at even length
  • Four windows in a grid
  • Three windows with one side bigger
Windows 11 Snap Layouts
  1. After choosing one Snap Layout, you can tile the opened programs in each section available in the layout according to your choice. 
  2. After this, your screen will be organized and you can get easy access to multiple apps.

Snap Groups

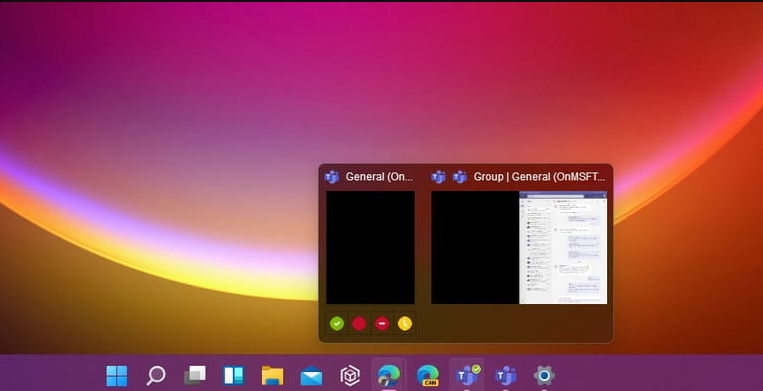
Windows 11 new feature, Snap Groups are the set of open programs that you adjusted and saved in the Snap Layouts. You can see the app individually and in layout as well in the taskbar. Snap Groups make access to all multiple programs easy. A visually clean interface allows you to multitask and increase productivity at work.

Windows 11 Snap Groups

Smart Layouts – SmartWindows

SmartWindows introduces a special feature ‘Smart Layouts’ specifically for Windows 11. Smart Layouts allow you to restore the Snap Layouts with one click. They help restore the Windows positioning and Window sizes according to the layout you saved previously. SmartWindows saves the screen configuration you create on manual arrangement of apps or using Snap Layouts. 

SmartWindows supports auto-restoration capability in unlimited profiles and up to 6 displays. 

Create your work zone once and you can restore it anytime on one or many screens. SmartWindows empowers your productivity at work in Windows 11. It saves your time for making Snap Layouts again every time you get started on work. You can pull your presets anytime for study, work, or entertainment. Make your Windows snapping more powerful with the fusion of Windows 11 and SmartWindows.

SmartWindows

Restore Browser Tabs with SmartWindows. It maintains an active tab history and restores browser size as well as display position on one screen or many.

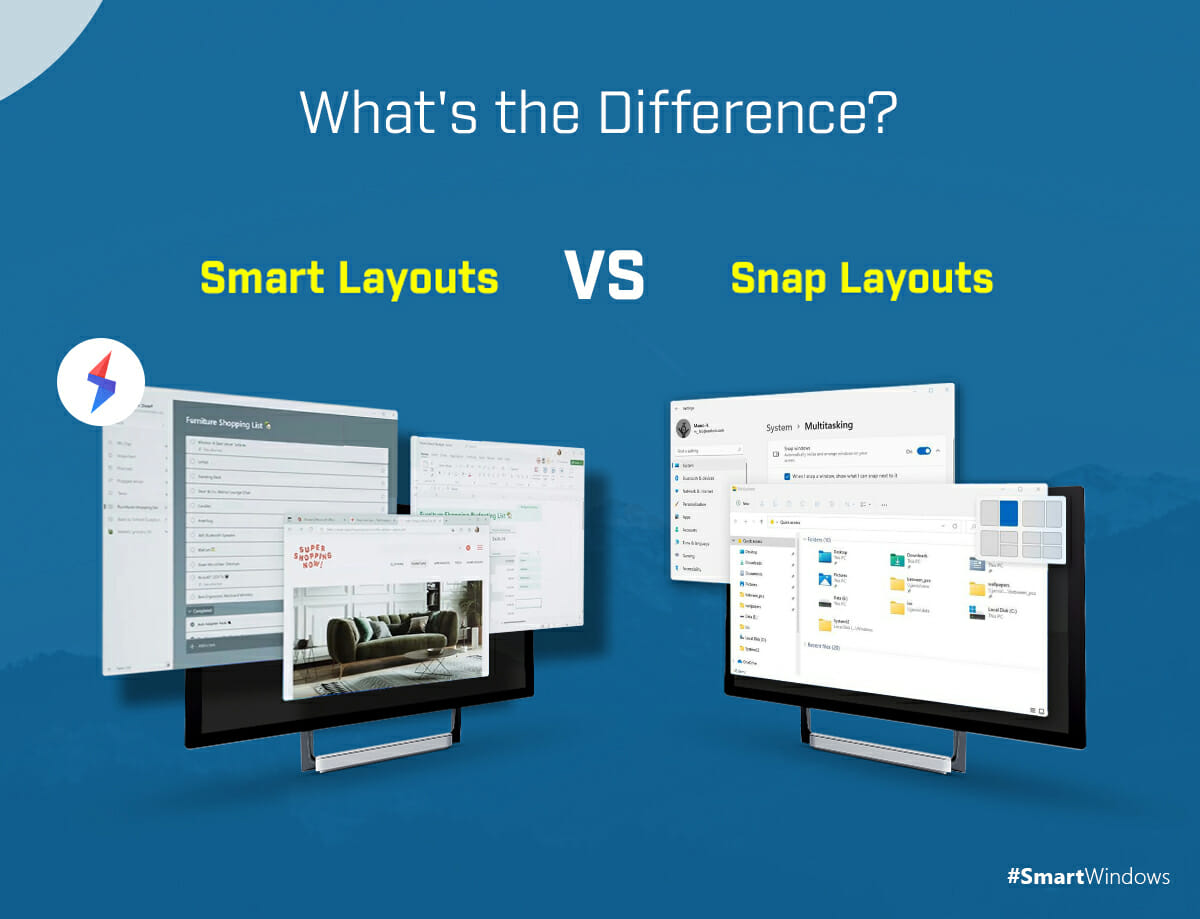
Snap Layouts vs Smart Layouts

Snap Layouts is one exclusive feature of Windows 11 updates that allows you to organize multiple desktop apps into the given layouts. It provides you access to a unified interface where you can easily switch between the applications. A fish-eye view of all apps and an organized work zone allow you to work efficiently on multiple windows. However, in Snap Layouts, you can not overlap one window over the other. On resizing, the other windows adjust their size accordingly.

Smart Layouts, on the other hand, give your Windows 11 capability to restore the Snap Groups anytime. All you need to do is save the screen configuration once you have created the Snap Groups. You can create separate Snap Groups on multiple products and displays. SmartWidnows allows you to restore the entire Snap Groups with one click. Contrary to Snap Groups, you can manually arrange apps on screen, overlap, and save screen configuration that you can restore anytime.

SmartWindows fully supports your Windows 11 with the following features:

  • Restore Snap Groups with Smart Layouts.
  • Arrange and adjust multiple apps on a screen, save, and restore anytime.
  • Remember the size and position of the window of each app.
  • Restore multiple browsers and tabs with respective URLs.
  • Restore MS Office files such as Word, Excel, PowerPoint, and Project, etc.
  • Intelligent app positioning and restoration.
  • Create and save Snap Groups on multiple displays and profiles.

So get Smart Layouts by SmartWindows to boost your productivity along with Windows 11 Snap Layouts!

Get the app now with a 30-day free trial!

Microsoft Announced Windows 11 Release Date: What to Expect?

Windows 11 Release Date

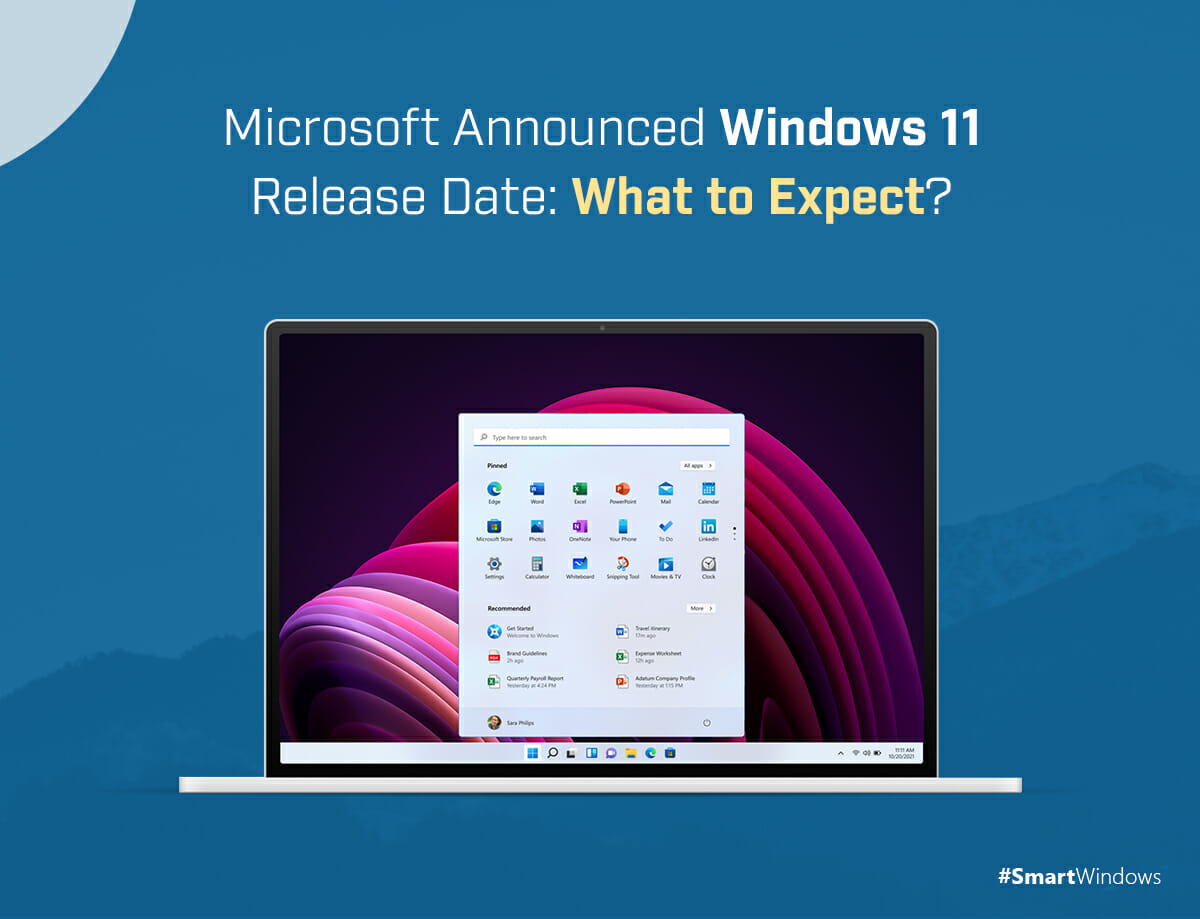
Microsoft has announced the Windows 11 release date i.e. October 5, 2021. The Windows 11 update will be available for the eligible users of Windows 10. Microsoft Windows 11 is designed primarily with two major peculiarities – productivity and creativity.

So let’s dive deep into the features Windows 11 is offering.

Highlights of Windows 11

Below are the distinguished features of the Windows 11 release.

  • The sound and design are more clean and fresh.
  • With Start, you could see your recent files.
  • Snap Groups, Snap Layouts, and Desktops allow you to multitask and optimize your screen. 
  • Microsoft Teams will come with this new release into the taskbar.
  • It promotes a gaming environment with strong support for the system’s hardware. 
  • The rebuilt Microsoft Store will make it easy for you to discover your favorite apps.
  • Windows 11 is coming up with optimized speed, improving customer experiences with digital pen, touch, and voice input.

What could be the Useful Features of Windows 11?

If we look at each feature of Windows 11, the major improvements are made in the area of productivity and user interface. Windows 11 (as also leaked in Windows 11 beta version) is giving Snap Groups and Snap Layouts that allow you to configure your screen automatically when you are working on more than one desktop app. By hovering your mouse to the maximize button of an app’s window, you would be able to choose one from the given layouts. By clicking on a layout, you will be able to snap all your apps’ windows into place. It organizes all your apps and adjusts their window size automatically on the screen.

Other than this, Windows 11 has updated UI, speed, and performance. All the other features are the same as in Windows 10. If you are a gamer, Windows 11 provides you with a supportive environment that suits all the hardware and memory needs of your game. 

How to Gear Up Windows 11 With SmartWindows?

There’s never been a better time to boost your Windows experience!

With a PC upgrade to Windows 11, be ready to elevate yourself at work with SmartWindows. 

SmartWindows is one full-featured productivity software fully compatible with your Windows 11 with enhanced properties and capabilities. An amazing fusion of SmartWindows and Windows 11 will take your Windows experience to the next level. It allows you to multitask in much more efficient and powerful ways. 

So whether you use a single, dual, or a multi-monitor setup, it gives you more hands at work by making your Windows 11 even smarter. SmartWindows provides the following features to Windows 11.

Multi-Tab & Multi-Browser Support: SmartWindows supports multiple browsers such as Google Chrome, Microsoft Edge, and Firefox. It remembers the tabs and URLs you were working on one or many browser windows. You do not need to manually restore the tabs in each browser every time, SmartWindows does it for you with a single click. Give your Windows 11 the capability to automatically restore a dozen tabs and multiple browser windows without wasting your precious time.

Auto-Restoration & Auto-Arrangement: SmartWindows remembers where you have positioned the window of each app on the screen. It also remembers the size of each app’s window you adjusted. Make your Windows 11 ‘Snap Layouts’ smart with SmartWindows ‘Smart Layouts’. SmartWindows remembers windows size and position on the screen, allows you to save the current state of your display, and restore it anytime on one or many screens. 

Even if you don’t use Snap Layouts in Windows 11, you can make your own work zones by arranging apps according to your liking on screen. You can make multiple layouts on multiple profiles, for instance, separately for study, work, and entertainment and gaming, etc. Just arrange the apps, save the screen configuration with SmartWindows and restore it whenever you want. See how simple and smart it is!

MS Office Files Support: SmartWindows fully supports multiple MS Office files which include Word, PowerPoint, Excel, Project, etc. If you are working on these multiple files at the same time and have used Snap Layouts for power window snapping, you can just save the layout with SmartWindows and can restore it anytime. With this, you do not need to manually open each file every time and snap the screen. With just one click, you are ready to continue with SmartWindows.

Multiple Display: SmartWindows provides you support for up to 6 displays. You can create six different work layouts as you want and can restore them anytime. For instance, create work zones for different projects, study, and entertainment. Save their screens’ states with SmartWindows and restore them anytime. You can switch to any layout according to your work needs and mood swings. Cool, isn’t it?

Unlimited Profiles: SmartWindows allows you to create unlimited profiles. Manage your data, files, and apps and organize everything efficiently. Empower your every profile in Windows 11 with SmartWindows. Save your time arranging and restoring apps every time before getting started to work. Advance your work experience in the best operating system, Windows 11 with the use of SmartWindows.

SmartWindows

Restore Browser Tabs with SmartWindows. It maintains an active tab history and restores browser size as well as display position on one screen or many.

‘Smart Layouts’ – Give Wings to your Windows 11!

Windows 11 has introduced a unique feature of ‘Snap Layouts’. You can access the snap layouts by hovering the mouse on the maximize button of a window or by using the shortcut Win + Z. Click on the menu and you will be able to see the available layouts. Click on a zone to snap a window. All the apps you have opened on your desktop screen will be arranged according to your chosen zone. This feature allows you to multitask and increase productivity at work. It enables users to work on multiple apps side by side and arrange them automatically without spending time, manually resizing each app’s window and positioning it on the screen.

Imagine how Windows 11 and SmartWindows duo brings fluency to your work.

With the release of Windows 11, the manifold use-cases of SmartWindows have made the life of Windows users easier than ever before. SmartWindows introduces ‘Smart Layouts’ for Windows 11. Smart Layouts make Snap Layouts of Windows 11 capable of auto-restoration.

This means you can save the entire layout in Windows 11 and can restore it with one click using SmartWindows without even opening apps again. Smart Layouts eliminate the need of opening apps every time and remember the layout you have already chosen from the Snap Layouts. The layout is saved as it is in your SmartWindows profile and you can restore it anytime on one or many screens. SmartWindows’ Smart Layouts allows you to create multiple presets for study, work, and entertainment, save each layout and restore them anytime. 

As we all know the Windows 11 release date so prepare yourself for an amazing experience with the Windows 11-SmartWindows duo