Ever been in the middle of working on a project and wished you could keep one window always visible, no matter what else you’re doing? That’s where the “always on top” feature comes in handy. This little trick keeps your chosen window right where you need it, staying on top of everything else. So, here you would know about “windows hotkey keep window open windows 11”.
So, why should you bother with this feature? For starters, it’s a real game-changer for multitasking. Imagine you’re on a video call and need to keep an eye on your to-do list at the same time. When a window is configured to be “always on top,” you may stop constantly navigating between them. It’s all about streamlining and optimizing your process. It also keeps crucial information visible and out of the way of other windows. Although it’s a basic function, the way you use your screen space may be greatly affected by it.
Let’s see how you can use hotkeys to keep your Windows always on top in Windows 11!
Related Blog: https://smartwindows.app/blog/how-to-keep-a-window-always-on-top-in-windows-10/
Using Built-In Windows 11 Features
Windows 11 doesn’t have a built-in feature specifically for keeping Windows always on top, but there are some native options and workarounds you can use to achieve a similar effect.
Snap Layouts
While not the same as “always on top,” Windows 11’s Snap Layouts can help you organize your windows more effectively. You may easily organize open windows into pre-defined sections of your screen by using Snap Layouts. Here’s how to use them:
- Open the windows you want to arrange.
- Press Win + Z or hover your cursor over the maximize button located in the upper-right corner of a window.
- From the options that show, choose a layout. This will snap the window into place, making it easier to keep multiple windows visible.
Virtual Desktops
Another built-in feature is Virtual Desktops, which can help manage multiple windows more efficiently, even though it doesn’t always keep a window on top. This is how virtual desktops are used:
- On your taskbar, click the Task View icon (or hit Win + Tab).
- To launch another virtual desktop, select “New desktop.”
- Task View allows you to move windows across desktops.
Focus Assis
Focus Assist can help you stay focused on one window by minimizing distractions. You can set it up to suppress notifications and alerts that might distract you from your important window.
- Go to Settings (press Win + I).
- Go to System > Focus Assist.
- Choose your preferred focus settings to limit interruptions.
Using Keyboard Shortcuts
If you’re a fan of keyboard shortcuts and want to keep a window always on top, you’re in luck! While Windows 11 doesn’t have a built-in hotkey for this feature, you can use some handy shortcuts or tools to achieve a similar effect.
Common Hotkeys
One popular hotkey to keep a window always on top is Win + Shift + T. This shortcut isn’t built into Windows 11 by default, but you can create a custom hotkey to make it work. Here’s a quick look at how this works with third-party tools:
- OnTopReplica: This free tool allows you to pin a window on top of others. Once installed, you can use its interface to set a specific window as always on top. The hotkey for this might vary based on the tool, so check its settings.
Creating and Customizing Hotkeys
You’ll need a third-party tool to set up or customize hotkeys since Windows 11 doesn’t provide this feature out of the box. Here’s a general guide using tools like AutoHotkey:
- Install AutoHotkey: Download and install AutoHotkey from its website.
Create a New Script:
- On your desktop, right-click and choose New > AutoHotkey Script.
- Name something memorable in your script file, like “AlwaysOnTop.ahk.”
Edit the Script:
- Right-click the script file and choose Edit Script.
- Add the following code to the script
^SPACE:: ; Ctrl + Space hotkey
Winset, AlwaysOnTop, , A
return
- This script sets the currently active window to always stay on top when you press Ctrl + Space.
- To execute the script, double-click after saving it.
- Use the hotkey you’ve defined (e.g., Ctrl + Space) to toggle the always-on-top feature for your active window.
Using Third-Party Tools
If you want to keep a window always on top and built-in options aren’t cutting it, third-party tools are your best bet. These tools offer more flexibility and features to help you manage your windows effectively. Here’s a quick look at some popular options and how to use them:
Popular Third-Party Tools
- DeskSoft’s “Always On Top” is a straightforward tool that does exactly what it says, it keeps any selected window on top. It is simple to use and requires little setup.
- OnTopReplica: This tool allows you to create a resizable, always-on-top replica of any window. It’s handy for monitoring applications or content while working on other tasks.
How to Set Up and Use These Tools
DeskSoft’s “Always On Top”:
- Download and install the software from DeskSoft’s official site.
- Upon launching the tool, a little icon will appear in the system tray.
- Right-click the tray icon and choose the appropriate option to select the window you want to keep on top. The selected window will now remain on top of all others.
“OnTopReplica”:
- OnTopReplica’s official website offers a download and installation option.
- Run the application. You’ll see a window with options to select which window you want to replicate.
- Choose the target window from the list or by using the window selector tool within OnTopReplica.
- Adjust the replica as needed by resizing or moving it around. All other windows will continue to be layered over the imitation window.
Troubleshooting
When attempting to keep a window always on top, you may encounter some difficulties even with the appropriate tools and shortcuts. Here’s a rundown of common issues and practical tips to resolve them:
Hotkeys Not Working
If your hotkeys aren’t doing their job, it could be due to several reasons:
- Conflicting Shortcuts: Other programs or system functions might use the same hotkeys. Check your tool’s settings to ensure there are no conflicts.
- Script Issues: If you’re using a tool like AutoHotkey, ensure your script runs correctly. Verify the script again for any mistakes or typos.
- Administrative Permissions: Some tools or scripts need administrative rights to function properly. Try running your tool or script as an administrator.
Solution:
- Check for Conflicts: Go into your tool’s settings and look for any conflicting shortcuts. Adjust as necessary.
- Verify Script: Open your script file and review the code for errors. You might find an easy fix if there’s a mistake.
- Run as Administrator: Right-click your tool or script and select “Run as administrator” to ensure it has the permissions it needs.
Tool Not Responding
Sometimes, the tool itself may not respond as expected:
- Outdated Software: Your tool might need an update to work correctly with the latest Windows version.
- Compatibility Issues: It’s possible that the program won’t work perfectly with Windows 11 or the most recent versions.
Solution:
- Update the Tool: Check the tool’s website or settings and install any available updates.
- Reinstall: Try removing and then reinstalling the tool if updating doesn’t work. This can fix problems with corruption or compatibility.
Window Not Staying On Top
If the window you want to keep on top isn’t staying put:
- Application-Specific Issues: Some applications may override the always-on-top setting due to their design or settings.
- System Settings: Occasionally, system settings or other software might interfere with your tool.
Solution:
- Look into the application settings you’re trying to manage. There might be options related to window behavior.
- Make sure that the operation of your tool is not hampered by any system utilities or other applications.
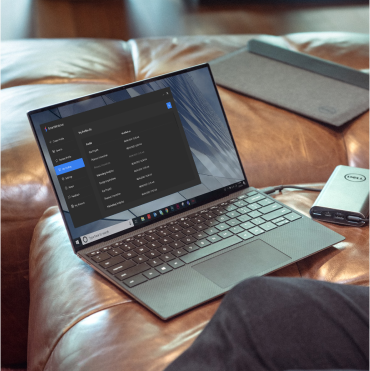
SmartWindows
Restore Browser Tabs with SmartWindows. It maintains an active tab history and restores browser size as well as display position on one screen or many.
How Can You Use Smart Windows to Keep Your Window on Top?
Smart Windows has got you covered if you want a simple way to keep certain windows on top. Using only a few clicks, you can preserve your window preferences using this useful utility. You can make and store numerous profiles using Smart Windows, each having a top-level window of its own. Whether you’re switching from work to study or moving into entertainment mode, Smart Windows makes it easy to jump between your favorite setups quickly. Keeping your workspace organized and efficient is key to maximizing time and effort savings.