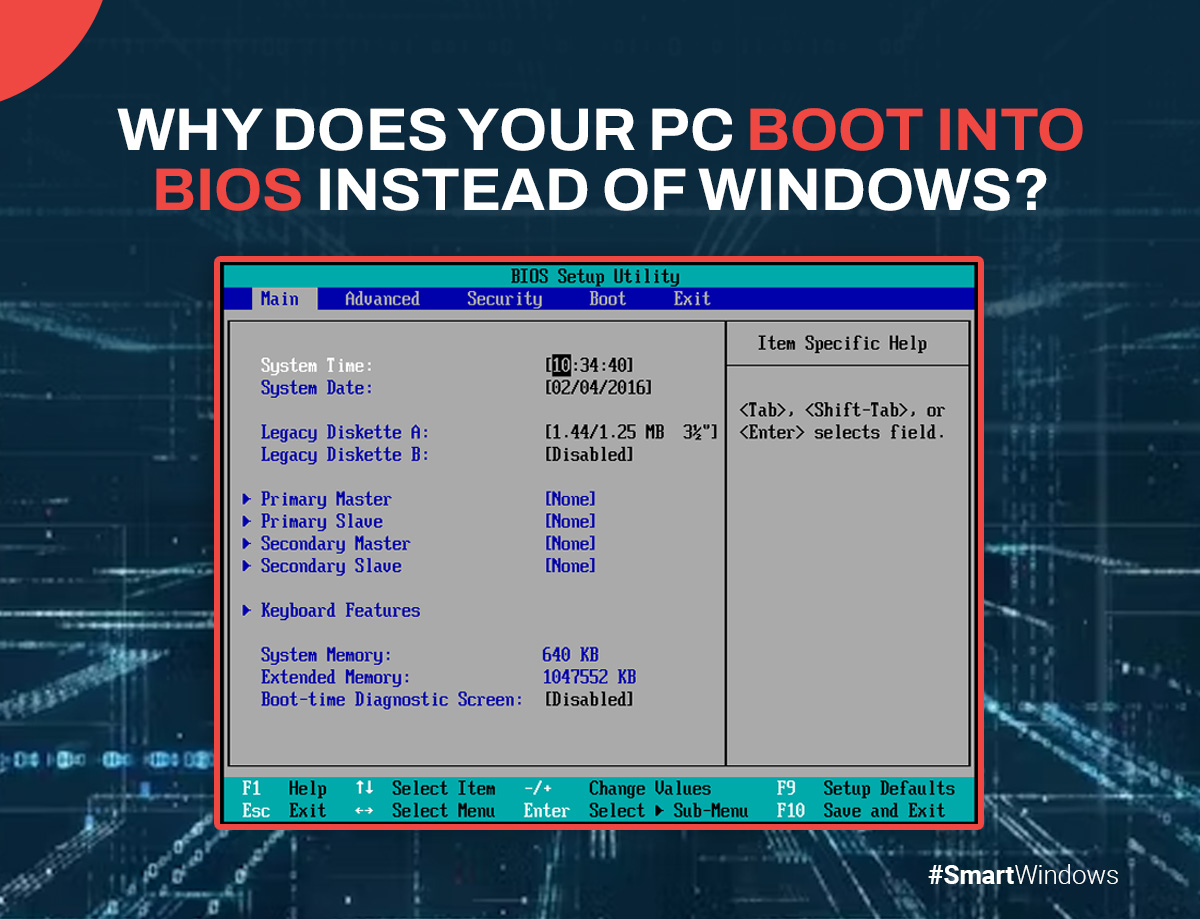
Why does your PC boot into BIOS instead of Windows

how to boot into bios

It can be quite frustrating when you boot your PC only for it to boot to the BIOS and not to Windows. Windows users have complained about this issue. So, what should one do if their computer keeps booting to the BIOS in Windows?

It can happen due to numerous reasons, such as having the boot key pressed, running an outdated BIOS, a misconfigured boot sequence, or a CMOS battery issue.

Regardless of the reason, it can be a frustrating experience. But we have your back! We have compiled a guide that can help you overcome this issue.

Why does your PC boot into BIOS instead of Windows?

If your PC boots every time to the BIOS instead of Windows, then it means that there is an issue with hardware connectivity or your CMOS battery needs to be replaced, among other issues.

But you can try out some of the following fixes to resolve this issue.

Disconnect all the peripherals 

If you have removed or added hardware to your PC, or if they are not connected properly, then this can cause your PC to boot to the BIOS.

You can fix this issue by disconnecting all the peripherals, for example, the keyboard, hard drive, and mouse. After that, try rebooting the PC and checking whether or not the issue persists.

Moreover, you have to discharge the static electricity by pressing the power button down for 30 seconds. Afterward, reboot the device and check if the issue is fixed or not.

Do a quick restart from the BIOS.

Another simple fix you can implement is to do a quick restart from the BIOS, which may bypass this issue. So, start by saving the changes and exiting the BIOS. After that your device will restart and will boot into Windows.

However, this won’t resolve the issue permanently. You have to restart Windows every time through the BIOS, which can be annoying at times.

Check whether your boot key isn’t pressed down

Users have to press a specific key during booting to enter the BIOS. Different manufacturers allocate different keys on the keyboard to access the BIOS. There is a high possibility that this key might be stuck and be constantly pressed down, signaling the PC to boot into the BIOS.

To fix this, ensure that your BIOS key isn’t pressed all the time. If a lot of dust is accumulated under or around the boot key, clean it so that it doesn’t keep your boot pressed down.

Check your boot sequence.

When your device searches for bootable data in a specific order, this order is called a boot sequence. So, it’s an ideal thing to keep the drive containing your OS on top of the sequence, especially if you have multiple storage devices connected.

By keeping this device on top, your device will find the bootable data and boot your operating system quickly.

Run Windows repair

When a computer automatically boots into the BIOS, you need to create a bootable USB or CD/DVD to run Windows Repair. After creating a bootable device, simply boot the PC from this device.

Afterward, enter WinRE and then click on Troubleshoot. From there, navigate to Advanced Options and find and click on Start Repair. Next, just follow the instructions on the screen to complete the repair.

Disable Fast Startup

The Fast Startup feature in Windows is built into the OS that hibernates the system and makes the booting processing faster. Although it is a quick fix that allows users to get back to work quickly, it can cause some annoying issues. But you can disable it through the BIOS. Go to your system manufacturer’s website and read the instructions on turning off Fast Startup from the BIOS.

Update your BIOS.

One of the most neglected causes that doesn’t allow you to boot directly into Windows is an outdated BIOS. Updating your BIOS, however, can fix the problem in discussion. You can do so easily by copying the BIOS file onto a USB and updating the BIOS on it.

Replace or reinsert your CMOS battery.

A CMOS battery powers the firmware of the BIOS on a system. One of the reasons why you aren’t able to boot directly into the window is that your CMOS battery isn’t inserted properly or has been damaged.

Often, just reinserting the battery can fix the issue; however, this can change a few settings on your system. In case your battery is dead, you have to replace it altogether.

SmartWindows

Restore Browser Tabs with SmartWindows. It maintains an active tab history and restores browser size as well as display position on one screen or many.

PC still booting into the BIOS?

Although fixing booting issues can be done through quick and simple fixes, more often than not, this issue can arise from some very serious problems. If you don’t have experience updating the BIOS or replacing a CMOS battery, we recommend that you don’t try to implement these fixes and take your PC to a service center.
How to Resolve Screenshots Not Saving in Windows 11?

why are my screenshots not saving

Does your work require you to take a lot of screenshots? If yes, then you might have faced the issue of your screenshots not saving at your desired location. This can happen due to a few reasons, most commonly a change of destination folder.

But sometimes, it can be a bit more serious than that, and you might have to dig into the Windows registry settings to set it right.

In this blog post, we will look into the reasons why your screenshots are not saving into the default Pictures folder and how you can fix that issue with a few simple fixes.

Why are my screenshots not saving in Windows 11?

A simple reason why your screenshots are not being saved in the Pictures folder is that your default folder has been changed. You can check where your screenshots are saved by right-clicking on the image and clicking on the Properties option.

But if your images are still not saving in your desired folder, then it might be that your registry files are corrupted. But if you go about fixing it without knowing what you are doing, then you can do more harm than good and might disturb other registry settings.

How can I save my screenshots in Windows 11?

If your registry files are corrupted, which is causing your screenshots to not save in your desired folder, then you can implement the following fix to resolve the issue:

  • Press Win+R to open the Run dialogue box.
  • In the dialog box, type regedit
  • Navigate to Explorer in HKCU.
  • Right-click on it and create a new DWORD (32-bit) value.
  • Rename it ScreenshotIndex.
  • Select the decimal option by double-clicking on it.
  • Enter the data value of 695.
  • Save these settings by clicking OK.
  • Navigate to the User Shell folders.
  • After that, click on the following {B7BEDE81-DF94-4682-A7D8-57A52620B86F}
  • Enter the following user profile: %USERPROFILE%\Pictures\ Screenshots
  • Save the it and reboot your PC

Here’s a bit more detail on these steps:

Before changing your registry settings, make sure to create a system restore point. Subsequently,  press the Windows + R keys to open the Run dialog box. Type regedit in the dialog box to open the Registry Editor.

Afterward, navigate to the following location:

HKEY_CURRENT_USER\Software\Microsoft\Windows\CurrentVersion\Explorer

Once you navigate to the aforementioned location, look for ScreenshotIndex. You will not find this DWORD in your registry editor. This is the reason why your screenshots aren’t being saved in the default folder. You have to create this word yourself.

Start by right-clicking on the right window pane and create a new DWORD value. Double-click on the word to modify its decimal value to 695.

The next step is to point out this word in the correct user profile settings. You can do this through the User Shell Folders entry inside the Registry Editor. Start by navigating to the following location:

HKEY_CURRENT_USER\Software\Microsoft\Windows\CurrentVersion\Explorer\User Shell Folders

In the right pane, click on the following entry:

 {B7BEDE81-DF94-4682-A7D8-57A52620B86F}

Make sure that the entry points to the following value data:

%USERPROFILE%\Pictures\Screenshots

After setting the value data, close the Registry Editor and reboot your PC. Now, try to take screenshots. You’ll see that your screenshots are saved in your desired folder.

How can you change where your screenshots are saved in Windows 11?

If you don’t want to use the default screenshot folder and want to change it, you can do it through the Registry Editor. After changing the default location through the Registry Editor, your computer will automatically start saving your screenshots to your new provided location.

SmartWindows

Restore Browser Tabs with SmartWindows. It maintains an active tab history and restores browser size as well as display position on one screen or many.

Conclusion

There you have it. With the steps mentioned in this guide, you can successfully resolve your screenshot-saving issues by just tweaking a few Registry Editor settings. But, before you change any settings in the Registry Editor, ensure that you first create a restore point. Because if the registry settings are wrongly changed, you can face serious issues with your PC.

That’s why you can save and restore your app positioning, display settings, and Registry Editor settings with SmartWindows. Smart Windows is a top-notch Windows utility tool that lets you become highly productive by allowing you to create multiple profiles for your Windows for multiple users and various tasks.

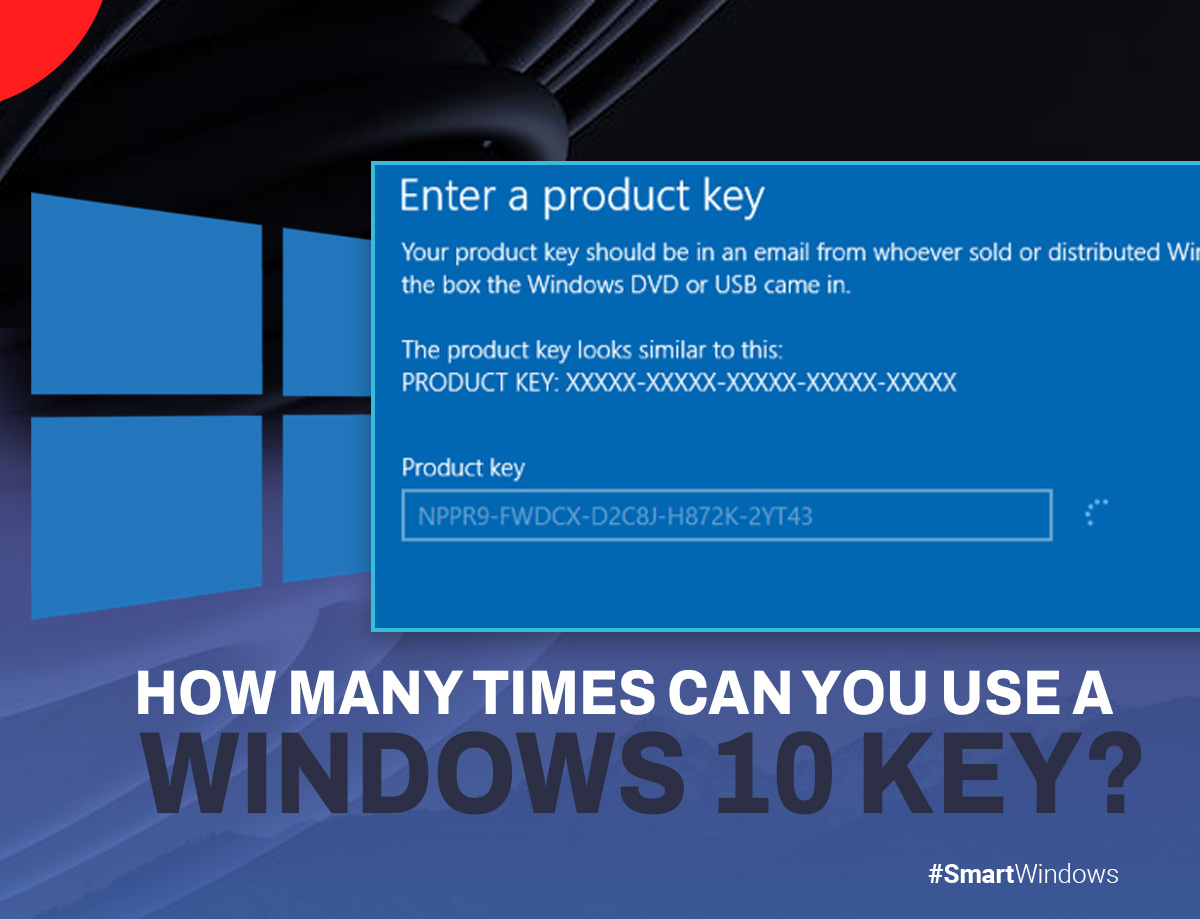
How Many Times Can You Use A Windows 10 Key?

windows 10 key

If we were to ask you what operating system you have on your PC, chances are you would say Windows. Windows 10, without a doubt,  is among the most popular operating systems in the world. However, one question that comes up regularly is how to use the product key and how many times you can use it.

The number of times you can use a product key depends on the license you have purchased. In this article, we’ll explain how you can use the product key and how you can use it multiple times.

How many times can you use a Windows 10 product key?

After purchasing Windows 10, you’ll be given a product key that is used to activate Windows. This key can be used multiple times to activate the operating system; however, the exact number of times you can use it depends upon the license you have purchased.

Let’s look in detail at what licenses you can purchase.

What licenses do you need to activate Windows 10?

The two licenses that you need to activate Windows 10 are the OEM license and the retail license.

OEM License

An OEM license is typically associated with specific hardware, such as laptops and desktops, and therefore cannot be transferred to another device. So, you can only use that product key for that specific device with a pre-installed OEM license.

Retail License

Retail licenses are not tied to any specific hardware. Retail licenses can be used for multiple devices. So, you can use the product key on up to 10 devices if you buy Windows 10 with a retail license.

Can you use the same Windows product key twice?

As we discussed earlier, reusing a Windows 10 product key entirely depends on the license. If your Windows 10 has an OEM license, then you can only use the product key once. However, if you have a retail license, you can use it up to 10 times.

Can you upgrade your Windows 10 license?

You can upgrade your Windows 10 license. If you have an OEM license, then you can buy a retail license from Microsoft or a third-party vendor. This will allow you to use your product key multiple times.

SmartWindows

Restore Browser Tabs with SmartWindows. It maintains an active tab history and restores browser size as well as display position on one screen or many.

Conclusion

You can reuse a Windows 10 product key multiple times with a Retail license. However, if you have an OEM license, you cannot use it more than once and also cannot transfer it to another device.

Therefore, if you want to reuse your product key for multiple devices, you need to get the right Windows license.

FAQs

Can you reactivate Windows 10 with the same key?

Yes. if you have uninstalled and reinstalled it on the same computer, you can reactivate Windows 10 with the same key. The key will be automatically reactivated.

However, if you have an OEM license and use the key on another computer, Microsoft will detect this and block the key from being used again.

What happens if you don’t activate Windows 10?

You can use Windows 10 without ever activating it, however, you won’t be able to use certain features, such as multiple desktops, Task View, or the Windows Store.

Moreover, you won’t be able to personalize your lock screen or change the themes, and your notifications will also be disabled.

For More Related Information: how to reopen closed tabs | appdata | snipping tool shortcut | windows 10 key 

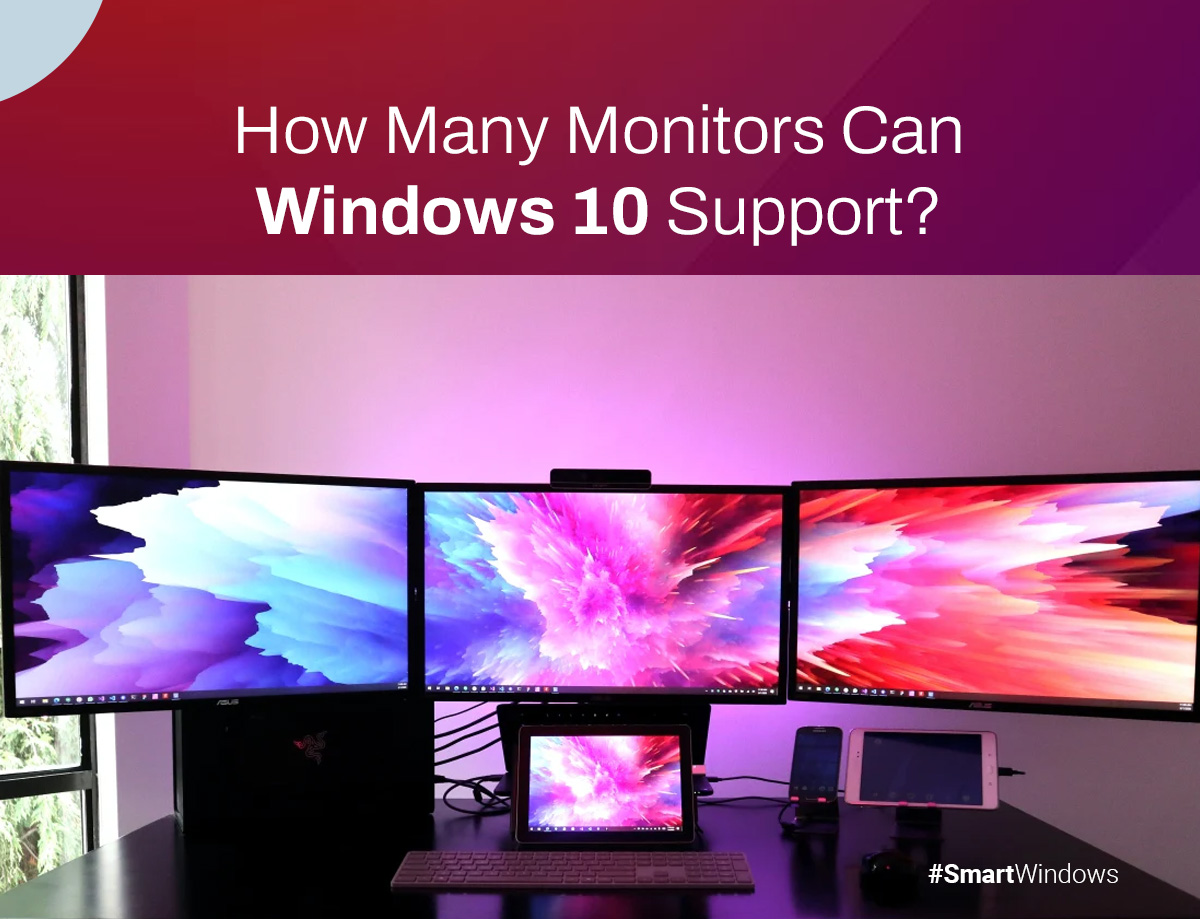
How Many Monitors Can Windows 10 Support?

how many monitors can my pc support

Do you need to attach more monitors to your PC for work, study, or even gaming? Also, do you run Windows 10 on your PC and find it difficult to effectively set up the monitors running the same OS? 

In this guide, we will be suggesting fixes that can help you to fix these issues.

How many monitors can Windows 10 support?

Windows 10 supports a maximum resolution of 5120 x 2880. So you can set up, in addition to your primary monitor, up to ten 1080p and four 4K monitors. However, there are some issues that can prevent you from connecting additional monitors to your PC.

Monitor limit set

Windows 10 is able to support ten additional monitors due to the default setting in Applet, however, some users can only attach up to three monitors. This is because there is a set limit by the Display Properties Applet, which doesn’t allow the configuration of monitors exceeding four or more.

Exceeded graphic card limit

Another reason why your Windows 10 might not support additional monitors is due to your PC’s graphics card. Usually, typical graphics cards support two additional monitors. When the limit of the graphics card exceeds, it becomes impossible to configure additional monitors.

Compatibility issues

Sometimes a monitor isn’t compatible with Windows 10. If the Windows 10 OS doesn’t recognize a monitor it will not be able to support any external monitors.

Limited USB and HDMI ports

If your PC has a limited number of USB and HDMI ports and all are used up, then you cannot attach any other external monitors unless an external source is attached to them.

Graphic cards and motherboard compatibility issues

Usually, graphic cards can support up to two monitors, but it is still possible that your graphics card isn’t compatible with your motherboard. So, you have to update the motherboard or the graphics card.

How can you fix the Windows 10 support issue?

To fix these issues, you can follow the following steps:

Check the maximum configurable limit

By changing the default settings of the Display Properties Applet in Windows 10, you can attach multiple monitors. Also, you can change the limit on how many monitors you want to attach. Here’s how:

  • Go to the Control Panel.
  • Search for Display Properties Applet
  • Click on the Customize button.
  • Configure more than ten monitors by customizing the Display Properties Applet
  • Turn off your PC and attach the additional monitors.
  • Turn on your PC, and your monitors will be set up.

Check the graphic card limit.

If you cannot configure your computer with more than four external monitors, then check the limit of monitors a graphic card can support. Usually, it depends on the model of the graphic card, but a graphic card usually supports up to two monitors.

You can check the limit of your graphic card by checking the settings of your graphic card.

Check the compatibility of your monitors with Windows 10.

Another thing you need to check before attaching a monitor is whether or not it is compatible with Windows 10. Check with the manufacturing company to see if it is compatible with Windows 10. Your screen will not boot if you don’t check its compatibility.

Check the total number of USB and HDMI ports.

Before you attach your monitors to your PC, check how many USB and HDMI ports are on the motherboard. If your computer has only a few USB ports, it can only attach and support only those monitors attached to them. You can attach an additional CPU or a USB hub to attach additional monitors.

Use a graphic card that is compatible with the motherboard.

Last but not least, you can try changing your graphics card to one that is compatible with your motherboard. 

Set up your monitors with SmartWindows!

Here you have it! Windows 10 can support up to 10 monitors by just customizing the Display Properties applet. Moreover, you should check the compatibility of your graphics card with both Windows 10 and your PC.

Also, check the USB and HDMI ports on your motherboard. This will also give you an idea of how many monitors you can attach to your PC.

If you want to boost your productivity, you can use SmartWindows! SmartWindows is a Windows utility app that lets you improve multi-screen productivity by prioritizing app positioning and snap layouts on up to six displays.

SmartWindows

Restore Browser Tabs with SmartWindows. It maintains an active tab history and restores browser size as well as display position on one screen or many.

FAQs

Is it possible to attach multiple monitors to a laptop?

Yes. You can attach multiple monitors to a laptop that has Windows 10 installed. Moreover, even if the laptop has a single USB or HDMI port, a setup of two or more monitors However, to save the laptop from any extra load, it is recommended to use a USB hub or additional GPUs.

Can you use HDMI cables to attach monitors to a PC?

Yes. It is necessary to use HDMI cables to attach monitors to a PC. Otherwise, the PC will not be able to detect the additional monitors.

Can Windows 10 support seven monitors or more?

Windows 10 can support up to ten monitors via the Display Applet. Therefore, it is possible to attach seven monitors or more to a PC.

How to Free Up RAM on Your Computer and Windows 11?

In the fast-paced world of technology, the need for optimal computer performance is more critical than ever. One key aspect that significantly influences your system’s speed and responsiveness is the Random Access Memory (RAM). In this blog post, we’ll delve into the importance of freeing up RAM and provide practical tips for enhancing your computer’s efficiency. 

Why is it important to free up RAM?

Random Access Memory (RAM) is like the workspace of your computer, where it temporarily stores data for active applications. When your RAM is overloaded, your system may slow down, leading to reduced performance and responsiveness. By freeing up RAM, you can ensure that your computer operates smoothly and efficiently, allowing you to tackle tasks seamlessly. 

5 Ways to Free up RAM on Any Computer

Restart Your Computer

A simple yet effective solution is to restart your computer regularly. This closes all running programs, freeing up RAM and giving your system a fresh start. Make it a habit to reboot your computer at least once a week to maintain optimal performance. 

Update Your Software

Keeping your operating system and software up to date is crucial for performance improvements. Software updates often include bug fixes and optimizations that can enhance the efficiency of your applications, ultimately freeing up valuable RAM. 

Clear Cache

Over time, cached files can accumulate on your computer, consuming precious RAM. Clearing your cache regularly, especially in web browsers, can help free up memory. This simple step can be performed in browser settings, giving your system a memory boost. 

Change Your Browser

Some web browsers are more resource-intensive than others. If you find your current browser is putting a strain on your computer’s RAM, consider switching to a lighter alternative. This can significantly improve your browsing experience and free up valuable memory. 

Remove Heavy Browser Extensions

Browser extensions can be convenient, but they can also contribute to RAM usage. Evaluate your installed extensions and remove any that you don’t regularly use or that are known to be resource intensive. This can lead to a noticeable reduction in RAM usage. 

4 Steps to Free up RAM on Windows 11

Disable Startup Programs You Don’t Need

Many programs launch automatically when you start your computer, consuming RAM from the get-go. Disable unnecessary startup programs to reduce the strain on your system memory. You can use the Task Manager to keep a check on programs that use a lot of RAM and stop those that are no longer needed. 

To disable these programs, you can: 

  • Open the Task Manager by pressing Ctrl + Alt + Esc
  • Choose the “Startups apps” tab from the Task Manager 
  • Click on “Startup Impact” to organize the programs from high to low usage 
  • Select apps you want to disable 
  • Click on the option “Disable” in the upper corner 

Stop Running Background Apps

Windows 11 may have background apps running that you’re not aware of. Check and close any unnecessary background processes to free up RAM and improve system performance. You can use your computer for years without realizing that these apps can take up a lot of RAM. These apps can quickly exhaust your memory, battery, and data bandwidth.  

To stop these background apps from eating up your RAM, you can follow these next steps: 

  • Go to your computer’s settings 
  • Click on “Apps”  
  • Click on “Installed apps” 
  • Scroll to the app you want to disable and click the three dots on the right 
  • Click on “Advanced Options” 
  • Under the option “Let this app run in the background,” select “Never” 

By following these steps, you can stop background apps from consuming additional RAM and keep your computer running smoothly.  

Reduce Visual Effects

Windows 11 comes with various visual effects that enhance the user interface but can also demand more RAM. Adjusting or disabling these effects can help optimize your system’s memory usage. You can turn off the animations for apps and icons that use storage for unnecessary effects. 

To access your computer’s visual effects: 

  • Open the computer settings 
  • Click on the “Accessibility Tab” 
  • Click “Visual effects.” 
  • Next to “Animation effects” toggle off the switch 
  • Also, toggle off the switch next to “Transparency effects” 

Track Memory

Use the Task Manager to monitor your computer’s memory usage. Identify processes that are consuming a significant amount of RAM and, if possible, close or limit their impact on your system.  

You can access the Task Manager, and use it to close additional programs, by following the below mentioned steps: 

  • Press and hold the Ctrl + Alt + Del keys to open the task manager 
  • Go to the “Performance” tab 
  • Check the memory column to view how much space they are taking 

You can now see which of the programs on your computer are taking up the most time and space on your computer and take timely action. 

SmartWindows

Restore Browser Tabs with SmartWindows. It maintains an active tab history and restores browser size as well as display position on one screen or many.

Conclusion

Freeing up RAM is a crucial step in ensuring your computer operates at its best. By following the outlined tips, you can optimize your system’s performance, resulting in a faster, more responsive computing experience. Whether you’re on a Windows 11 machine or any other operating system, incorporating these practices into your routine will help keep your computer running smoothly for the long haul.

How to Add Snipping Tool to Taskbar Windows 11?

snipping tool shortcut

Bloggers, artists, and anyone who wants or intends to take a screenshot on a Windows computer might have used the Snipping Tool once. A handy utility tool built into the Windows ecosystem, Snipping Tool is the go-to app for anyone who works with a lot of media.

But with the recent feature update in Windows 11, the Snipping Tool has now been replaced with the Snip and Sketch app. However, if you are someone who’s from the old school and prefer to use the good old Snipping Tool in Windows 11, you can do so by following the steps outlined in this guide.

Where is the Snipping Tool located in Windows 11?

Snipping Tool is a well-known tool that is found in both Windows 10 and 11. You can access this tool by searching for it in the search box in the taskbar and clicking on the respective search result. Afterward, you can use the options to capture the screen as per your requirements.

How do I add the Snipping Tool to the Windows 11 taskbar?

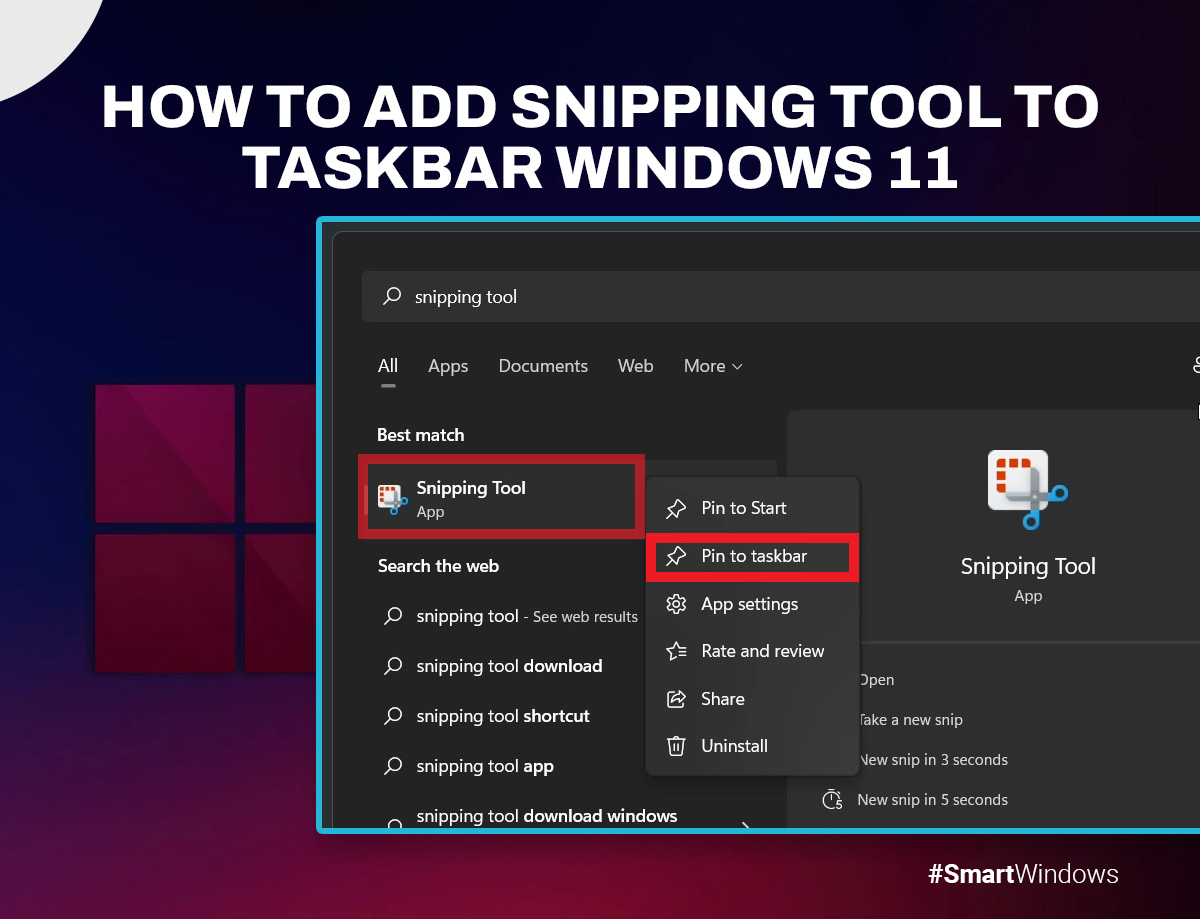
To pin the Snipping Tool to the taskbar in Windows 11, start by searching “Snipping Tool” in the Windows Search box.

In the search results, you will see the Snipping Tool icon. Right-click on it and then select the option “Pin the taskbar.” Afterward, you will see the Snipping Tool icon appear in the taskbar.

However, if the Snipping Tool doesn’t appear in the search results, you don’t have to worry. There’s another way you can pin a Snipping Tool to the taskbar.

Open the File Explorer in Windows 10/11 and navigate to the following path:

C:\WINDOWS\system32

Find the file SnippingTool.exe, right-click on it, and select Pin to taskbar. After you have done this, you will see the Snipping Tool icon in the taskbar.

SmartWindows

Restore Browser Tabs with SmartWindows. It maintains an active tab history and restores browser size as well as display position on one screen or many.

Can you create a shortcut for the Snipping Tool in Windows 11?

You cannot create a shortcut for Snipping Tool in Windows 10 or 11. However, you can use keyboard shortcuts to take screenshots using the Snipping Tool. Press Win + Shift + S to take a screenshot.

Conclusion

If you are someone who uses a snipping tool a lot, then you probably need to have it handy at all times. However, if others use your computer, then they can change the positioning of your apps, causing you to restore your preferences. But you can use SmartWindows to save yourself the headache.

SmartWindows is a top-tier Windows utility app that allows you to save and restore your display settings and app positioning on single and multiple screens with a single click. Create unlimited profiles and save multiple desktops for work and entertainment.

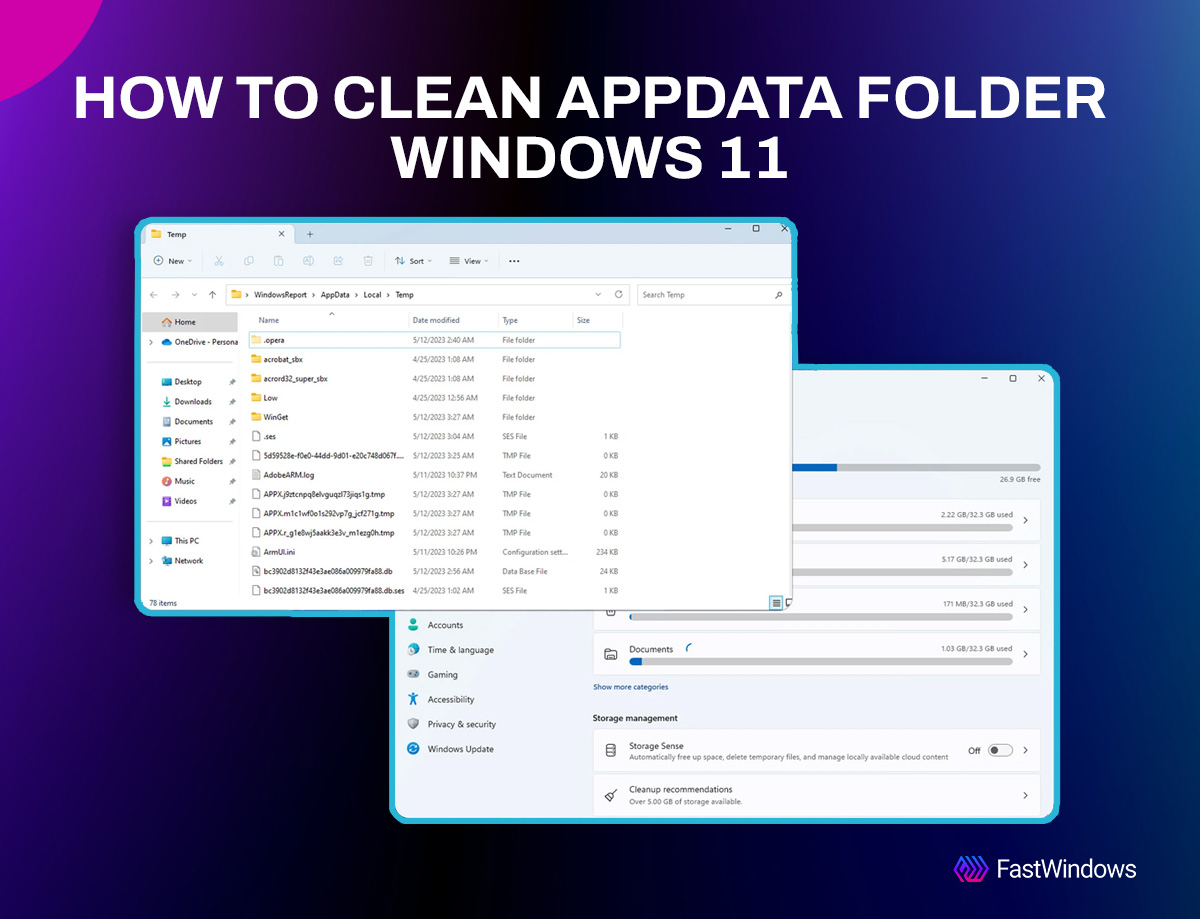
How to Clean AppData Folder in Windows 11?

appdata folder windows 11

Are you experiencing a slow PC? Then this could be due to your AppData folder taking a lot of storage space on your PC. Here you can know about “appdata folder windows 11”.

So, if you don’t want to compromise on your PC’s performance, you have to clean your AppData folder. If you are looking for ways to clean your AppData folder in Windows 11 then this guide has all that you need to know about cleaning your AppData folder.

But first, let’s understand what the AppData folder is and how cleaning it can affect your computer.

What is the AppData folder?

The AppData folder is where all the app data and settings of all applications and programs are stored.  This folder can be found on the C drive in every Windows computer. C:\Users\User Name\AppData is the path of this folder.

As it is hidden by default in Windows, you first have to make the AppData folder visible. You can unhide this folder by going to View > Show and select Hidden items on Windows 11. This will make the Windows show all the hidden files and folders.

Why does the AppData folder take up a lot of space on your computer?

When you use your PC for a long time, the AppData folder can take a lot of GBs on your C drive. If there are too many files in C drive, then it can slow down your system and cause performance issues.

However, it is not safe to jump the gun and delete all the files in the AppData manually as it can cause serious performance issues. The files in the AppData folder are important for the apps that are installed on your PC. If you delete these files then your apps might not work properly, and you will also lose user information and all other saved data.

How to delete the AppData Folder in Windows 11?

Here are 3 ways you can delete temporary files from the AppData folders in Windows 11.

1. Manually delete the files

You can manually delete temporary files in the AppData folder. Temporary files of the app are saved in a folder called Temp. Here’s how you can delete these files:

  • Open Run by pressing Win + R
  • In the Run dialogue, type %LocalAppData%\Temp and press Enter. With this, you can navigate to the Temp folder in the AppData folder. There you will find some temporary files which are safe to delete
  • Press Ctrl + A to select all temporary files. Then delete the files by pressing the delete button or by right-clicking on the selected files and selecting the delete option
  • If you want to permanently delete the temporary files press Shift after right-clicking and selecting all the files, and then click on the Delete option. After you do it, a pop-up will appear saying “Are you sure you want to permanently delete these XYZ items.” Click Yes to complete the process
  • To permanently delete these files from the Recycle Bin, just right-click on it and click on “Empty Recycle Bin”.

2. Through the settings app

Windows 11 has some built-in features for users to delete temporary files in the AppData folders. Storage is a feature in the settings app that lets you safely delete temporary files.

  • Press Win + I to open the settings apps
  • Navigate to System > Storage 
  • Click on Temporary files
  • You have to make sure that the Temporary Files option is selected. Click on the Remove Files button. This will clean up the temporary files in the AppData folder. 

3. Use the Disk Cleanup feature

Disk Cleanup is another built-in Windows feature that can help you to remove temporary files from your computer. Here’s how you can use this tool:

  • Into the search box, Type cleanup and select Disk cleanup from the result to open this tool
  • Select drive C and click OK to start the scan for junk and temporary files
  • In the Disk cleanup interface, select Temporary files to remove them. Moreover, you can also select junk files to delete.
  • After the process ends, click OK.

It doesn’t matter what way you use to clear your AppData folder, you will find more space in your C drive after you are done.

Why should you clean your AppData folder?

Cleaning your AppData folder can help you improve your PC’s performance. Temporary files can cause your PC to slow down, or at least, to lag. But deleting the contents manually can also affect the performance of your apps. 

If you don’t want to delete AppData folders, but don’t want to compromise on your PC’s performance, then you can use FastWindows.

FastWindows is a top-tier windows utility app that allows you to allocate your PC’s resources effectively so that you get optimal performance from your PC.

Simply just download and install FastWindows, launch it, and the app will automatically assign priority to the apps and games you use the most. If you want to personalize your app prioritization, then you can do that as well with FastWindows.

FastWindows

Boost productivity and system performance with FastWindows. Organize your apps and games and simplify your workflows with FastWindows’ automatic app prioritization

Conclusion

Given how many apps we use these days on our PC, it shouldn’t come as a surprise when our PCs become slower. However, you can clean your AppData folder to improve your PC’s performance with all the ways listed in this guide.

How Can You Stop Windows From Automatically Resizing in Windows 11?

turn off automatic window resizing windows 11

As a Windows user, you might have experienced turn off automatic window resizing windows 11 when you split your screen in two and the other resizes automatically. This can be a little frustrating as it can create undue hindrance in your work, study, or gaming experience.

If you are worried about it, then we have prepared a small guide that can help you overcome this.

How do I stop Windows from automatically resizing in Windows 11?

Snap layouts is a great feature that allows you to place various windows at different locations automatically. It is extremely helpful for multitasking.

But it can get in the way of your productivity when you try to resize the window, to adjust the font or something else, and the next adjacent window resizes automatically, causing you to adjust your windows every time you adjust one or the other.

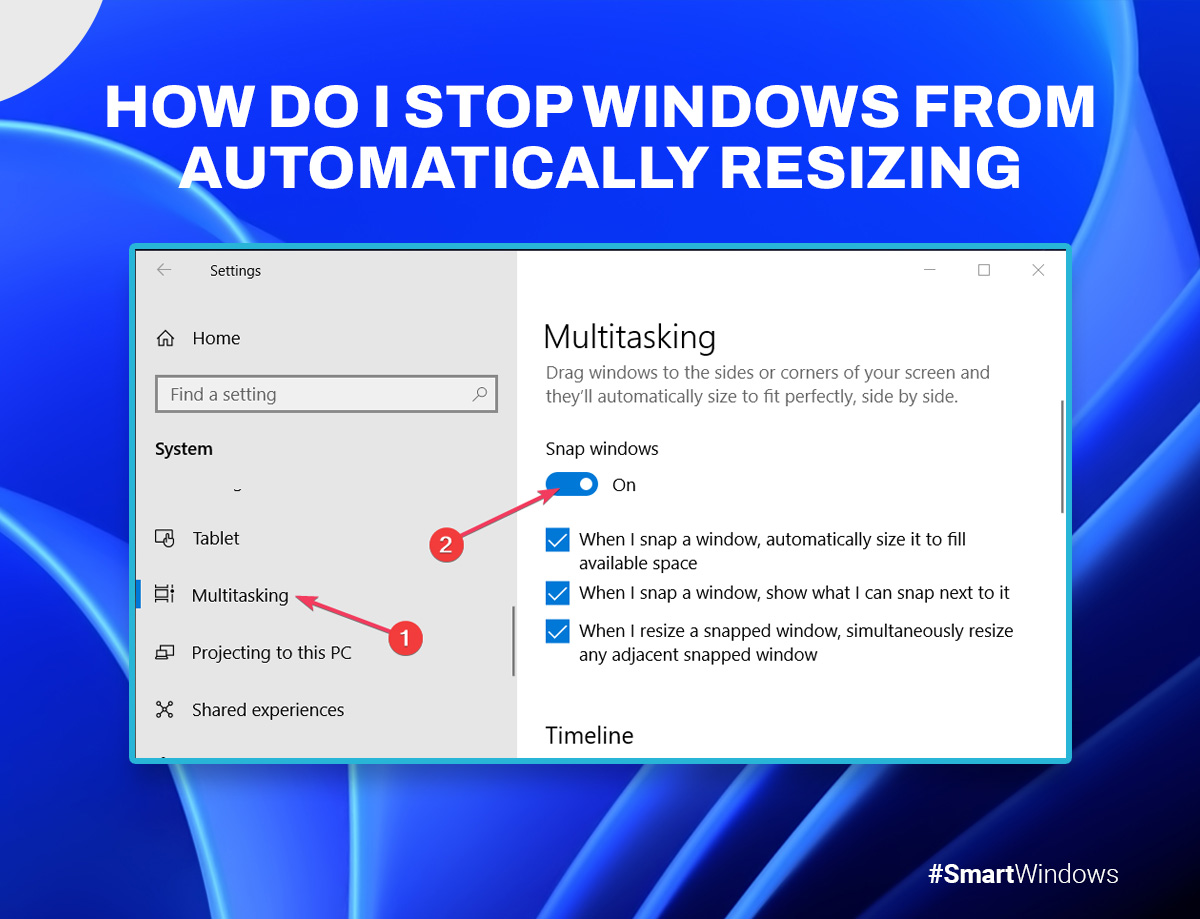
If you want to disable the automatic resizing of windows in Windows 11, you can do so in the following way:

  • Press Win+I to open windows settings
  • Navigate to the System tab
  • Click on the Multitasking option
  • Locate the settings “Adjust Windows,” and turn it off

How can you stop Windows from snapping Windows?

You can stop Windows from snapping windows by disabling the Snap Window feature. Here’s what you can do:

  • Press the Win+I keys to open the Windows Settings
  • From the Windows Settings, navigate to System > Multitasking
  • From there, switch the toggle off called Snap windows

How can you save your resizing preferences in Windows 11?

If you want to save your resized window preferences in Windows 11 then you have no option but to use third-party software. One of the best windows utility apps that you can use to save your windows size preferences is SmartWindows.

SmartWindows is a top-notch Windows utility app that lets you save and restore your preset display arrangements and app positions with just a click. With SmartWindows, you can create unlimited profiles for your work, study, and entertainment. Whether you use a single screen or have a multi-screen setup, SmartWindows can remember every screen size and app position efficiently.

SmartWindows

Restore Browser Tabs with SmartWindows. It maintains an active tab history and restores browser size as well as display position on one screen or many.

Conclusion

With these simple and quick fixes, we are sure that you won’t face any resizing issues. You can save your display and app positioning with SmartWindows and don’t have to worry about your turn off automatic window resizing windows 11.

For More Related Information: how to reopen closed tabs | appdata | snipping tool shortcut | windows 10 key 

Why is Chrome so slow on Windows 11?

Windows 11 improves considerably on the previous iterations of Windows. However, users have come to experience slow browsing on Chrome after upgrading to Windows 11.

If you are one of those not happy with a laggy Chrome browsing experience, we have got you covered. We will share a few useful tips to fix slow browsing issues on Windows 11, in this guide.

Reasons for Chrome becoming so slow on Windows 11?

There can be a myriad number of reasons, but the most common one is not upgrading to the latest version of Chrome. Secondly, there can be cache blocking going on that can make browsing on Chrome extremely slow.

Moreover, some other programs or applications might be using too much of your PC’s resources, causing Chrome to slow down.

7 Tips to Fix Slow Chrome Browsing in Windows 11

Here are a few fixes that you can try to make your Chrome browsing experience a breeze in Windows 11.

1. Restart your computer or Chrome

The first fix is an easy one. Just restart your computer. If this doesn’t help, you can also restart your browser.

For restarting Chrome, type chrome://restart in the address bar. This will restart your browser quickly.

2. Close all unused tabs

Google Chrome is famous for using a lot of resources, especially when you open a lot of tabs. Too many tabs can eat a lot of your RAM resources because each tab opens its own process,  which can lead to your browser getting slow.

You can check how many resources your Chrome browser has through the Task Manager. Press Ctrl + Alt + Delete to open the Task Manager. Then find Chrome under the apps section and check how much resources it is consuming in the Memory section on the right.

As you can see in the image, Google Chrome is using a lot of memory. Sometimes, if you have a high-end PC with sufficient RAM, then your Chrome window might not slow down. However, if you don’t have a lot of PC resources and your Chrome gets slow, then close unnecessary tabs and see if it fixes the issues.

3. Clear browsing cache and cookies

Accumulated cached data and cookies can also slow down your browser if you have been using Chrome for a long time. You can resolve this issue by clearing the browsing cache and cookies. 

  • Press Ctrl + Shift + Delete to go to the clear browsing page
  • The next step is to check the Cache and Cookies boxes
  • Click “Clear Data” to clear the caches and cookies
4. Disable unused Chrome extensions

Your browser might be running slow because of unnecessary extensions. Some extensions can conflict with other programs, hence slowing down your browser. You can easily disable such extensions by:

  • Start by typing chrome://extensions in the address bar
  • From the Extensions page, choose an extension you want to disable. We are using Kaspersky Protection as an example.
  • Turn off the blue toggle button on the extension.
  • You can turn off as many extensions as you want. After that, check whether your Google Chrome is working normally.
5. Disable hardware acceleration

If you are still facing slow Chrome then this next tip can help you. Disabling hardware acceleration is another tip that can fix slow Chrome issues. Hardware acceleration is used to reduce the workload on the CPU by assigning computing tasks to other specialized hardware. But your browser can get slowed down because of this feature.

Here’s how you can disable it:

  • First, find the Settings option.
  • From the Settings page, navigate to the System section.
  • Find the toggle “Use hardware acceleration when available” and disable it.
  • After disabling it, restart your Chrome browser and see if it’s slow or not.
6. Update Chrome version

Another reason for your Chrome browser getting slow might be that you are running an old version of the browser that doesn’t support some plug-ins and features. Google, with the new Chromium built, releases regular monthly updates. To avoid your browser getting slow, keep it up to date.

  • Open settings and navigate to “About Chrome”
  • Check the version of your browser, and update it if necessary
  • After installing the latest version, see if your browser is working normally or not.
7. Use third-party software

If your browser is still slow, then you can always turn to third-party software to effectively allocate PC resources to Chrome. One such software is FastWindows. FastWindows is a Windows utility app that can supercharge your PC’s performance. With FastWindows, you can allocate your PC’s resources to Chrome to ensure that it doesn’t slow down.

Here’s how you can use FastWindows to boost your browser’s performance:

  • Download and install FastWindows.
  • Once you launch the application, a menu will open up
  • If you enable the “Auto Manage” toggle in the menu, then FastWindows will automatically assign the highest priority to apps that are in use.
  • You can assign priority manually to apps through the “Manage Apps” section. Also, you can add other apps and assign them their respective priorities.

FastWindows

Boost productivity and system performance with FastWindows. Organize your apps and games and simplify your workflows with FastWindows’ automatic app prioritization

Conclusion

Chrome on Windows 11 can get slow due to a number of reasons. However, you can restart your browser to resolve simple issues. Also, for more serious issues, you can either clear your caches, disable hardware acceleration, or use third-party software, like FastWindows, to fix this problem.

FAQs

How Can I Make Chrome Run Faster in Windows 11?

  • Close unnecessary tabs
  • Update Chrome
  • Turn off any unwanted processes
  • Configure your preload settings

How do I reduce RAM Usage in Chrome Windows 11?

To reduce RAM usage in Chrome Windows 11, follow the following steps:

  • Open Chrome and type the following into the address bar:

chrome://flags/#high-efficiency-mode-available

  • Next, type the following in the address bar:

chrome://settings/performance

  •  From the Performance menu, toggle the Memory Saver switch to enable it
  • Restart your browser for the change to take effect

How to stop games minimizing dual monitors windows 11

games keep minimizing windows 11

Here we are going to tell you about “games keep minimizing windows 11“. Gamers like to be completely immersed when they are gaming. They use a variety of equipment, such as headphones, a gaming mouse, and gaming chairs, to achieve this. Dual-monitor setups are another thing that gamers use to totally immerse themselves in the games they play.

However, many gamers experience their game, which can ruin their experience. Fortunately, we have compiled a list of few fixes that you can implement to resolve these issues.

How can you stop games from minimizing on dual monitors?

Here’s how you can stop games from minimizing on dual monitors or games keep minimizing windows 11:

  1. Adjust the game’s Windows settings

You troubleshoot the problem by adjusting the game window setting if your game continues to minimize while using a secondary monitor. Here’s what you can do:

  • Start by opening the game’s Windows settings
  • Go to the Functions tab
  • From the “Window Management” section select prevent window deactivation
  • Select a key combination
  • Save the changes you made
  • Use the keys to switch freely between the monitors
  1. Utilize borderless windows

A borderless window combines both the fullscreen and windowed modes to give you a borderless display. By using a windowless display, gamers can interact with the second screen while gaming on the other.

As a gamer, here’s how you can utilize a borderless window:

  • In the game settings, turn on the borderless window function.
  • Next, check the aspect ratio settings. If the aspect ratio was changed when you turned on the borderless function, then change it back to what it was before.
  • After turning on the borderless function and aspect ratio settings, perform a few clicks on the second monitor to check if the functionality is performing as intended.
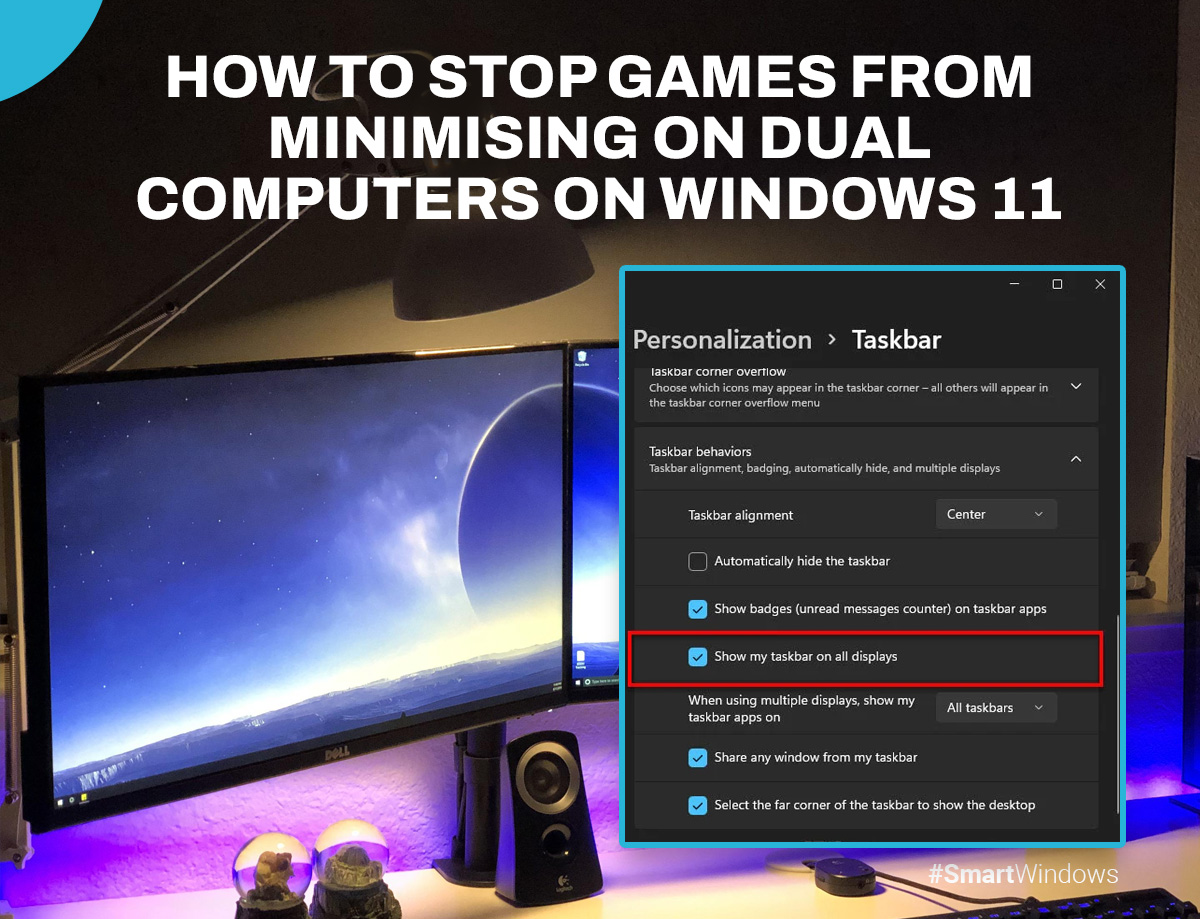
  1. Taskbar settings

Changing the taskbar setting is another way you can fix game minimization issues on multi-monitor setups.

  • Open the settings by right-clicking on the taskbar
  • Find and enable the toggle switch for Show taskbar on the All Displays. 
  • Subsequently, restart the monitors
  1. Display extension settings

You can also fix the game minimization issues through the display extension settings by following these steps.

  • If the game is running, close it
  • Under the Settings tab, locate System
  • Find the Multiple-Displays option in the System tab
  • Allow the device to find both monitors
  • Select the extend option from the menu
  • Save and restart the game.
  1. Check for system updates

More often than not, the issue can be with your device’s operating system not upgraded to the latest version. If you have tried all the other fixes and none of them have worked, check your system for any pending updates.

  • Open settings using the Win+I keys.
  • Click on Update and Security.
  • Select the Check for Update option.
  • If there are any pending updates, install them and run the game.
  1. Close background applications

Applications that remain running in the background can consume vital CPU power. This can cause the computer to minimize the game as other tasks get reprioritized. This happens if you use your computer for multiple tasks such as work and study.

Close all unnecessary applications through the task manager. Press CTRL + ALT + Delete to access the task manager.

  1. Adjust CPU priority

Another way you can fix the minimization issue is by adjusting the CPU priority to be focused on the game. This method alters the computer’s standard prioritization and allows the game to continue running smoothly.

Here’s how you can adjust your CPU’s priority:

  1. Launch your game
  2. Minimize the window using Ctrl + Alt + Delete
  3. Launch the task manager and find the details
  4. Right-click on the game to open the menu
  5. Select the option “Set Priority”
  6. In the pop-out menu, change the priority to high from normal
  7. Return to the game after saving the changes

Please be aware that this method causes some background applications to close to give priority to the game. Before altering your CPUs priorities, save all of your work.

SmartWindows

Restore Browser Tabs with SmartWindows. It maintains an active tab history and restores browser size as well as display position on one screen or many.

Conclusion

So, here is the final words about “games keep minimizing windows 11”. Gamers have been constantly inconvenienced by their games minimizing while using a dual-monitor system. However, the good news is that there are relatively simple fixes that you can implement to resolve this issue.

The easiest way to solve this problem is to use SmartWindows! SmartWindows is a Windows utility app that lets you save and restore your display settings and app positioning with a single click. Moreover, SmartWindows supports up to six displays, improving your gaming experience considerably.

FAQs

Do dual monitors require more CPU?

Dual monitors do require more CPU power. However, there will be minimal effects on your computer’s performance, and you probably won’t notice it in your usage.

However, if you are running high-volume media on both monitors, you will see a visible difference in performance, and maybe, even a reduction as well.

Can you run the game in full-screen on both monitors?

Yes. You can run your game on both monitors. This is a highly appealing option for players that seek total immersion. To spread your game windows across multiple monitors, you should:

  • In the upper right-hand corner of the game, locate the window
  • Enter full-screen mode
  • Choose a single display on the full screen if you want to keep one monitor as your desktop