For those who need to multi-task efficiently, a triple monitor setup can be a game-changer. Whether you’re a developer debugging complex code, a designer working with multiple assets, or a financial analyst tracking various datasets, an apps for 3 monitors broadens your digital workspace. Triple monitors remove the need for continual window switching by keeping multiple applications open at the same time, ultimately boosting proficiency.
A multimonitor setup has unquestionable benefits, but it can become burdensome if not maintained properly. Lacking the right tools to manage windows, taskbars, and app syncing across monitors can lead to disorganization. This in turn makes your setup less efficient and hinders productivity.
This is where the right apps for 3 monitors like SmartWindows come into play. In this blog post, we’ll introduce you to ten must-have applications for maximizing your three-monitor setup.
Why Do You Need Apps for 3 Monitors?
Window Management: Advanced algorithms provide intuitive window slamming, auto-positioning, and resizing over several displays, enabling fast navigation and window alignment without manual modifications.
Taskbar Synchronization: The taskbar can be extended across all connected monitors, maintaining similarity in the user interface while limiting the need for constant screen flipping.
Dynamic Profiles: Users may create custom screen configurations and switch between them dynamically based on various workflows, boosting productivity when working with multiple apps at one time.
Visual Desktop and Hotkey Customization: These features facilitate efficient multitasking by establishing automated processes and simplifying navigation using specified keystrokes.
Discover Top 10 Apps for 3 Monitors for Smarter Task Management
1. SmartWindows
SmartWindows is the finest solution for IT managers and professionals wanting to optimize multi-monitor workloads. With features developed to optimize your multiple- or triple-monitor configuration, it increases productivity whether you’re managing electronic data processes or multitasking between apps. Restore sessions, manage numerous profiles with ease, and save time with smart layouts.
Features
- Automatically arrange windows across multiple screens with a single click for smooth workspace management.
- Restore preset display configurations and applications on Windows 10 and 11, including Snap layouts and desktop management.
- Provide multi-browser session recovery and automatic restoration of Microsoft Office files (Word, Excel, PowerPoint, etc.).
- Increase productivity with support for up to 6 monitors and easy profile switching for work, entertainment, or study environments.
2. DisplayFusion
Display Fusion is an extensive application that enhances multi-monitor management. It provides advanced features for customers who need to maintain the accuracy of displays. You may customize your taskbars, create window management profiles, and even add dynamic wallpaper to each screen. This tool’s customizable hotkey profiles facilitate the setup of multiple displays and allow users to switch between presentation, business, and entertainment settings with ease.
- Each monitor has its own task bar with personalized shortcuts.
- It’s simple to switch between monitors and arrange windows.
- Several displays can be covered by a single image, or each screen might have a different backdrop image.
- Create profiles for different workstations and change parameters for specific apps or tasks.
3. Ultramon
Ultramon is a high-performance design intended for people who have many displays. It provides a wide range of monitor settings, window management, and advanced display features. The software includes powerful navigation windows, making it simple to traverse over numerous screens. The design also provides managed screen-specific display settings and multi-monitor taskbar control.
4. Microsoft PowerToys
Microsoft PowerToys is a powerhouse for Windows users, and its FancyZones feature is especially useful for those with multiple monitors. FancyZones allows users to create custom layouts for Windows, ensuring that each screen fits perfectly. It also has the utility of managing multiple system objects and services, making it an important tool for users who need to perform multiple tasks simultaneously.
Features
- A window manager that allows users to divide their screens into custom zones, making it easier to organize apps and windows.
- Use customizable shortcuts to quickly navigate windows to preset locations.
- Easily increases your ability to manage multiple applications and documents across multiple screens.
5. Multiple Monitors
MultiMonitor app is a lightweight, and effective tool designed for basic multimonitor applications. Allows users to easily move windows between monitors, change display settings, and monitor usage while performing tasks. Ideal for users looking for an easy option to control monitor settings seamlessly in advanced applications.
Features
- Quickly move windows between screens with a simple click.
- Easily specify the primary monitor and adjust its settings.
- Disable or enable monitors according to your needs, which can be useful when switching between single-screen or multi-monitor settings.
5. X-Mouse Button Control
X-Mouse Button Control is an exclusive application designed to boost mouse performance, particularly if deploying multiple displays. By modifying the mouse buttons to start specific screen activities, it offers greater flexibility and control over navigation. By assigning mouse buttons to carry out a range of tasks, like switching monitors or launching apps, this feature is very useful for users who want to optimize their productivity.
Features
- Give the mouse button commands to do things like move around the screen, open certain applications, or change system options.
- Simply glide the mouse pointer across the screen to quickly toggle between many monitors.
- Create complex macros that execute repetitive tasks using simple mouse clicks.
6.Wallpaper Engine
This app for tri-monitors provides dynamic wallpapers that cover all three monitors, letting customers modify the visual attractiveness of their multimedia desktop. It offers moving, interactive backgrounds and immerses the user in a customized, immersive world that mimics the system’s design and appearance.
Features
- Dynamic wallpapers are animated wallpapers that respond to system activity or user input.
- The wallpaper extends over all connected monitors, resulting in a unified viewing experience.
- Users can make or download wallpapers that reflect their personal style or brand.
7. AquaSnap
In a multi-monitor setup, AquaSnap is a window manager that improves window snapping’s accuracy and efficacy. It enables users to drag windows into editable snap zones, making window management more flexible and convenient. AquaSnap is extremely handy for those who want to maximize screen space while maintaining design.
Features
- Snaps the window into place on the screen, resizing it to fit predefined areas.
- Shake all windows quickly, excluding the ones you’re focusing on.
- Window Docking feature arranges windows on both edges of the screen to create a neat and elegant desktop.
9. Mouse Without Borders
Mouse Without Borders is an application that helps you control several computers with a single mouse and keyboard. This app allows users with multi-monitor settings on multiple devices to operate all systems without switching ports.
Features
- Control up to four PCs with a single mouse and keyboard, making it ideal for those with complex workstations.
- Shared clipboard lets you copy and paste content between systems, dropping the need to manually relocate files.
- With drag-and-drop features, you can easily transfer files across devices.
10. SpaceDesk
SpaceDesk is a flexible way to turn your primary desktop into a separate monitor that can be used on a variety of devices, including tablets and smartphones. This feature is useful for users who need more display area for various projects, analyses, or presentations.
- It works with a wide range of devices, allowing smartphones and tablets to serve as administrative assistants with greater screen sizes.
- Efficiently expands the size of your primary desktop secondary screen, giving you the most space for many apps or exacting project management.
- By fully enabling multi-touch capabilities, touch devices can operate as dynamic input sources, giving them more flexibility and control.
Benefits of Using Apps for 3 Monitors in Your Daily Tasks
Better Output
You can configure windows, assign specific screen tasks, and move between them with ease using Monitor 3 viewing apps. With better control over multiple windows, you can focus on the task at hand, greatly reducing distractions and increasing productivity across all three monitors.
Excellent Window Management
Snapping and placing windows is made easier using apps for 3 monitors, such as DisplayFusion and SmartWindows. This creates an orderly workplace for effective multitasking by making it simple to work on numerous applications at once with a jumble of overlapping windows.
Flexible Workspace
Apps for 3 monitors with SmartWindows and UltraMon allow you to customize your workspace to suit specific tasks. Create different window layouts or profiles for different tasks so that you can easily change layouts. This individual flexibility can save time and reduce the cognitive load of managing tasks on three monitors.
Efficiently Navigate Between Screens
Apps like SmartWindows make switching between monitor and computer simpler, hence enhancing workflow. You can save time and effort by controlling several devices or screens with a single peripheral or by switching between mouse buttons.
SmartWindows
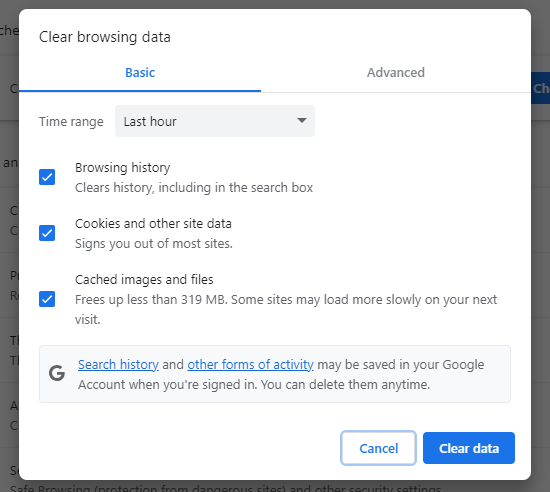
Restore Browser Tabs with SmartWindows. It maintains an active tab history and restores browser size as well as display position on one screen or many.
Conclusion
Managing a triple-monitor system is a great way to increase productivity, but attaining its maximum efficiency requires the proper tools. SmartWindows helps you manage your workspace, boost profitability, and easily switch between work.
These apps for 3 monitors can customize your workspace with these tools. Adding applications to your system’s three displays could help you work more productively, stay organized, and accomplish tasks faster. Turn your multi-monitor setup into a creative force by leveraging its formidable functionality.