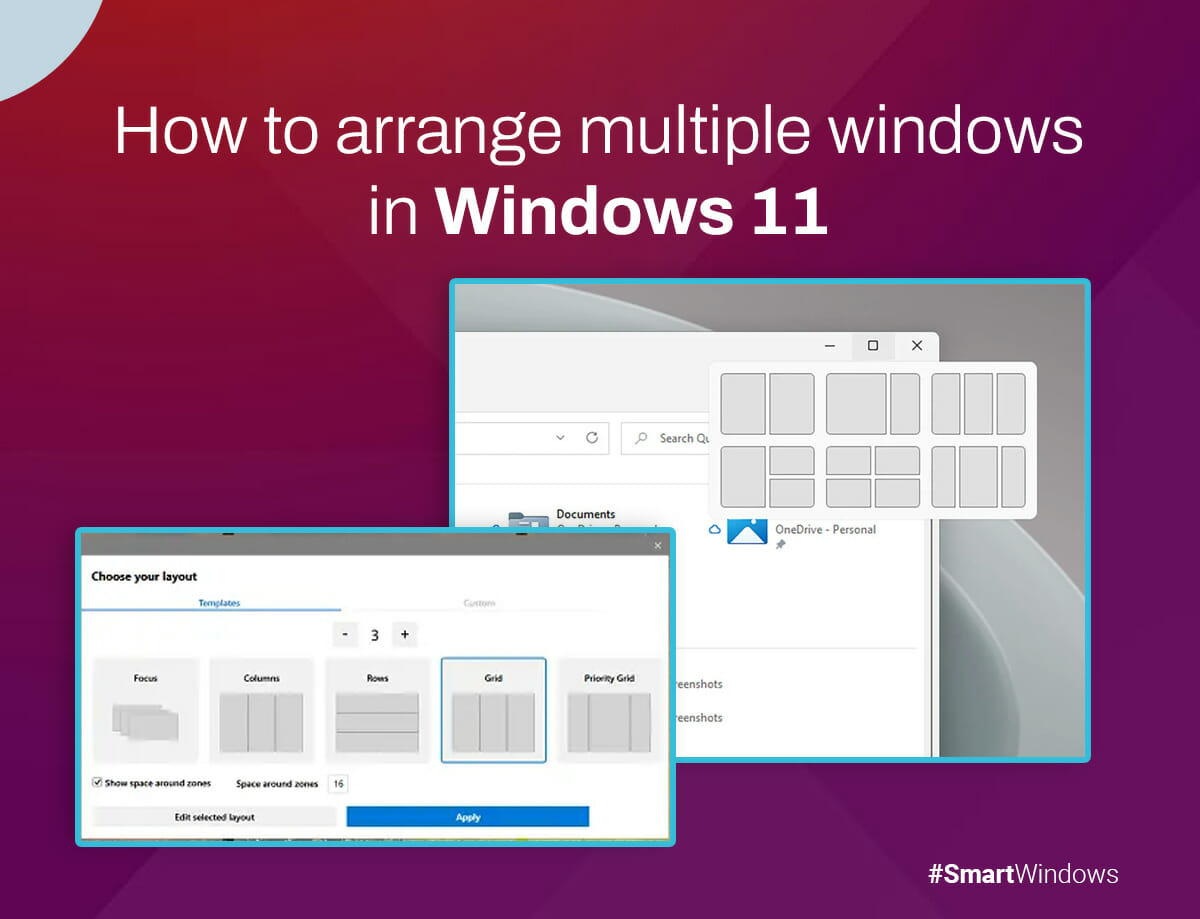
The latest version of Windows, Windows 11, offers new features that facilitate multitasking, making it more convenient for users. Seamlessly orchestrating a symphony of windows on your desktop is now at your fingertips, courtesy of the ingenious snap layouts. These fresh alternatives transcend the familiar territory of the time-honored Alt and Tab shortcut. In this blog, we’ll discuss how to arrange multiple Windows in Windows 11. So, let’s get started!
Snap Your Windows to Increase Productivity
The Snap feature is the best to boost your productivity. It lets you put multiple app windows together on one screen. There are multiple layout options available, each with varying sizes. You can access and use your preferred apps easily with this feature while focusing on your tasks. Let’s look at how you can get advantages from the Snap feature.
Snap Layouts
Windows’ Snap feature brings a handful of ready-to-use layouts that let you easily organize all your open windows.
Using Snap with a mouse in Windows 11 is straightforward:
To access Snap layouts:
- Press the Windows Logo Key + Z to open the layout options in the window you want to snap.
- To snap a window, simply hover over that window’s Minimize or Maximize button. This will trigger the layout options to appear.
Depending on your screen size, you might come across various predefined layouts designed specifically for your display dimensions.
Snap Assist
Once you’ve snapped your initial window, the Snap Assist tool steps in automatically. It presents thumbnails of all your other open windows, allowing you to cherry-pick which ones you’d like to incorporate into the chosen layout.
Here’s how to make the most of Snap Assist in Windows 11:
Snap Assist comes to your aid when you need to tweak the size of the layout boxes. Pick a dividing line, drag it, and voila, your window sizes readjust. If you resize one window, the neighboring one adapts to fit snugly, eliminating any wasted screen real estate.
Keep in mind that Snap Assist only works with two app windows at a time on Windows 11 SE.
Snap Groups
As soon as you opt for a layout and Snap all the designated windows into their respective spots, it magically transforms into a Snap group. This handy feature is particularly useful when working on multiple tasks within different applications. Even if an interruption prompts you to open a new app, don’t worry; revisiting your Snap group is a breeze. Just hover over any open apps within the group, and like a breadcrumb trail, it guides you back to your cherished Snap group.
Snap with the Keyboard
In Windows, there are two methods to Snap using your keyboard:
Using the keyboard to open the Snap layout box
- Use Windows Logo Key + Z to access the layout box.
- Key in the number corresponding to your desired layout. Then, type the number for the spot where you want your window to fit in that layout.
- You can also use your mouse to pick your preferred layout.
- Click to choose your preferred layout.
It’s as simple as that when you’re Snap-ing with your keyboard in Windows 11.
Using keyboard arrows for Snap layout
- Hold down the Windows Logo Key + Arrow to Snap the app you’re currently on. You can keep juggling Snap positions using your keyboard arrows.
- Left Arrow: The app aligns to the left side of your screen.
- Right Arrow: The app takes its place on the right side.
- Up Arrow: The app snugly fits on the upper side.
- Once you’ve landed on your desired Snap spot, release the Windows Logo Key.
You can still use Snap Assist to populate your layout with additional windows or apps you wish to Snap together on your screen. The key is to ensure that your space meets your needs!
Snap with the Mouse
There are multiple ways to work with your mouse when using Snap in Windows.
Maximize Your Space with a Hover
- To Snap an app, simply hover your cursor over the Minimize or Maximize button. This will prompt the Snap layout box to appear automatically.
- Select the Snap layout you prefer from the choices in the layout box.
Arrange Apps by Dragging to Screen Sides
- To Snap a window or app to the side or edge of your screen, simply click and drag it. The Snap layout box will appear.
- Choose the layout you want to use and release the app accordingly.
- Snap Assist can also help you fill your layout with other windows or apps to Snap together.
To create a side-by-side Snap, simply drag an app toward your screen’s middle right or middle left.
Arrange Apps by Dragging to Screen Sides
- To use the Snap feature, simply move the window or app you want to Snap to the upper middle of your screen by clicking and dragging it. The Snap layout box appears.
- Release the app into the layout you desire.
Making the most of these mouse-driven Snap techniques empowers you to arrange your workspace efficiently. It’s all about tailoring your screen to suit your needs!
SmartWindows Restores Preset Display Arrangements and Snap Layouts on Windows 10 and 11
Have you experienced your display settings or ‘Snap Layouts’ on Windows 11 being disrupted by system changes or glitches? SmartWindows is the ultimate solution for easily restoring display arrangements and Snap Layouts configurations.
SmartWindows is your trusty tool that understands the value of your workspace layout. With it, you can swiftly reclaim your carefully organized Windows and application placements on Windows 11 and easily harness the power of ‘Snap Layouts’ on Windows 11.
Gone are the days of fretting over unintentional window shifts or layout distortions. Whether you’re a meticulous multitasker, a creative professional, or someone who takes your workspace arrangement seriously, SmartWindows offers the peace of mind you deserve. Restore your display settings easily and return to being productive in just a few clicks.

SmartWindows
Restore Browser Tabs with SmartWindows. It maintains an active tab history and restores browser size as well as display position on one screen or many.


